Nikon 25048 User Manual
Nikon 25048 - Coolpix 775 2MP Digital Camera Manual
 |
UPC - 018208250486
View all Nikon 25048 manuals
Add to My Manuals
Save this manual to your list of manuals |
Nikon 25048 manual content summary:
- Nikon 25048 | User Manual - Page 1
first pictures, and transferring them to your computer. Guide to Digital Photography The Guide to Digital Photography (this manual) provides complete operating instructions for your camera. Nikon View Reference Manual The Nikon View Reference Manual can be found in electronic format on the reference - Nikon 25048 | User Manual - Page 2
Nikon product or injury to yourself or to others, read the following safety precautions in their entirety before using this equipment. Keep these safety instructions After removing the battery, take the equipment to a Nikonauthorized service center for inspection. Do not use in the presence of - Nikon 25048 | User Manual - Page 3
as the result of a fall or other accident, remove the battery and/or AC adapter and then take the product to a Nikon-author ized service center for inspection. Observe proper precautions when handling batteries Batteries may leak or explode if improperly handled. Observe the following precautions - Nikon 25048 | User Manual - Page 4
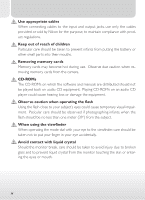
input and output jacks, use only the cables provided or sold by Nikon for the pur pose, to maintain compliance with product regulations. Keep cards from the camera. CD-ROMs The CD-ROMs on which the software and manuals are distributed should not be played back on audio CD equipment. Playing CD-ROMs - Nikon 25048 | User Manual - Page 5
CAUTIONS Keep dry This product is not waterproof, and may malfunction if immersed in water or exposed to high levels of humidity. Rusting of the internal mechanism can cause irreparable damage. Keep free of salt, sand, and dust After using your camera at the beach or seaside, wipe off any sand or - Nikon 25048 | User Manual - Page 6
difficult to see in a bright light. • The monitor is lit by a fluorescent backlight. Should the monitor begin to dim or flicker, contact your Nikon service representative. • Do not apply pressure to the monitor, as this could cause damage or malfunction. Dust or lint adhering to the monitor can be - Nikon 25048 | User Manual - Page 7
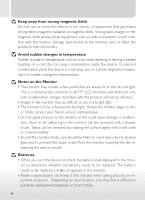
• On cold days,the capacity of batteries tends to decrease. Be sure the battery is fully charged before taking pictures outside in cold weather. Keep a spare batter y in a warm place and exchange the two as necessar y. Once warmed, a cold batter y may recover some of its charge. • Should the battery - Nikon 25048 | User Manual - Page 8
reserves the right to change the specifications of the hardware and software described in these manuals at any time and without prior notice. • Nikon will not be held liable for any damages resulting from the use of this product. • While every effor t has been made to ensure that the - Nikon 25048 | User Manual - Page 9
energy and, if not installed and used in accordance with the instructions, may cause har mful interference to radio communications. However, there made to this device that are not expressly approved by Nikon Corporation may void the user's authority to operate the equipment. Interface - Nikon 25048 | User Manual - Page 10
Notice Concerning Prohibition of Copying or Reproduction Note that simply being in possession of material that has been digitally copied or reproduced by means of a scanner, digital camera or other device is punishable by law. • Items prohibited by law from being copied or reproduced Do not copy or - Nikon 25048 | User Manual - Page 11
registered trademark of Iomega Corporation in the U.S. and other countries. All other trade names mentioned in this manual or the other documentation provided with your Nikon product are trademarks or registered trademarks of their respective holder s. A Note on Electronically Controlled Cameras In - Nikon 25048 | User Manual - Page 12
Notices ...viii Introduction: Before You Begin 1 Overview: About This Manual 2 Getting to Know the COOLPIX775: The Par ts of the ts of the COOLPIX775 4 How to Use It-Camera Controls and Displays 6 Menu Guide: Using Camera Menus 14 Viewing the Menus ...15 Making a Selection ...16 Accessing the - Nikon 25048 | User Manual - Page 13
Review and Deletion: Quick Review 56 Quick Review ...58 Full-Screen Review ...60 Thumbnail Review ...62 Where Do I Go from Here? Doing More withYour Digital Camera 65 How Do I Send Pictures to My Friends and Family? Distributing Photos by E-Mail and the Web 66 Taking Photos for E-Mail and the Web - Nikon 25048 | User Manual - Page 14
Computer 140 BeforeYou Begin: Installing Nikon View 142 Getting Connected: Connecting to Your Computer 144 Technical Notes: Camera Care, Options, and Resources 152 Car ing for Your Camera ...153 Optional Accessories ...154 Web Resources ...155 Troubleshooting ...156 Specifications ...162 Index - Nikon 25048 | User Manual - Page 15
. Parts of the COOLPIX775 Bookmark this section and refer to it as you read through the manual for information on the names and functions of camera parts. Menu Guide Refer to this section for instructions on using the menus that control some aspects of camera operation. This section also contains an - Nikon 25048 | User Manual - Page 16
color printer. Finally, the "Reference" section provides a comprehensive guide to all aspects of digital photography with the COOLPIX775, including manual control of exposure , tone, and sharpness. The "Reference" section also includes information on caring for your camer a, troubleshooting, - Nikon 25048 | User Manual - Page 17
using your camera. This icon indicates that more information is available elsewhere in this manual. Life-Long Learning As part of Nikon's "Life-Long Learning" commitment to ongoing product support and education, continually-updated information is available on-line at the following sites: • For - Nikon 25048 | User Manual - Page 18
camera controls and displays. You may find it helpful to bookmark this section and refer to it as you read through the rest of the manual. Where to Find It-Parts of the COOLPIX775 The par ts of the camera are identified below. For more information on the function of each - Nikon 25048 | User Manual - Page 19
Introduction-Getting to Know the COOLPIX775 The functions of the controls and displays that are labeled with a letter of the alphabet are outlined in the following section. D C E B 10 13 11 A F 12 G H I JK 10 Red (flash-ready) light 6 11 Green (autofocus) light 6 12 Interface connector for - Nikon 25048 | User Manual - Page 20
the image seen in the viewfinder. Use the monitor when your subject is close to the camera. The two lights next to the viewfinder provide a guide to camera status while you frame your picture. Light On Flashes Off On Flickers Blinks Meaning Flash will fire when picture is taken. Flash charging - Nikon 25048 | User Manual - Page 21
Introduction-Getting to Know the COOLPIX775 B The Monitor 1 2 3 4 8 9 1. 25 10 5 11 12 13 VGA 14 5 F INE 15 6 +2.0 10 16 7 Like the viewfinder, the monitor can be used to frame pictures. During shooting, the monitor shows the view through the camera lens together with icons indicating - Nikon 25048 | User Manual - Page 22
C The Power Switch Introduction-Getting to Know the COOLPIX775 The power switch turns the camera on and off. When the camera is turned on, the green light next to the viewfinder will turn on and the lens cover will open. The cover closes automatically when the camera is turned off. D The Shutter- - Nikon 25048 | User Manual - Page 23
Introduction-Getting to Know the COOLPIX775 E The Mode Dial The mode dial is used to select the operating mode. You have a choice of nine shooting modes for taking still pictures and movies, and a playback mode for viewing pictures and movies already taken. Icon Mode Description An automatic - Nikon 25048 | User Manual - Page 24
F The Multi Selector Introduction-Getting to Know the COOLPIX775 The multi selector is used to perform a variety of operations: to compose pictures, to scroll through images in quick review and playback, and to navigate through the camera menus and control the display in the monitor. Button - Nikon 25048 | User Manual - Page 25
Introduction-Getting to Know the COOLPIX775 Button Situation Function Taking pictures/ Zoom in on your subject,enlarging small quick review or distant objects to fill the frame. 84 Full-frame play- Star t or stop movie playback. 125 back Using the menus Make a selection. 16 Full-frame - Nikon 25048 | User Manual - Page 26
and to transfer selected images from the camera to a computer running Nikon View. When images are played back on the camera monitor, the a later date ( 114). When the camera is connected to a computer running Nikon View,pressing the TRANSFER button copies all selected images to the computer ( 146). - Nikon 25048 | User Manual - Page 27
Introduction-Getting to Know the COOLPIX775 J The / Button When taking pictures, the flash mode ( ) button controls the built-in Speedlight ( 92). In full-fr ame playback or full-screen review, pressing this button displays the images on the memory card as small thumbnail previews, allowing you to - Nikon 25048 | User Manual - Page 28
Introduction-Menu Guide Menu Guide Using Camera Menus Changes to some settings can be made with the help of menus that appear in the monitor. The options available depend on - Nikon 25048 | User Manual - Page 29
Introduction-Menu Guide Viewing the Menus When the camera is on, the menu for the current operating mode can be displayed by pressing the MENU button. If "MENU - Nikon 25048 | User Manual - Page 30
Introduction-Menu Guide Making a Selection Use the multi selector to make a selection. 1 IMAGE SIZE 2 QUAL 1 SIZE S A MENU O F F SELECT SET Highlight menu item IMAGE SIZE QUAL 1 SIZE FULL XGA - Nikon 25048 | User Manual - Page 31
Introduction-Menu Guide Accessing the Setup Menu To access the SET-UP menu from the AUTO or SCENE menu: 1 Position cursor in main menu QUAL 1 SIZE IMAGE QUALITY S A - Nikon 25048 | User Manual - Page 32
Introduction-Menu Guide Index to Menu Options The pages that follow list the options that are displayed when the MENU button is pressed, together with the page number - Nikon 25048 | User Manual - Page 33
blur pictures. 104 EXP. +/- Adjust exposure for bright, dark, or high-contrast subjects. 106 Image Sharpening Make image outlines more distinct. 108 19 Introduction-Menu Guide - Nikon 25048 | User Manual - Page 34
Introduction-Menu Guide The SCENE Menu The SCENE menu contains options for adjusting image quality and size . QUAL 1 SIZE SCENE S MENU O F F SELECT SET 20 - Nikon 25048 | User Manual - Page 35
Introduction-Menu Guide IMAGE QUALITY QUAL FINE 1 SIZE NORMAL BASIC S MENU O F F SELECT SET IMAGE SIZE QUAL 1 SIZE FULL XGA VGA S MENU O F F SELECT SET Image Quality Choose BASIC for - Nikon 25048 | User Manual - Page 36
Introduction-Menu Guide The SET-UP Menu The SET-UP menu contains two pages of options. SET-UP Menu, Page 1 SET-UP Brightness 1 Auto Transfer Seq. Number Memory Card Format S Date Auto Off MENU PAGE2 SELECT SET 22 - Nikon 25048 | User Manual - Page 37
Introduction-Menu Guide BRIGHTNESS 1 S Brightness Adjust monitor brightness. MENU O F F SELECT SET AUTO TRANSFER Brightness 1 Auto Transfer On Seq. Number Off Memory Card Format S Date Auto Off MENU O F F SELECT - Nikon 25048 | User Manual - Page 38
Introduction-Menu Guide The SET-UP Menu SET-UP Menu, Page 2 SET-UP 1 Video Mode Language S MENU O F F SELECT SET 24 - Nikon 25048 | User Manual - Page 39
Introduction-Menu Guide VIDEO MODE 1 Video Mode Language NTSC PAL S MENU O F F SELECT SET LANGUAGE 1 Video Mode Language D E S F S MENU O F F SELECT SET Video Mode Choose the standard for video output - Nikon 25048 | User Manual - Page 40
Introduction-Menu Guide The PLAY BACK Menu The playback menu contains options for deleting pictures, managing the pictures stored on the memory card, and playing images back in automatic "slide shows." PLAY BACK MENU Delete 1 Slide Show Protect Print Set Transfer MENU O F F SELECT SET 26 - Nikon 25048 | User Manual - Page 41
Introduction-Menu Guide DELETE Delete 1 Selectd Images All Images Delete all or selected pictures; delete print orders. Print Set MENU O F F SELECT SET 130 SLIDE SHOW 1 Start Frame Intvl - Nikon 25048 | User Manual - Page 42
28 - Nikon 25048 | User Manual - Page 43
This section details the steps you will take before using your camera for the first time. Taking Pictures Read this section for a step-by-step guide to the basics of taking pictures with the COOLPIX775. Review and Deletion Learn how to review and delete pictures while setting up your next shot - Nikon 25048 | User Manual - Page 44
STEP 1 Tutorial-First Steps First Steps Getting Ready to UseYour Camera Before using your camera for the first time, you will need to complete the steps shown below. Additional information on the topics covered in this section may be found on the pages listed in the rightmost column. STEP - Nikon 25048 | User Manual - Page 45
Tutorial-First Steps STEP 1 1 2 2 4 3 MEMORY CARD FORMAT 1 WARNING! All images will be deleted! S No Format MENU O F F SELECT SET AUUTTO 1 2 LLAANNGGUUAAGGEE 1 Video Mode Language D E S F S MENU O F F SELECT SET DDAATTEE 1 YMD S MENU O F F SELECT SET NNOORRMMAALL [ - Nikon 25048 | User Manual - Page 46
Tutorial-First Steps Step 1-Attach the Camera Strap To ensure that the camera is not dropped and damaged, attach the camera strap as shown and wear it around your wrist while using or carrying the camer a. 32 - Nikon 25048 | User Manual - Page 47
rechargeable Nikon EN-EL1 lithium-ion battery supplied with your camera is not fully charged at shipment. We recommend that you use the battery charger supplied with your camera to charge the batter y before use. Instructions for charging the battery may be found in the instruction manual supplied - Nikon 25048 | User Manual - Page 48
) 1 2 Read Battery Warnings Read and follow all warnings and instructions supplied by the battery manufacturer. Caution regarding battery use • In if an exhauted battery is re-inser ted into the camera. • The rechargeable Nikon EN-EL1 litium-ion battery should be removed and recharge as soon as the - Nikon 25048 | User Manual - Page 49
the COOLPIX775 can be used with non-rechargeable 2CR5 (DL245) lithium batteries, available at a variety of retail outlets, we recommend the rechargeable Nikon EN-EL1 Li-ion battery supplied with your camera. This lithiumion battery, for use exclusively with COOLPIX775, 880, and 995 digital cameras - Nikon 25048 | User Manual - Page 50
Tutorial-First Steps Step 3-Insert the Memory Card In place of film, your Nikon digital camera uses CompactFlash™ (CF) memory cards to store pictures. This step provides instructions on inserting memory cards. 3.1 Turn the camera off 3.2 Insert the memory card Slide the card-slot cover out (1) and - Nikon 25048 | User Manual - Page 51
Tutorial-First Steps Formatting Memory Cards While the memory card provided with your camera is formatted at shipment, other memory cards must be formatted before first use. To format a memor y card: A B IMAGE QUALITY QUAL 1 SIZE Set mode dial to and turn camera on S A MENU O F F SELECT - Nikon 25048 | User Manual - Page 52
Tutorial-First Steps Formatting Memory Cards (Continued) G MEMORY CARD FORMAT 1 WARNING! All images will be deleted! S No Format MENU O F F SELECT SET Confirmation dialog displayed H MMEEMMOORRYYCCAARRDDFFOORRMMAATT 1 WARNING! All images will be deleted! S No Format MENU OF F - Nikon 25048 | User Manual - Page 53
Tutorial-First Steps Step 4-Check the Battery Level Before using the camer a, check the battery level in the monitor to make sure that the battery is charged. 4.1 Turn the camera on 4.2 Check the battery level in the monitor When the batter y is running low, a battery AUUTTO indicator appears in - Nikon 25048 | User Manual - Page 54
Tutorial-First Steps Step 5-Choose a Language Camera menus and messages can be displayed in your choice of German, English, French and Spanish. 5.1 5.2 QUAL 1 SIZE IMAGE QUALITY Set mode dial to and turn camera on S A MENU O F F SELECT SET Press MENU button to display AUTO menu 5.3 - Nikon 25048 | User Manual - Page 55
Tutorial-First Steps 5.7 LANGUAGE 1 Video Mode Language D E S F S MENU O F F SELECT SET Display options 5.8 LANGUAGE 1 Video Mode Language D E S F S MENU O F F SELECT SET Choose a language from: D Deutsch (German) E English F Fr ançais (French) S Español (Spanish) 5.9 AUUTTO - Nikon 25048 | User Manual - Page 56
Steps Step 6-Set the Time and Date Information on the time and date of recording is included with all pictures and movies taken with your Nikon digital camera. To set the camera's internal clock to the correct time and date: 6.1 6.2 QUAL 1 SIZE IMAGE QUALITY Set mode dial to and turn camera - Nikon 25048 | User Manual - Page 57
Tutorial-First Steps 6.7 1 DDAATTEE YMD S MENU O F F SELECT SET Display DATE menu 6.9 1 S DATE YMD 7 MENU O F F SELECT SET Edit selected item. Repeat steps 6.8- 6.9 until all items have been set. 6.8 1 DATE YMD S MENU O F F SELECT SET Highlight Year, Month, Day, hour, or minute ( - Nikon 25048 | User Manual - Page 58
STEP 1 Tutorial-Taking Pictures Taking Pictures The Basics This section details the basic steps involved in taking pictures in auto mode . In this automatic, "point-and-shoot" mode, the majority of settings are controlled by the camera in response to lighting conditions and focus distance , - Nikon 25048 | User Manual - Page 59
Tutorial-Taking Pictures STEP AUTO NORMAL [ 10 ] 45 - Nikon 25048 | User Manual - Page 60
Tutorial-Taking Pictures Step 1-Ready the Camera Before using your camera, complete the following steps: 1.1 Turn the mode dial to 1.2 Turn the camera on The lens cover will open when the camera is turned on and the green light next to the viewfinder will turn on. After a short pause, the view - Nikon 25048 | User Manual - Page 61
Tutorial-Taking Pictures 1.3 Check indicators in the monitor Before taking pictures, be sure that the bat- AUTO ter y is charged and that enough memory is A available on the memory card. If the battery is low,a icon (A) will appear in the moni- tor, indicating that the battery should be - Nikon 25048 | User Manual - Page 62
Tutorial-Taking Pictures Step 2-Adjust Camera Settings (Optional) In auto mode , you can use the buttons and menus to control the settings listed the following table. The first time you use the camera, these settings will be set to the default values shown below. These settings are adequate for - Nikon 25048 | User Manual - Page 63
Tutorial-Taking Pictures Setting Default Description Control Exposure compensa- tion ±0 Optimal exposure for most scenes. AUTO 107 menu Image Sharpening Auto Camera sharpens edges for optimal AUTO results. menu 108- 109 49 - Nikon 25048 | User Manual - Page 64
Tutorial-Taking Pictures Step 3-Frame the Picture After adjusting camera settings, you are ready to frame your picture. 3.1 Ready the camera To prevent blurred pictures caused by unsteady hands (camera shake), hold the camera steadily in both hands. Pictures can be framed in the monitor (A) or - Nikon 25048 | User Manual - Page 65
Tutorial-Taking Pictures Move That Camera! Although zoom is a useful tool for composing pictures, remember that original compositions can be created just by moving the camera to another position. If you have time, try framing your subject from a number of different angles-including from below and - Nikon 25048 | User Manual - Page 66
Tutorial-Taking Pictures Step 4-Focus and Shoot 4.1 Focus To focus the camera on the subject in the center of the frame , press the shutter-release button halfway. Check the status of the green (autofocus) and red (flash) lights next to the viewfinder. Red light Green light Lamp Meaning On - Nikon 25048 | User Manual - Page 67
Tutorial-Taking Pictures Focusing on an Off-Center Subject: Focus Lock Depending on the effect you want to achieve, your subject may not be at the center of the final composition. If your subject is not located at the center of the frame when the shutter-release button is pressed halfway, the - Nikon 25048 | User Manual - Page 68
Tutorial-Taking Pictures Step 5-Check the Results After each shot, the green light will blink as the picture is recorded to the memor y card. If the monitor is on, the shot you have just taken will be displayed briefly in the monitor. Any additional shots you take while ear lier pictures are being - Nikon 25048 | User Manual - Page 69
Tutorial-Taking Pictures Step 6-Turn the Camera Off When you have finished using the camera, turn the camera off to save battery power. Turning the camera off also closes the lens cover. During Recording While pictures are recorded to the memory card,the green light will blink. Do not eject the - Nikon 25048 | User Manual - Page 70
turned out as you had hoped. Using the quick review function on your Nikon digital camera, on the other hand, you can view the results of section allows you to view photos and movies without leaving shooting mode. Your Nikon digital camera is also equipped with a full playback mode, which can be - Nikon 25048 | User Manual - Page 71
Tutorial-Review and Deletion To use quick review, the camera must be in shooting (auto or scene) mode. Press the button once to display existing pictures at the top left corner of the monitor, twice to display pictures full screen. Pressing the button a third time returns you to shooting mode. - Nikon 25048 | User Manual - Page 72
Tutorial-Review and Deletion Quick Review When you press the button to enter quick review mode, the most recent picture on the memor y card will be displayed at the top left corner of the monitor. [ 5] AUTO NORMAL [ 5] 58 - Nikon 25048 | User Manual - Page 73
Tutorial-Review and Deletion The following operations can be performed: To Press Description View other photos Press the multi selector up to view images recorded before the current photo, down to view images recorded after current photo. Hold down to scroll r apidly to desired frame number. - Nikon 25048 | User Manual - Page 74
Tutorial-Review and Deletion Full-Screen Review From quick review, press the button to enter full-screen review. The picture displayed in quick-review mode will be displayed full screen. The following operations can be performed: 2001.07.25 14:20 NORMAL 0005.JPG [ 5/ 9] To View other photos - Nikon 25048 | User Manual - Page 75
Tutorial-Review and Deletion To Press Description Select current photo for transfer to computer TRANSFER Images mar ked for tr ansfer to a computer are shown by a icon. To select the current image for transfer, press the TRANSFER button. If the current image is already selected for transfer, - Nikon 25048 | User Manual - Page 76
Tutorial-Review and Deletion Thumbnail Review Pressing the button in full-screen review displays a menu of nine thumbnail images. The following oper ations can be performed while thumbnails are displayed: To Highlight images Press Description Press the multi selector up, down, left, or r ight - Nikon 25048 | User Manual - Page 77
Tutorial-Review and Deletion To Press Description Select highlighted photo for transfer to computer TRANSFER Images mar ked for tr ansfer to a computer are shown by a icon. To select the current image for transfer, press the TRANSFER button. If the current image is already selected for - Nikon 25048 | User Manual - Page 78
Tutorial-Review and Deletion Selecting images for transfer to the computer In Full-Screen Review Mode and Thumbnail Review Mode, images to be transferred to the computer can be selected and deselected using theTRANSFER button. 2121004400::1122..000077..2255 00000055..JJPPGG NNOORRMMAALL [ 55// - Nikon 25048 | User Manual - Page 79
Where Do I Go from Here? When they have finished shooting, users of conventional film cameras typically take the film to be developed. But what do you do with pictures you have taken with a digital camera? This chapter offers some tips on how you can accomplish the following common tasks: Doing - Nikon 25048 | User Manual - Page 80
with your camera. This section describes how to take pictures for electronic distribution and transfer them to your computer. More information on using Nikon View can be found in "Reference: Connections" ( 140). Taking Photos for E-Mail and the Web Your camera stores pictures in JPEG format, which - Nikon 25048 | User Manual - Page 81
How Do I Go from Here?-How Do I Send Pictures to My Friends and Family? 1 Choose an image quality of BASIC or NORMAL Choosing an image quality of BASIC or NORMAL reduces file size so that images take less time to transmit over an Internet connection. With the camera in auto ( 46) or scene mode: a - Nikon 25048 | User Manual - Page 82
How Do I Go from Here?-How Do I Send Pictures to My Friends and Family? 2 Choose an image size ofVGA or XGA Not only are VGA (640 × 480 pixel) images small enough to fit in a browser window when displayed on most computer monitors, the re- duced size means that the file will transmit faster. a - Nikon 25048 | User Manual - Page 83
40 s VGA (640 × 480 pixels) 90 KB 35 s VGA (640 × 480 pixels) 50 KB 20 s Understanding Image Quality and Size The table below is your guide to image quality and size settings. Image quality File size Image size High FINE NORMAL BASIC Low Large Small Lar ge Small FULL XGA VGA - Nikon 25048 | User Manual - Page 84
your camera, the COOLPIX775 comes with Canto Cumulus, iView Media Pro, or Fotostation Easy. The documentation on the Nikon View 4 reference CD included with your camera provides instructions for installing these applications ( 142). If you will be using Cumulus or iView Media Pro, remember to - Nikon 25048 | User Manual - Page 85
How Do I Go from Here?-How Do I Send Pictures to My Friends and Family? 4Transfer marked images Press the TRANSFER button on the camera to copy all images marked for transfer to the computer. The message "PREPARING TO TRANSFER" will appear in the camera monitor. After a brief pause, transfer will - Nikon 25048 | User Manual - Page 86
you have a suitable printer, you can also print pictures at home using Nikon View. Many newer color printers for the home market offer near photo-quality that you intend to print at a later date. See the instructions in the preceding section for information on setting image quality and size ( 96 - Nikon 25048 | User Manual - Page 87
Where Do I Go from Here?-How Do I Make Prints? Digital Print-Order Format (DPOF) The Print Set option in the playback menu is used to create a digital "print order" that is stored on the memory card in Digital Print-Order Format (DPOF). Once you have prepared a print order, the card can be removed - Nikon 25048 | User Manual - Page 88
Make Prints? Printing from Removable Media Even if your photofinisher does not offer support for DPOF, you may still be able to get professional prints made by formats suppor ted). Pictures can be copied to disk using Nikon View. For information on the operations that can be performed while the camera is - Nikon 25048 | User Manual - Page 89
you have transferred large numbers of photos to your computer, you may have trouble finding that picture you took of your aunt "a month or two ago" on the NikonView 4 reference CD included with your camera provides instructions for installing these applications ( 142). If you will be using - Nikon 25048 | User Manual - Page 90
76 - Nikon 25048 | User Manual - Page 91
. Connections How to connect your camera to a computer and transfer images using Nikon View. Technical Notes This section describes how to care for camera and what . Index An alphabetical index to the topics covered in this manual. The Details Beyond Point-and- Shoot 78-93 Advanced Photography - Nikon 25048 | User Manual - Page 92
Beyond Point-and-Shoot Camera Controls This section covers operations that can be performed in auto ( ), scene, and movie modes using the mode dial and the buttons on the back of the camera. Reference-Beyond Point-and-Shoot 78 - Nikon 25048 | User Manual - Page 93
Reference-Beyond Point-and-Shoot Control Described in Creative Photography 80-83 Framing Pictures 84-85 Focusing Near and Far 86-89 Delaying Shutter Release 90-91 Throwing Light on Your Subject 92-93 79 - Nikon 25048 | User Manual - Page 94
Reference-Beyond Point-and-Shoot Creative Photography: Choosing a Mode Although auto mode, with its range of menu options and camera settings, is suited to almost any situation, some common compositions, such as portraits or landscapes, require special combinations of settings that apply to any - Nikon 25048 | User Manual - Page 95
Reference-Beyond Point-and-Shoot This section describes when to use each of the nine shooting modes. To choose a mode, turn the mode dial to the appropriate position. When one of the nine modes is chosen, a large icon corresponding to the current mode will be shown in the top left corner of the - Nikon 25048 | User Manual - Page 96
Reference-Beyond Point-and-Shoot The table below illustrates when to use each of the nine shooting modes. The icons in the "Flash Mode" and "Focus Mode" columns show the flash and focus-mode settings that can be selected in each operating mode. Where more than one option is listed, the user can - Nikon 25048 | User Manual - Page 97
. Shutter speed is slowed to capture background lighting, making pictures more susceptible to AUTO * UT blurring. Use a tripod to steady the camera or support the camera steadily in both hands with your elbows against your torso. Auto or Use for vivid landscape photos that en- hance outlines - Nikon 25048 | User Manual - Page 98
Reference-Beyond Point-and-Shoot Framing Pictures: Optical and Digital Zoom Your Nikon digital camera offers two kinds of zoom: optical zoom, in which the camer a's telescoping lens can be used to magnify the subject up to 3 ×, and - Nikon 25048 | User Manual - Page 99
Reference-Beyond Point-and-Shoot Optical vs. Digital Zoom In digital zoom, data from the camera's image sensor are processed digitally, enlarging the center portion of the image to fill the frame. Unlike optical zoom, digital zoom does not increase the amount of detail visible in the picture. - Nikon 25048 | User Manual - Page 100
you may want the camera to focus on something closer than 30 cm-for example, to create a close-up of a flower or business card. Your Nikon digital camera offers focus modes for both situations. Some focus modes can be combined with a timer to delay shutter release , either to keep the camer - Nikon 25048 | User Manual - Page 101
Reference-Beyond Point-and-Shoot The following settings are available (restrictions may apply depending on the mode selected): Setting How It Works When to Use It NO ICON Camera automatically adjusts focus Use with subjects 30 cm (1´) or more Autofocus according to distance to subject. from - Nikon 25048 | User Manual - Page 102
Reference-Beyond Point-and-Shoot Autofocus Mode The autofocus system operates in one of two modes, depending on whether the monitor is on or off: AF Mode How It Works Pros and Cons PRO Minimizes time needed for camera to fo- Camera adjusts focus contin- cus, allowing you to react quickly - Nikon 25048 | User Manual - Page 103
Reference-Beyond Point-and-Shoot Getting Good Results with Autofocus Autofocus performs best when: • There is contrast between the subject and the background. For example, autofocus may not perform well on subjects that are the same color as the background. • The subject is evenly lit. Autofocus - Nikon 25048 | User Manual - Page 104
Reference-Beyond Point-and-Shoot Delaying Shutter Release: Self-Timer Mode When the self-timer is used, the camera will not take a picture until ten or three seconds after the shutter-release button is pressed. The ten-second timer is generally used for pictures in which you wish to appear - Nikon 25048 | User Manual - Page 105
Reference-Beyond Point-and-Shoot 3 Compose the picture Adjust camera settings and frame the picture. 4 Start the timer Press the shutter-release button all the way down to activate the timer. Press once for a ten-second delay, twice for a three-second delay. To stop the timer, press the shutter- - Nikon 25048 | User Manual - Page 106
Reference-Beyond Point-and-Shoot Throwing Light on Your Subject:The Flash Button The flash can be adjusted for a variety of situations, as described in the table opposite under the heading, "When to Use It." To select a flash setting, press the tor on the back of the camera. button, which may be - Nikon 25048 | User Manual - Page 107
Reference-Beyond Point-and-Shoot The following settings are available (restrictions may apply depending on the mode selected): Setting How ItWorks When to Use It AUTO Auto Flash fires when lighting is poor. Best choice in most circumstances. Flash Cancel (off) Use when subject is outside - Nikon 25048 | User Manual - Page 108
Reference-Advanced Photography Advanced Photography Using Shooting Menu Options In auto ( ) and scene modes, adjustments to some shooting options are made from the camera menus (no menu is available in movie mode). The AUTO menu can be used to adjust camera settings for specific subjects or - Nikon 25048 | User Manual - Page 109
AUTO QUAL 1 SIZE S AUTO Menu The AUTO menu contains the options listed below. A MENU O F F SELECT SET QUAL 1 SIZE SCENE SCENE Menu The SCENE menu con- S tains image quality and size options. MENU OF F SELECT SET Reference-Advanced Photography IMAGE QUALITY QUAL FINE 1 SIZE NORMAL BASIC - Nikon 25048 | User Manual - Page 110
Reference-Advanced Photography Making Effective Use of Memory: Image Quality and Size Together, image quality and size determine how much space each picture occupies on the memory card. This in turn determines the total number of pictures that can be stored. To get an idea of how different - Nikon 25048 | User Manual - Page 111
Reference-Advanced Photography Image Quality To reduce the amount of memory that each picture occupies, images are compressed as they are saved to the memory card. The camera uses JPEG compression, which analyzes images in blocks eight pixels on a side and selectively reduces detail within each - Nikon 25048 | User Manual - Page 112
Reference-Advanced Photography Image Size The image-size menu controls the physical dimensions of the image, measured in pixels. Smaller sizes require less space to store, making them suited to distribution by e-mail and the web. Conversely, the larger the image, the larger the size at which it can - Nikon 25048 | User Manual - Page 113
resolution, the smaller the final print size). The following table shows how images of different sizes will print at a resolution of 200 dpi (supported by most household inkjet printers). Image Size Dimensions When Printed at 200 dpi FULL XGA VGA Approx. 20 × 15 cm (7.9˝ × 5.9˝) Approx. 13 × 10 - Nikon 25048 | User Manual - Page 114
Keeping Colors True:The White-Balance Menu Reference-Advanced Photography What Is "White Balance"? The color of the light reflected by an object depends on the color of the light source. The human br ain is able to detect and compensate for such changes in color, with the result that a white - Nikon 25048 | User Manual - Page 115
Reference-Advanced Photography Preset White Balance Preset white balance is used to adjust white balance when shooting under mixed lighting or to compensate for light sources with a strong color cast (for example, to make pictures taken under a lamp with a red shade look as though they had been - Nikon 25048 | User Manual - Page 116
Reference-Advanced Photography Taking Pictures in a Sequence:The Continuous Menu The "continuous" menu determines whether the camera takes one picture each time the shutter-release button is pressed, or records a continuous sequence of pictures while the shutter-release button is held down. QUAL - Nikon 25048 | User Manual - Page 117
Reference-Advanced Photography During Recording While images are being transferred from the buffer to the memory card for permanent storage, the green light next to the viewfinder will blink. Do not eject the memor y card, or remove or disconnect the power source until the light has stopped - Nikon 25048 | User Manual - Page 118
Reference-Advanced Photography Getting Sharper Photos:The BSS Menu "Best-shot selection" (BSS) is used when inadvertent BSS camera movement could cause blurring. It is most ef- QUAL 1 SIZE fective in situations in which inadvertent camera move- ment can produce blurred pictures, for example - Nikon 25048 | User Manual - Page 119
Reference-Advanced Photography Restrictions on BSS BSS is not available at "continuous" settings of Continuous and Multi-Shot 16. Selecting either of these options automatically cancels BSS. Viewing the Current BSS Setting When BSS is on, a BSS icon appears in the monitor. NORMAL [ 10 ] 105 - Nikon 25048 | User Manual - Page 120
Reference-Advanced Photography Bright, Dark, and High-Contrast Subjects: The Exp. +/- Menu To obtain the desired results with certain subject compositions (for example, when large areas of the frame are very bright, very dark, or contain areas of strong contrast), it may be necessary to alter - Nikon 25048 | User Manual - Page 121
Reference-Advanced Photography Choosing an Exposure CompensationValue As a rule of thumb, select positive values when large areas of the frame are ver y bright (for example, when photographing an expanse of sunlit water, sand, or snow) or when the background is much brighter than the main subject. - Nikon 25048 | User Manual - Page 122
Reference-Advanced Photography Making Edges More Distinct:The Image Sharpening Menu When you take a picture, the camer a automatically outlines edges, making the image appear sharper. In auto mode,the image-sharpening menu gives you control over the amount of sharpening performed (in scene mode, - Nikon 25048 | User Manual - Page 123
Reference-Advanced Photography The effects of sharpening are not visible in the monitor. Viewing the Current Image Sharpening Setting At settings other than Auto and Off, the current imagesharpening setting is shown by an icon in the monitor. AUTO NORMAL [ 10 ] 109 - Nikon 25048 | User Manual - Page 124
Reference-Camera Setup Camera Setup The SET-UP Menu This section details the options available in the SET-UP menu, where you make changes to basic camera settings, and perform such tasks as formatting memory cards. To view the SET-UP menu: 1 2 IMAGE QUALITY QUAL 1 SIZE Select or S A - Nikon 25048 | User Manual - Page 125
Reference-Camera Setup The SET-UP menu contains two pages of options: SET-UP Brightness 1 Auto Transfer Seq. Number Memory Card Format S Date Auto Off MENU PAGE2 SELECT SET-UP Menu, Page 1 SET BRIGHTNESS 1 S Brightness Controls monitor brightness. MENU O F F SELECT SET 113 AUTO TRANSFER - Nikon 25048 | User Manual - Page 126
Reference-Camera Setup SSEETT--UUPP 1 Video Mode Language S SET-UP Menu, Page 2 MENU OF F SELECT SET VIDEO MODE VIDEO MODE 1 Video Mode Language NTSC PAL S Video Mode This option is used to choose the standard for video output from NTSC and PAL. MENU O F F SELECT SET LANGUAGE LANGUAGE 1 - Nikon 25048 | User Manual - Page 127
Reference-Camera Setup Adjusting Monitor Brightness:The Brightness Menu This option controls monitor brightness. Press the multi selector up or down to increase or decrease the brightness of the monitor by moving the arrow to the right of the display up or down. Changes to brightness take effect - Nikon 25048 | User Manual - Page 128
files of any file number can be transferred. To transfer 1000 or more images, use one of the following methods: 1) Transfer the images using Nikon View 4, not the TRANSFER button. 2) Transfer 999 images using theTRANSFER button, and unmark the images once they have been transferred. Then mark the - Nikon 25048 | User Manual - Page 129
the extension "MOV" (e.g., "DSCN0001.MOV"). Photos and movies are stored in folders with a name consisting of a three-digit number between 100 and 999,followed by "NIKON" (e.g., "100NIKON"). 115 - Nikon 25048 | User Manual - Page 130
Reference-Camera Setup Memor y Card Format The memor y card supplied with your camera is already formatted for use in the COOLPIX775. Other memory cards will however need to be formatted prior to use. For more information on formatting memory cards, see"Tutorial: First Steps" ( 37). MEMORY CARD - Nikon 25048 | User Manual - Page 131
Reference-Camera Setup The Date Menu The Date option is used to set the camera to the current date and time. For more information, see "Tu- 1 torial: First Steps" ( 42). S DDAATTEE YMD MENU OF F SELECT SET 117 - Nikon 25048 | User Manual - Page 132
Reference-Camera Setup Conserving Battery Power :The Auto-Off Menu When oper ated on battery power, the camer a will enter sleep mode if no operations are performed for thir ty seconds (or three minutes when menus are displayed). The time limit for sleep mode can be chosen from thir ty seconds, - Nikon 25048 | User Manual - Page 133
Reference-Camera Setup Choosing aVideo Standard:The Video-Mode Menu The Video Mode menu is used to select the standard used for video output. Adjust this setting to match the standard used in any video device to which you connect the camera. VVIDIDEEOOMMOODDEE 1 Video Mode Language NTSC PAL S - Nikon 25048 | User Manual - Page 134
Playing Images Back Playback Mode This section details the operations that can be performed when the mode dial is set to . It is divided into the following three sub-sections shown opposite: Reference-Playing Images Back 120 - Nikon 25048 | User Manual - Page 135
Reference-Playing Images Back Basic Playback...122-127 This section covers operations that can be performed using the multi selector and the buttons on the back of the camera, including: • playback of pictures stored on the memory card, whether singly or in "contact sheets" of nine or four - Nikon 25048 | User Manual - Page 136
Reference-Playing Images Back Basic Playback When the mode dial is turned to , the camera enter s playback mode with the most recent picture displayed in the monitor. This section covers the operations that can be perfor med in playback mode using the multi selector and buttons on the back of the - Nikon 25048 | User Manual - Page 137
Reference-Playing Images Back To Delete current photo View multiple images ( 127) Zoom in on current photo ( 126) Press ( ) Description A confirmation dialog will be displayed. Press multi selec- tor up or down to highlight option, press to right to select. DELETE • Select Yes to delete - Nikon 25048 | User Manual - Page 138
Reference-Playing Images Back Photo Information Photo information is superimposed on images displayed in single-image playback. To hide the photo information display, press the multi selector to the left. Pressing the multi selector to the left a second time will restore the photo information - Nikon 25048 | User Manual - Page 139
Reference-Playing Images Back Movie Playback In single-image playback, movies are indicated by a icon in the lower left corner of the display. Movie playback is controlled by the multi selector. 21010:14.024.2200 00000022..MMOOV Operation Function SSTTAARRTT [ 22// 55] Star t movie. While - Nikon 25048 | User Manual - Page 140
Reference-Playing Images Back Zoom / Use the ( ) button to zoom in on pictures ×2 displayed in single-image playback (zoom can not be used with movies). Operation Function SCROLL ( ) Magnify center of image to fill monitor (2×). Press a second time to Press cancel zoom. Scroll to - Nikon 25048 | User Manual - Page 141
Reference-Playing Images Back Viewing Multiple Images:Thumbnail Playback / Pressing the button in single-image playback displays a menu of nine thumbnail images, where you can select pictures or movies for viewing, delete images, and mark images for transfer to a computer. To Press Description - Nikon 25048 | User Manual - Page 142
Reference-Playing Images Back The Playback Menu The playback menu contains options for deleting images and print-orders, for protecting images from deletion, and for playing images back one after the other in automatic "slide shows." You can also create a digital "print order" for pr inting - Nikon 25048 | User Manual - Page 143
Reference-Playing Images Back The playback menu contains the following options: PLAY BACK MENU Delete 1 Slide Show Protect Print Set Transfer Playback Menu MENU O F F SELECT SET DELETE Delete 1 Selectd Images All Images This option can be used to delete all or selected photos, and to - Nikon 25048 | User Manual - Page 144
Reference-Playing Images Back Deleting Pictures and Print Orders:The Delete Menu Using the options in the Delete menu, you can: • delete selected pictures 1 • delete all pictures • delete the current print order ( 136) DELETE Selectd Images All Images Print Set Deleting Selected Pictures and - Nikon 25048 | User Manual - Page 145
Reference-Playing Images Back 5 DELETE Press button to display a confirma- 2Y2YEEEESRSRAOAOSRSRENIOMA?GES No Yes MENU O F F SELECT SET tion dialog. Press multi selector up or down to highlight option, press to right to put choice into effect: • Select Yes to delete all selected images • - Nikon 25048 | User Manual - Page 146
Reference-Playing Images Back Automated Playback:The Slide-Show Menu The slide-show option in the playback menu is used for automated sequential playback. When Start is selected in the slide-show menu, all images on the memor y card will be played back one after the other in the order recorded, - Nikon 25048 | User Manual - Page 147
Reference-Playing Images Back The following operations can be performed while a slide show is in progress: To Pause slide show End slide show Press () MENU Description Press the button to pause PAUSE the slide show. The dialog shown 1 at right will be displayed. To re- start the slide show, - Nikon 25048 | User Manual - Page 148
Reference-Playing Images Back Safeguarding Valuable Images:The Protect Menu Selecting Protect from the playback menu displays PROTECT the menu shown at right, where you can select images to protect from accidental deletion. Protected files can not be deleted in review, single-image playback, - Nikon 25048 | User Manual - Page 149
3 Press button to complete operation. To exit Protect menu without changing pro- tected status of images, press MENU but- DONE ton. Reference-Playing Images Back 135 - Nikon 25048 | User Manual - Page 150
Reference-Playing Images Back Ordering Prints:The Print-Set Menu Selecting Print Set from the playback menu displays the menu shown at r ight. Here you can specify pictures to be printed, the number of prints, and the information to be included on each print. This information is stored on the - Nikon 25048 | User Manual - Page 151
Reference-Playing Images Back 3 PRINT Use multi selector to specify number of prints. Press up to increase (maximum 9), down to decrease . To deselect image, press multi selector down when number of prints is 1. Repeat steps 1-3 to select additional SELECT SET images. To exit without - Nikon 25048 | User Manual - Page 152
files of any file number can be transferred. To transfer 1000 or more images, use one of the following methods: 1) Transfer the images using Nikon View 4, not the TRANSFER button. 2) Transfer 999 images using theTRANSFER button, and unmark the images once they have been transferred. Then mark the - Nikon 25048 | User Manual - Page 153
Reference-Playing Images Back Television Playback: ConnectingYour Camera to a Video Device Using the EG-775 video cable provided with your camer a, you can connect the COOLPIX775 to a television or VCR. The video device will show the same picture as is displayed in the camera monitor. 1 Connect the - Nikon 25048 | User Manual - Page 154
Camera andYour Computer By connecting your Nikon digital camera to a computer running Nikon View, you unleash its full potential images to your computer using the UC-E2 USB cable, the COOLPIX775 requires the version of Nikon View 4 provided with the camera. If you have a version of Nik on View that - Nikon 25048 | User Manual - Page 155
Reference-Connections This section describes how to connect your camera to a computer running Nikon View using the UC-E2 Universal Serial Bus (USB) cable supplied with your camera. Users whose computers are not equipped with a USB interface can inser t - Nikon 25048 | User Manual - Page 156
on and waiting for the operating system to start up, place the reference CD in a CD-ROM drive. Nikon View 4.1 Version 4.0 Macintosh and Windows Jp En De Fr Es Nl It Reference Manual 6MTS5004 If you are using a Macintosh computer, the reference CD window will open automatically on the desktop - Nikon 25048 | User Manual - Page 157
Once installation is complete, double-click the INDEX.pdf icon in the Nikon window (see opposite) to view a clickable index of the documentation available for Nikon View. Follow the links to display the installation instructions for your computer system. If desired, you can print the installation - Nikon 25048 | User Manual - Page 158
Connected: Connecting toYour Computer Once you have installed Nikon View, you are ready to transfer pictures and of images are selected,some time will be required for transfer. "Hot Plug" The USB interface supports "hot plug" connection of peripheral devices. This means that the camera can be on or - Nikon 25048 | User Manual - Page 159
the first time the camera is connected. The files needed to register the camera with Windows 98/98 Second Edition (SE) is contained on the Nikon View installer CD. Be sure the CD is inserted in the drive when you first connect your camera. Other versions of Windows do not - Nikon 25048 | User Manual - Page 160
Reference-Connections Use a Reliable Power Source When transferring data between the camera and the computer, we recommend that you use an EH-21 AC adapter/battery charger (available separately) to ensure a reliable power supply. If the camera is running on batter y power, be sure that the battery - Nikon 25048 | User Manual - Page 161
Reference-Connections 5 Press the TRANSFER button Once the camera is turned on, NikonView will automatically detect the camera. After Nikon View has started, press the TRANSFER button on the camera to copy all mar ked images from the memory card to the computer. The message " - Nikon 25048 | User Manual - Page 162
Reference-Connections Disconnecting the Camera When you want to disconnect the camera from the computer,follow the instructions below before turning the camera off or disconnecting the USB cable. Windows Millenium Edition / Windows 2000 Click the "Unplug or eject hardware" icon in the - Nikon 25048 | User Manual - Page 163
Reference-Connections Disconnecting the Camera During image Transfer Confirm that image transfer is complete and the message "TRANSFER COMPLETED" is displayed in the camera monitor, before performing any of the above operations. Do not turn the camera off, disconnect the cable or remove the memory - Nikon 25048 | User Manual - Page 164
™ memory cards using a PC card slot, you will require an EC-AD1 PC-card adapter, available separately from Nikon. Viewing the Nikon View Reference Manual The Nikon View Reference Manual is stored in Portable Document Format (PDF) on the reference CD provided with your camera. To view the Reference - Nikon 25048 | User Manual - Page 165
to start up. 3 Insert the adapter into the card slot If Nikon View has already been installed, and the memory card is from a Nikon Digital Camera, NikonView will automatically detect the card. See the Nikon View Reference Manual for information on transferring images to your computer. Removing the - Nikon 25048 | User Manual - Page 166
your camera. Optional Accessories ...Learn what optional accessories are available for the COOLPIX775. Web Resources...Where to get help on line. Troubleshooting ...Read this section for help when your camera does not function as expected. Specifications ...Technical data for the COOLPIX775. 153 - Nikon 25048 | User Manual - Page 167
Reference-Technical Notes Caring forYour Camera Cleaning Lens/ Viewfinder The key to cleaning these glass par ts is to not touch them with your fingers. Use a blower (typically a small device with a rubber bulb attached to one end that you pump to produce a stream of air out the other) to remove - Nikon 25048 | User Manual - Page 168
Optional Accessories At the time of writing, the following optional accessories were available for the COOLPIX775. Contact your retailer or local Nikon representative for details. AC adapter/battery charger EH-21 AC adapter/battery charger Carrying case CS-E775 Soft Case CompactFlash memory - Nikon 25048 | User Manual - Page 169
time of writing, the following on-line resources were available for user s of Nikon digital imaging equipment: For Product Information andTips • For users in the USA: http://www.nikonusa.com/ • For users in the Europe: http://www.nikon-euro.com/ • For users in the Asia, Oceania, the Middle East, and - Nikon 25048 | User Manual - Page 170
Notes Troubleshooting If your camera fails to function as expected, check the list of common problems below before consulting your retailer or Nikon representative. Refer to the page numbers listed in the rightmost column for infor mation on solving the problems listed here. Problem Possible - Nikon 25048 | User Manual - Page 171
Reference-Technical Notes Problem Possible Cause • Flash is off. 92 Photos are too dark • Flash window blocked. 93 (underexposed) • card reader, card adapter, or card slot. 150 reader or card slot See NikonView Reference Manual for further information on 142 troubleshooting Nikon View. 157 - Nikon 25048 | User Manual - Page 172
Messages The following table lists the error messages and other warnings that appear in the monitor and how to deal with them. Display Problem Solution (Flashes) Clock calendar not set. Set clock calendar to current date and time. 42 (Flashes) Battery exhausted. Turn camera off and replace - Nikon 25048 | User Manual - Page 173
Reference-Technical Notes Display MEMORY CARD FULL Prob lem Solution Error occurs during shooting: • Reduce image quality or 96-99 Insufficient memory to record size. further pictures at current • Delete photographs. 130 settings. • Insert new card. 36 Error appears when you try to - Nikon 25048 | User Manual - Page 174
Reference-Technical Notes Display Problem Solution If error message displayed in Interface cable or disconnect- computer monitor, click OK COMMUNICATIONS ERROR ed or memory card removed while images are being - Nikon 25048 | User Manual - Page 175
on or off. tional AC adapter (if using), remove and re-insert battery. If lens is obstructed, remove obstruction. If error persists, contact retailer or Nikon rep- 8, 34 resentative. 161 - Nikon 25048 | User Manual - Page 176
Reference-Technical Notes Specifications Type CCD Total pixels Effective pixels Image size Lens Digital zoom Autofocus (AF) Focus modes Focus range Viewfinder Ma gnification Frame coverage Monitor Frame coverage Auto off Digital camera E775 1/2.7˝ charge-coupled device (CCD) 2.14 million 2.01 - Nikon 25048 | User Manual - Page 177
Reference-Technical Notes Storage System Design rule for Camera File systems,Digital Print-Order Format (DPOF) compliant Compression JPEG-baseline-compliant; • FINE(approx. 1/4) • NORMAL(approx. 1/8) • BASIC(approx. 1/16) QuickTime movies Media Approximate Capaciy CompactFlash™ (CF) Card Type I - Nikon 25048 | User Manual - Page 178
USB interface Video output User can choose from NTSC and PAL I/O terminals • DC input • Data output (video/USB) Power requirements • One rechargeable Nikon EN-EL1 lithium-ion battery (supplied), or six-volt 2CR5 (DL245) lithium batter y (available separately) • EH-21 AC adapter/battery charger - Nikon 25048 | User Manual - Page 179
amount equivalent to twice the capacity of the camera memory card required when Nikon View is running Display: 640 × 480 with 16-bit color (800 recom- mended) Others: CD-ROM drive USB interface (only built in USB ports supported) Mac® OS8.6 needs USB driver (ver. 1.3.5) on Web site of Apple - Nikon 25048 | User Manual - Page 180
Reference-Index Index Symbols 2CR5. See Battery A See White balance A AC adapter 35, 139 AUTO menu 18, 95 Auto mode 46-55 Auto Off 118 Auto sharpening 108 Auto Transfer 114 Auto white balance 100 Autofocus 87 Autofocus mode 88 Getting good results with 89 B Backlight mode 82 B ASIC. - Nikon 25048 | User Manual - Page 181
Reference-Index I Image quality 97 Image sharpening 108 Image size 98 Incandescent (white balance)......... 100 Infinity 87 N Night portrait mode 83 NORMAL. See Image quality Normal (image sharpening 108 Number of exposures remaining ..... 47 NTSC 119 J JPEG 97 L Landscape mode 83 - Nikon 25048 | User Manual - Page 182
Reference-Index R Red-eye reduction 93 Red-eye reduction lamp 93 Red light 52 V VGA. See Image size Video Mode 139 Viewfinder 6 S SCENE menu 20, 95 Scene mode 82-83 Self-timer 90-91 Self-timer lamp 91 Seq. Numbers 115 SET-UP menu 22, 110-119 Sharpening. See Image sharpening Shutter-
-
 1
1 -
 2
2 -
 3
3 -
 4
4 -
 5
5 -
 6
6 -
 7
7 -
8
-
9
-
10
-
11
-
12
-
13
-
14
-
15
-
16
-
17
-
18
-
19
-
20
-
21
-
22
-
23
-
24
-
25
-
26
-
27
-
28
-
29
-
30
-
31
-
32
-
33
-
34
-
35
-
36
-
37
-
38
-
39
-
40
-
41
-
42
-
43
-
44
-
45
-
46
-
47
-
48
-
49
-
50
-
51
-
52
-
53
-
54
-
55
-
56
-
57
-
58
-
59
-
60
-
61
-
62
-
63
-
64
-
65
-
66
-
67
-
68
-
69
-
70
-
71
-
72
-
73
-
74
-
75
-
76
-
77
-
78
-
79
-
80
-
81
-
82
-
83
-
84
-
85
-
86
-
87
-
88
-
89
-
90
-
91
-
92
-
93
-
94
-
95
-
96
-
97
-
98
-
99
-
100
-
101
-
102
-
103
-
104
-
105
-
106
-
107
-
108
-
109
-
110
-
111
-
112
-
113
-
114
-
115
-
116
-
117
-
118
-
119
-
120
-
121
-
122
-
123
-
124
-
125
-
126
-
127
-
128
-
129
-
130
-
131
-
132
-
133
-
134
-
135
-
136
-
137
-
138
-
139
-
140
-
141
-
142
-
143
-
144
-
145
-
146
-
147
-
148
-
149
-
150
-
151
-
152
-
153
-
154
-
155
-
156
-
157
-
158
-
159
-
160
-
161
-
162
-
163
-
164
-
165
-
166
-
167
-
168
-
169
-
170
-
171
-
172
-
173
-
174
-
175
-
176
-
177
-
178
-
179
-
180
-
181
-
182
 |
 |

i
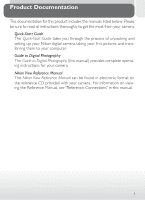
The documentation for this product includes the manuals listed below.
Please
be sure to read all instructions thoroughly to get the most from your camera.
Quick-Start Guide
The
Quick-Start Guide
takes you through the process of unpacking and
setting up your Nikon digital camera, taking your first pictures, and trans-
ferring them to your computer.
Guide to Digital Photography
The
Guide to Digital Photography
(this manual) provides complete operat-
ing instructions for your camera.
Nikon View Reference Manual
The
Nikon View Reference Manual
can be found in electronic format on
the reference CD provided with your camera.
For information on view-
ing the Reference Manual, see “Reference: Connections” in this manual.
Product Documentation