Nikon 500mm F4G User Manual - Page 31
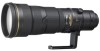
Built-in rotating tripod collar, Lens hood HK-34 AF-S 500mm/HK-35 AF-S 600mm, Slip-in filter holder - for
 |
UPC - 018208021727
View all Nikon 500mm F4G manuals
Add to My Manuals
Save this manual to your list of manuals |
Page 31 highlights
10. Built-in rotating tripod collar • When shooting vertical pictures, loosen the tripod collar lock screw by turning it counterclockwise, rotate the lens to an appropriate position, then tighten the screw clockwise. • When holding the camera by its handgrip and rotating the camera with the En lens in its tripod collar, your hand may bump into the tripod, depending on the tripod in use. ˾ Monopod (supplied accessory) • The tripod collar can be exchanged for a monopod collar by removing the tripod collar lock screw. • After changing the tripod collar, make sure the screw is fully tightened. Failure to fully tighten the screw could lead to accidents or damage to the lens and camera. For details on this procedure, contact your nearest Nikon service center or representative office. 11. Lens hood HK-34 (AF-S 500mm)/HK-35 (AF-S 600mm ) (AF-S 500mm: HK-34) • Tighten the lens hood screw securely when using the lens hood. • To store the hood, place it in the reverse position and tighten the screw securely. (AF-S 600mm: HK-35-1/HK-35-2) Two-part lens hoods (HK-35-1 for attachment to the front of the lens and HK-35-2 for attachment to the front of HK-35-1) are provided. Using the HK-35-1: First, loosen the lens hood screw on the HK-35-1, slip HK-35-1 onto the front of the lens, then tighten the screw. Attaching the HK-35-2: Loosen the lens hood screw on the HK-35-2, slip HK-35-2 onto the front of the HK-35-1, then tighten the screw. Storing the lens hoods: First, reverse the HK-35-2, and slip it back onto the HK-35-1. Then reverse the HK-35-1 with the HK-35-2 attached, and slide both back onto the front of the lens. 12. Slip-in filter holder • Always use a (52mm screw-in) filter. A 52mm screwin NC filter is attached to the filter holder when shipped from the factory. 1 Screw a filter into the side of the filter holder marked with the words "Nikon" and "JAPAN". (Fig. 10) Fig. 10 31
-
 1
1 -
2
-
3
-
4
-
5
-
6
-
7
-
8
-
9
-
10
-
11
-
12
-
13
-
14
-
15
-
16
-
17
-
18
-
19
-
20
-
21
-
22
-
23
-
24
-
25
-
 26
26 -
 27
27 -
 28
28 -
 29
29 -
 30
30 -
 31
31 -
 32
32 -
 33
33 -
 34
34 -
 35
35 -
 36
36 -
37
-
38
-
39
-
40
-
41
-
42
-
43
-
44
-
45
-
46
-
47
-
48
-
49
-
50
-
51
-
52
-
53
-
54
-
55
-
56
-
57
-
58
-
59
-
60
-
61
-
62
-
63
-
64
-
65
-
66
-
67
-
68
-
69
-
70
-
71
-
72
-
73
-
74
-
75
-
76
-
77
-
78
-
79
-
80
-
81
-
82
-
83
-
84
-
85
-
86
-
87
-
88
-
89
-
90
-
91
-
92
-
93
-
94
-
95
-
96
-
97
-
98
-
99
-
100
-
101
-
102
-
103
-
104
-
105
-
106
-
107
-
108
-
109
-
110
-
111
-
112
-
113
-
114
-
115
-
116
-
117
-
118
-
119
-
120
-
121
-
122
-
123
-
124
-
125
-
126
-
127
-
128
-
129
-
130
-
131
-
132
-
133
-
134
-
135
-
136
-
137
-
138
-
139
-
140
-
141
-
142
-
143
-
144
-
145
-
146
-
147
-
148
-
149
-
150
-
151
-
152
-
153
-
154
-
155
-
156
-
157
-
158
-
159
-
160
-
161
-
162
-
163
-
164
-
165
-
166
-
167
-
168
-
169
-
170
-
171
-
172
-
173
-
174
-
175
-
176
-
177
-
178
-
179
-
180
-
181
-
182
-
183
-
184
-
185
-
186
-
187
-
188
-
189
-
190
-
191
-
192
-
193
-
194
-
195
-
196
-
197
-
198
-
199
-
200
-
201
-
202
-
203
-
204
-
205
-
206
-
207
-
208
-
209
-
210
-
211
-
212
-
213
-
214
-
215
-
216
-
217
-
218
-
219
-
220
-
221
-
222
-
223
-
224
 |
 |
