Nikon COOLPIX S9300 Reference Manual
Nikon COOLPIX S9300 Manual
 |
View all Nikon COOLPIX S9300 manuals
Add to My Manuals
Save this manual to your list of manuals |
Nikon COOLPIX S9300 manual content summary:
- Nikon COOLPIX S9300 | Reference Manual - Page 1
DIGITAL CAMERA Reference Manual En - Nikon COOLPIX S9300 | Reference Manual - Page 2
Interface are trademarks or registered trademarks of HDMI Licensing LLC. • All other trade names mentioned in this manual or the other documentation provided with your Nikon product are trademarks or registered trademarks of their respective holders. AVC Patent Portfolio License This product is - Nikon COOLPIX S9300 | Reference Manual - Page 3
Introduction Parts of the Camera and Basic Operations The Basics of Shooting and Playback Shooting Features Playback Features Recording and Playing Back Movies Using GPS/Electronic Compass (COOLPIX S9300 only) General Camera Setup Reference Section Technical Notes and Index i - Nikon COOLPIX S9300 | Reference Manual - Page 4
please contact the store where you purchased the camera. or COOLPIX S9300 Digital Camera COOLPIX S9200 Digital Camera Camera Strap Rechargeable Li-ion Battery EN-EL12 (with terminal cover) Charging AC Adapter EH-69P* USB Cable UC-E6 Audio Video Cable EG-CP16 ViewNX 2 Installer CD Reference - Nikon COOLPIX S9300 | Reference Manual - Page 5
"Technical Notes and Index." • SD, SDHC and SDXC memory cards are referred to as "memory cards" in this manual. • The setting at the time of purchase is referred to as the "default setting." • The names of menu items displayed in the camera monitor, and the names of buttons or messages displayed on - Nikon COOLPIX S9300 | Reference Manual - Page 6
Accessories Nikon COOLPIX cameras are designed to the highest standards and include complex electronic circuitry. Only Nikon brand electronic accessories (including battery chargers, batteries, Charging AC Adapter and AC adapters) certified by Nikon specifically for use with this Nikon digital - Nikon COOLPIX S9300 | Reference Manual - Page 7
sure to also replace any pictures selected for the Select an image option in the Welcome screen setting (A100). Care should be taken to avoid injury or damage to property when physically destroying data storage devices. For the COOLPIX S9300, the log data saved on the memory card is handled in the - Nikon COOLPIX S9300 | Reference Manual - Page 8
a fall or other accident, take the product to a Nikon-authorized service representative for inspection, after unplugging the product and/or removing the battery. Do not use the camera or Charging AC Adapter in the presence of flammable gas Using the camera in the presence of flammable gases such as - Nikon COOLPIX S9300 | Reference Manual - Page 9
Charge the battery by inserting it into the camera and connecting the Charging AC Adapter. EH-69P (included). • When inserting the battery, do not attempt to insert it upside down or backwards. • Do not short or disassemble the battery or attempt to remove or break the battery insulation or casing - Nikon COOLPIX S9300 | Reference Manual - Page 10
power off while inside the airplane during take off or landing. Also, before boarding an airplane, set the GPS tracking information recording function to OFF (COOLPIX S9300). If using in a hospital, be sure to follow the instructions of the hospital. The electromagnetic waves emitted by this camera - Nikon COOLPIX S9300 | Reference Manual - Page 11
CAREFULLY FOLLOW THESE INSTRUCTIONS For connection to a supply not in the U.S.A., use an attachment plug adapter of the proper configuration for the power outlet if needed. The power supply unit is dealer or an experienced radio/television technician for help. COOLPIX S9300 COOLPIX S9200 ix - Nikon COOLPIX S9300 | Reference Manual - Page 12
the equipment. Interface Cables Use the interface cables sold or provided by Nikon for your equipment. Using other interface cables may exceed the limits of Class B Part 15 of the FCC rules. Notice for Customers in the State of California WARNING Handling the cord on this product will expose you to - Nikon COOLPIX S9300 | Reference Manual - Page 13
Introduction Notes on GPS/electronic compass (COOLPIX S9300 only) ● Location name data of this camera Before using the GPS function, make sure to read "USER LICENSE AGREEMENT FOR LOCATION NAME DATA (COOLPIX S9300 only)" (F7) and agree to the terms. • The location name information (Point - Nikon COOLPIX S9300 | Reference Manual - Page 14
2 Charge the Battery 16 Preparation 3 Insert a Memory Card 18 Internal Memory and Memory Cards...19 Approved Memory Cards ...19 Step 1 Turn the Camera On ...20 Turning the Camera On and Off...21 Setting the Display Language, Date, and Time 22 Step 2 Select a Shooting Mode...24 Available Shooting - Nikon COOLPIX S9300 | Reference Manual - Page 15
of Each Special Effect ...57 Changing Special Effects Mode Settings 58 Features That Can Be Set Using the Multi Selector 59 Available Functions ...59 Using the Flash (Flash Modes) ...60 Using the Self-timer ...63 Using Macro Mode ...64 Adjusting Brightness (Exposure Compensation), Vividness, and - Nikon COOLPIX S9300 | Reference Manual - Page 16
Using GPS/Electronic Compass (COOLPIX S9300 only 93 Starting GPS Data Recording...94 Changing the GPS or Electronic Compass Settings (GPS Options Menu 97 General Camera Setup...99 The Setup Menu ...100 Reference Section...E1 Using Easy Panorama (Shooting and Playing Back E2 Taking Pictures with - Nikon COOLPIX S9300 | Reference Manual - Page 17
Memory Card E51 C Sequence Display Options...E52 x Choose Key Picture...E52 The Movie Menu...E53 Movie Options ...E53 Open with HS Footage...E54 Recording Movies in Slow Motion and Fast Motion (HS Movie E55 Autofocus Mode...E57 Wind Noise Reduction...E57 GPS Options (COOLPIX S9300 only E58 GPS - Nikon COOLPIX S9300 | Reference Manual - Page 18
Products...F2 The Camera ...F2 The Battery...F3 Charging AC Adapter ...F4 The Memory Cards...F5 Caring for the Camera ...F6 Cleaning ...F6 Storage ...F6 USER LICENSE AGREEMENT FOR LOCATION NAME DATA (COOLPIX S9300 only).... F7 Troubleshooting...F11 Specifications ...F19 Supported Standards ...F22 - Nikon COOLPIX S9300 | Reference Manual - Page 19
functions of each part and the basic camera operations. Parts of the Camera 2 The Camera Body 2 Controls Used in Shooting Mode 4 Controls Used in Playback Mode 5 The Monitor...6 Basic Operations 9 Switching Between Shooting Mode and Playback Mode 9 Using the Rotary Multi Selector 10 Using - Nikon COOLPIX S9300 | Reference Manual - Page 20
of the Camera and Basic Operations 14 13 12 11 10 9 8 COOLPIX S9200 1 2 3 4 4 7 Flash raised 6 Lens cover closed 14 13 12 11 10 9 8 7 1 Mode dial 24 2 Shutter-release button 4, 28 3 Power switch/power-on lamp 21 4 Microphone (stereo 81, 88 5 GPS antenna (COOLPIX S9300 only)... 95 - Nikon COOLPIX S9300 | Reference Manual - Page 21
b (e movie-record) button 9, 30, 88 9 l (delete) button 32, 92 10 Memory card slot 18 11 Battery latch 14, 15 12 Battery chamber 14 13 Cover latch 14, 18 14 Battery-chamber/ memory card slot cover 14, 18 15 Power connector cover (for connection with an optional AC Adapter) .....E91 - Nikon COOLPIX S9300 | Reference Manual - Page 22
Operations Parts of the Camera Controls Used in Shooting Mode Control Name Main Function A Mode dial Change the shooting mode. 24 Rotate toward g you stop Shutterrelease button pressing when you feel resistance slightly): Set focus and exposure. When pressed all the way: Release the - Nikon COOLPIX S9300 | Reference Manual - Page 23
press 21 and hold this button to turn the camera on in playback mode. • Return to shooting mode. 9 • Enlarge the image when rotated toward g movies. • Switch from image thumbnail or zoomed image display to full-frame playback mode. d (menu) button Display and hide the menu. 30 30, E7 47, - Nikon COOLPIX S9300 | Reference Manual - Page 24
changes depending on the camera's settings and state of use. In the default setting, information is displayed when the camera is turned on and when you operate the camera, and turns off after a few seconds (when Photo info in Monitor settings (A100) is set to Auto info). Shooting Mode 43 42 41 40 - Nikon COOLPIX S9300 | Reference Manual - Page 25
Parts of the Camera 1 Shooting mode 24, 25 2 Macro mode 64 3 Zoom indicator 27, 64 4 AF indicator 28 5 AE/AF-L indicator E5 6 Flash mode 61 7 Battery level indicator 20 Eye-Fi communication 8 indicator 102, E83 9 Vibration reduction icon 101 10 GPS reception (COOLPIX S9300 only).....96 11 - Nikon COOLPIX S9300 | Reference Manual - Page 26
E83 Album icon in favorite pictures mode 78, E9 5 Category icon in auto sort mode 78, E13 List by date mode 78, E15 6 Battery level indicator 20 7 Protect icon 80 Recorded GPS information indicator 8 (COOLPIX S9300 only 96 Compass display (shooting direction) 9 (COOLPIX S9300 only 98 10 Print - Nikon COOLPIX S9300 | Reference Manual - Page 27
Between Shooting Mode and Playback Mode The camera has two modes of operation: Shooting mode, which is used for taking pictures, and playback mode, which is used for viewing pictures. Press the c (playback) button to switch between shooting mode and playback mode. • While using playback mode, you - Nikon COOLPIX S9300 | Reference Manual - Page 28
this manual. When Using Shooting Mode Rotate to select an item* Display m (flash mode) (A60) menu Display creative slider Display n (Selftimer) menu (A63) (A65), Display o (exposure compensation) guide (A68) Auto Apply selection Display D (macro mode) menu (A64) * Pressing up or down will - Nikon COOLPIX S9300 | Reference Manual - Page 29
Playback menu Quick retouch D-Lighting Skin softening Filter effects Print order Slide show Protect Playback menu N tab: Selects the playback mode (A 78). c tab: Displays the settings available for the current playback mode (A 78). z tab (COOLPIX S9300 only): Displays the GPS options menu (A97 - Nikon COOLPIX S9300 | Reference Manual - Page 30
Press the rotary multi selector J to highlight the tab. Shooting menu Image mode White balance Metering ISO sensitivity AF area mode Autofocus mode Set up Welcome screen Time zone and date Monitor settings Print date Vibration reduction Motion detection AF assist Press the rotary multi selector - Nikon COOLPIX S9300 | Reference Manual - Page 31
1 Insert the Battery 14 Preparation 2 Charge the Battery 16 Preparation 3 Insert a Memory Card 18 Shooting Step 1 Turn the Camera On 20 Setting the Display Language, Date, and Time (First Use Only 22 Step 2 Select a Shooting Mode 24 Step 3 Frame a Picture ...26 Step 4 Focus and Shoot...28 - Nikon COOLPIX S9300 | Reference Manual - Page 32
battery latch will lock the battery in place. B Inserting the Battery Correctly Inserting the battery upside down or backwards could damage the camera. Be sure to check that the battery is in the correct orientation. 3 Close the battery-chamber/memory card slot cover. • Charge the battery before - Nikon COOLPIX S9300 | Reference Manual - Page 33
opening the battery-chamber/memory card slot cover. To eject the battery, open the battery-chamber/ memory card slot cover and push the orange battery latch in the direction shown (1). Then, remove the battery straight (2). B High Temperature Caution The camera, battery, and memory card may be - Nikon COOLPIX S9300 | Reference Manual - Page 34
The Basics of Shooting and Playback 3 16 USB Cable UC-E6 (included) • When charging starts, the charge lamp flashes slowly in green. • About three hours and 50 minutes is required to charge a fully exhausted battery. • When the battery has been completely charged, the charge lamp turns off. • See - Nikon COOLPIX S9300 | Reference Manual - Page 35
You can also charge the COOLPIX S9300/S9200 Rechargeable Li-ion Battery EN-EL12 by connecting the camera to a computer (A82, A102). • The EN-EL12 can be charged without using the camera by using the Battery Charger MH-65 (available separately; E91). C AC Power Source • You can take pictures and play - Nikon COOLPIX S9300 | Reference Manual - Page 36
the memory card until it clicks into place. B Inserting the Memory Card Correctly Inserting the memory card upside down or backwards could damage the camera or the memory card. Be sure to confirm that the memory card is in the correct orientation. 3 Close the battery-chamber/memory card slot - Nikon COOLPIX S9300 | Reference Manual - Page 37
in either the camera's internal memory (COOLPIX S9300: approx. 26 MB; COOLPIX S9200: approx. 25 MB) or on a memory card. To use the camera's internal memory for shooting or playback, first remove the memory card. Approved Memory Cards The following Secure Digital (SD) memory cards have been tested - Nikon COOLPIX S9300 | Reference Manual - Page 38
. Prepare to charge or replace the battery. Cannot take pictures. Charge or replace the battery. Number of Exposures Remaining The number of exposures remaining is displayed. • When a memory card is not inserted, C is displayed and pictures are recorded to the internal memory (COOLPIX S9300: approx - Nikon COOLPIX S9300 | Reference Manual - Page 39
three minutes, the camera will turn off automatically. To turn on the monitor again in standby mode, perform either one of the following operations. • Press the power switch, shutter-release button, c button, or b (e movie-record) button. • Rotate the mode dial. Flashes No operations performed - Nikon COOLPIX S9300 | Reference Manual - Page 40
The Basics of Shooting and Playback Step 1 Turn the Camera On Setting the Display Language, Date, and Time Dialogs for language selection and camera clock setting are displayed the first time the camera is turned on. 1 Press the multi selector H or I to choose the desired language and press the - Nikon COOLPIX S9300 | Reference Manual - Page 41
and time, O flashes when the shooting screen is displayed. Use the Time zone and date setting in the setup menu (A100) to set the date and time. C The Clock Battery • The camera's clock is powered by a backup battery that is separate from the camera's main battery. • The backup battery charges after - Nikon COOLPIX S9300 | Reference Manual - Page 42
2 Select a Shooting Mode Rotate the mode dial to select the shooting mode. • The following describes how to take pictures in A (auto) mode as an example. Rotate the mode dial to A. Auto mode • The camera switches to A (auto) mode and the shooting mode icon changes to A. Shooting mode icon 29m 0s - Nikon COOLPIX S9300 | Reference Manual - Page 43
Shoot a continuous sequence or use BSS (best shot selector). F Smart portrait mode (A50) The camera detects smiling faces and releases the shutter automatically. Scene mode (A38) When one of the scene modes is selected, pictures are captured using settings that are optimized for the selected scene - Nikon COOLPIX S9300 | Reference Manual - Page 44
of a tripod is recommended to avoid the effects of camera shake: - When shooting in a dark location or with the flash mode (A61) set to W (off) - When shooting in the telephoto zoom position • To take a picture with the camera attached to a tripod, set Vibration reduction in the setup 26 menu (A100 - Nikon COOLPIX S9300 | Reference Manual - Page 45
the focus area will not be displayed when the digital zoom is in effect. C Digital Zoom and Interpolation Unlike the optical zoom, the digital zoom uses a digital imaging process known as interpolation to magnify images, resulting in slight deterioration of image quality depending on the image mode - Nikon COOLPIX S9300 | Reference Manual - Page 46
will turn green. 1/250 F3.5 Shutter speed Aperture value • When a face is not detected: Selects the focus areas (up to nine) containing the subject closest to the camera. When the subject is in focus, the focus area (active focus area) lights in green (maximum of nine areas). • When the digital - Nikon COOLPIX S9300 | Reference Manual - Page 47
data, or in damage to the camera or the memory card. B Autofocus Autofocus may not perform as expected in the following situations. In some rare cases, the subject may not be in focus despite the fact that the active focus area or the focus indicator lights in green: • Subject is very dark • Objects - Nikon COOLPIX S9300 | Reference Manual - Page 48
selector. • To play back images that are saved in the internal memory, remove the memory card. C is displayed in brackets, before "Current image number/total number of images" on the playback screen. • To return to shooting mode, press the c button again, or press the shutter-release button, or - Nikon COOLPIX S9300 | Reference Manual - Page 49
f (h) Image is displayed in full- frame playback mode. Image is zoomed in. Display position guide • To adjust the zoom ratio, rotate the zoom Pictures taken using face detection (A75) or pet detection (A48) are enlarged at the center of the face that was detected during shooting. If the camera - Nikon COOLPIX S9300 | Reference Manual - Page 50
shooting, each series of images is treated as a group (pictures in a sequence) and only the group's "key picture" is displayed in the default setting (E7). • When you press the l button during key picture playback, all images in the key picture's sequence can be deleted (E8). • To delete each - Nikon COOLPIX S9300 | Reference Manual - Page 51
/OFF 2 Add y to all images that you want to delete and then press the k button to apply the selection. • A confirmation dialog is displayed. Follow the instructions displayed on the monitor. The Basics of Shooting and Playback C Selecting Certain Types of Images for Deletion When using favorite - Nikon COOLPIX S9300 | Reference Manual - Page 52
34 - Nikon COOLPIX S9300 | Reference Manual - Page 53
Shooting Features This chapter describes each of the camera's shooting modes and the features that are available when using shooting mode. By referring to this information, you will learn how to select different shooting modes and adjust settings according to the shooting conditions and the kind - Nikon COOLPIX S9300 | Reference Manual - Page 54
the subject closest to the camera. When the subject is in focus, the focus area (active focus area) lights in green (maximum of nine areas). Changing A (Auto) Mode Settings • See "Features That Can Be Set Using the Multi Selector"(A59) for more information on flash mode (A60), self-timer (A63 - Nikon COOLPIX S9300 | Reference Manual - Page 55
suited to the sky conditions or light source to achieve better results if the default setting results are unsatisfactory. • When the white balance setting is other than Auto or Flash, set the flash mode (A60) to W (off ). E33 Select the method that the camera uses to measure the brightness of - Nikon COOLPIX S9300 | Reference Manual - Page 56
When one of the following scenes is selected using the mode dial or the scene menu, images are captured using settings that are optimized for the selected scene. x (Scene auto selector) (A39) When you frame a picture, the camera automatically selects the optimum scene for simpler shooting. j Night - Nikon COOLPIX S9300 | Reference Manual - Page 57
manually. • The digital zoom is not available. Shooting Features C If Night Landscape or Night Portrait Is Selected When Shooting with Scene Auto Selector • If the camera switches to g (Night landscape), the flash switches to off (W (off)) regardless of the flash mode setting and the camera - Nikon COOLPIX S9300 | Reference Manual - Page 58
of the applied option in the setup menu. - Press the shutter-release button all the way to shoot a single picture at slow shutter speeds. • When the shutter-release button is pressed halfway, the focus area or focus indicator (A6) always lights in green. • The digital zoom is not available. 40 - Nikon COOLPIX S9300 | Reference Manual - Page 59
HDR is set to Off (default setting): The flash fires to prevent the backlit subject from being hidden in shadow. - The camera focuses at the center area of the frame. - Press the shutter-release button all the way to shoot a single picture. • When HDR is set to On: Use when taking pictures with very - Nikon COOLPIX S9300 | Reference Manual - Page 60
. • The digital zoom is not available. y M c Landscape Use this mode for vivid landscapes and cityscapes. • When the shutter-release button is pressed halfway, the focus area or focus indicator (A6) always lights in green. y M d Sports Use this mode when shooting sporting events. The camera captures - Nikon COOLPIX S9300 | Reference Manual - Page 61
mode is selected. • Hand-held: - The Y icon is displayed on the shooting screen. - When the e icon in the upper left of the monitor lights in green and the shutter- release button is pressed all the way, pictures are shot continuously. The camera combines these pictures to save a single picture - Nikon COOLPIX S9300 | Reference Manual - Page 62
of candlelight and other indoor background lighting. • The camera focuses at the center area of the frame. • When shooting in a dark location, hold the camera steadily to avoid the effects of camera shake. To take a picture with the camera attached to a tripod, set Vibration reduction in the setup - Nikon COOLPIX S9300 | Reference Manual - Page 63
adjust each setting. - Flash mode - Self-timer - Exposure compensation • The camera focuses on the subject even when the shutter-release button is not pressed halfway. You may hear the sound of the camera focusing. y M u Food Use this mode when taking pictures of food. • Macro mode (A64) is set to - Nikon COOLPIX S9300 | Reference Manual - Page 64
is pressed halfway, the focus indicator (A6) always lights in green. • Only the five optical zoom positions shown on the right can be applied. When the zoom control is rotated, zoom will not stop at any position other than the five indicated (digital zoom is available). y M n Black and white copy - Nikon COOLPIX S9300 | Reference Manual - Page 65
B Note on Printing Panorama Pictures When printing panorama pictures, a full view may not be printed depending on the printer settings. Additionally, printing may not be available depending on the printer. For more information, see your printer's manual or contact a digital photo lab. 47 - Nikon COOLPIX S9300 | Reference Manual - Page 66
When remaining capacity of the internal memory or memory card is low To continue shooting with pet portrait auto release, press the multi selector J (n) to set again. • The digital zoom is not available. • Under some shooting conditions such as pet-to-camera distance, speed of moving pets, direction - Nikon COOLPIX S9300 | Reference Manual - Page 67
To view 3D pictures in 3D, a 3D-compatible TV or monitor is required. 3D pictures can be played back in 3D by connecting the camera to a 3D-compatible TV or monitor using a 3D-compatible HDMI cable (A82). • When connecting the camera using an HDMI cable, set the following for the TV settings in the - Nikon COOLPIX S9300 | Reference Manual - Page 68
any of the following operations. - Turn off the camera. - Set the Smile timer to Off. - Rotate the mode dial to switch to a shooting mode other than F (Smart portrait) mode. B \Notes on Smart Portrait Mode • The digital zoom is not available. • Under some shooting conditions, faces and smiling - Nikon COOLPIX S9300 | Reference Manual - Page 69
detected, the camera focuses on the subject at the center of the frame. Changing Smart Portrait Mode Settings • See "Features That Can Be Set Using the Multi Selector" (A59) for more information on flash mode (A60), self-timer (A63), and exposure compensation (A68). • See "Options Available in the - Nikon COOLPIX S9300 | Reference Manual - Page 70
Faces) Using Skin Softening In the following shooting modes, the camera detects up to three human faces when the shutter the desired results are not produced, select another shooting mode or set Skin softening to Off when using smart portrait mode and shoot again. • The skin softening level cannot - Nikon COOLPIX S9300 | Reference Manual - Page 71
is pressed all the way. There is no need to hold the shutter-release button down. • The focus, exposure, and white balance settings are fixed at the values for the first image in each series. • After taking a picture, the camera returns to the shooting screen. If O is displayed, do not turn the - Nikon COOLPIX S9300 | Reference Manual - Page 72
on the image mode, type of memory card used, and shooting conditions. • When Continuous is set to Pre-shooting cache, Continuous H: 120 fps, Continuous H: 60 fps, or Multi-shot 16, banding or variance in brightness or hue may occur in images that were captured under lighting that flickers at - Nikon COOLPIX S9300 | Reference Manual - Page 73
For options other than for Continuous, see "Options Available in the Shooting Menu (A (Auto) Mode)" (A36). • Settings for options other than Continuous are also applied to A (auto) mode, and the settings are saved in the camera's memory even if the camera is turned off. Continuous Shooting (Options - Nikon COOLPIX S9300 | Reference Manual - Page 74
camera takes 16 shots at a rate of about 30 fps and arranges them in a single image. • The image mode is fixed at L (image size: 2560 ×1920 pixels). • The digital zoom is not available cache setting is indicated by an icon when shooting (A6). The preshooting cache icon lights in green while the - Nikon COOLPIX S9300 | Reference Manual - Page 75
mode Special effects Shooting Features Special effects Image mode Special effects • The camera focuses at picture. Add a dark tone over the entire picture. Create a black and white image in which only the specified color remains. B Special Effects Mode Settings When Movie options (A91) is set - Nikon COOLPIX S9300 | Reference Manual - Page 76
to retain from the slider by pressing H or I. To adjust the following settings, press the k button to temporarily cancel color selection, and then adjust each setting. - Flash mode (A60) - Self-timer (A63) - Macro mode (A64) - Exposure compensation (A68) Save To return to the color selection - Nikon COOLPIX S9300 | Reference Manual - Page 77
(A68) 0.0 Macro mode 0.0 Brightness (Exp. +/-) Available Functions Available functions differ according to the shooting mode as follows. • See "List of the Default Settings" (A69) for more information on the default settings in each shooting mode. Function m Flash mode (A60) n Self - Nikon COOLPIX S9300 | Reference Manual - Page 78
charging. The camera cannot take pictures. - Off: The flash will not fire when a picture is taken. • If the battery is low, the monitor will be turned off while the flash is charging. Shooting Features C Effective Range of the Flash The flash has a range of about 0.5 to 5.1 m (1 ft 8 in. to 16 - Nikon COOLPIX S9300 | Reference Manual - Page 79
shut. Available Flash Modes U Auto Flash fires automatically when lighting is dim. V Auto with red-eye reduction Best choice for portraits. Reduces red-eye effect caused by flash in portraits (A62). W Off Flash does not fire. • Use of a tripod is recommended to avoid the effects of camera shake - Nikon COOLPIX S9300 | Reference Manual - Page 80
A73). • For A (auto) mode, the changed flash mode setting is saved in the camera's memory even after the camera is turned off. C Auto with Red-eye Reduction This camera uses advanced red-eye reduction ("In-Camera Red-Eye Fix"). If the camera detects red eye when a picture is taken, the affected area - Nikon COOLPIX S9300 | Reference Manual - Page 81
camera shake. • When the shooting mode is set to Pet portrait in scene mode, Y (Pet portrait auto release) is displayed (A48). The self-timer n10s and n 2s are not available. Self-timer • If the k button is not pressed within a few seconds, the selection will be canceled. 3 Frame the picture - Nikon COOLPIX S9300 | Reference Manual - Page 82
the Flash The flash may be unable to light entire subject at distances of less than 50 cm (1 ft 8 in.) from the camera. C Autofocus When using macro mode in A (auto) mode or continuous shooting mode, you can focus without pressing the shutter-release button halfway by setting Autofocus mode (A37 - Nikon COOLPIX S9300 | Reference Manual - Page 83
), Vividness, and Hue (Creative Slider) When the shooting mode (A24) is set to A (auto) mode (A36) or continuous shooting mode (A53), use the creative slider to adjust brightness (exposure compensation), vividness, and hue for taking pictures. Operating the Creative Slider 1 Press the multi selector - Nikon COOLPIX S9300 | Reference Manual - Page 84
to take a picture. Exit 29m 0s 1140 Shooting Features C Creative Slider Settings • This feature mode and continuous shooting mode share the same settings for Brightness (Exp. +/-) (exposure compensation), Vividness, and Hue; these settings are saved in the camera's memory 66 even when the camera - Nikon COOLPIX S9300 | Reference Manual - Page 85
Exposure compensation Histogram value A histogram is a graph showing the distribution of tones in the image. Use as a guide when using exposure compensation and shooting without the flash. • The horizontal axis corresponds to pixel brightness, with dark tones to the left and bright tones to the - Nikon COOLPIX S9300 | Reference Manual - Page 86
pressed within a few seconds, the selection is set and the setting menu disappears. • When an exposure compensation value picture. • To turn off exposure compensation, return to step 1, change the value to 0.0. C Exposure Compensation Value When the shooting mode is the Fireworks show scene mode - Nikon COOLPIX S9300 | Reference Manual - Page 87
0.0 1 Cannot be used when Blink proof is set to On. 2 Can be set when Smile timer is set to Off. 3 The setting cannot be changed. • Settings applied in A (auto) mode and continuous shooting mode are saved in the camera's memory even after the camera is turned off (except for self-timer). Shooting - Nikon COOLPIX S9300 | Reference Manual - Page 88
, the camera automatically selects the flash mode appropriate for the scene it has selected. 2 The setting cannot be changed. 3 Flash is fixed at X (fill flash) when HDR is set to Off, and is fixed at W (off) when HDR is set to On. 4 The setting cannot be changed. Fill flash fires for red-eye - Nikon COOLPIX S9300 | Reference Manual - Page 89
image size and compression ratio that is used when saving images. Select the image mode best suited to the manner in which images will be used and the capacity of the internal memory or memory card. The higher the image mode setting, the larger the size at which it can be printed, but the number of - Nikon COOLPIX S9300 | Reference Manual - Page 90
this number may differ depending on the make of memory card, even if the capacity of the memory card is the same. Image mode Q 4608×3456P P 4608×3456 R 3264×2448 r 2272×1704 q 1600×1200 O 640×480 l 4608×2592 Internal memory COOLPIX COOLPIX S9300: 26 MB S9200: 25 MB 2 2 4 4 9 8 20 18 43 - Nikon COOLPIX S9300 | Reference Manual - Page 91
with other functions. Restricted function Setting Description Flash mode Blink proof (A51) When Blink proof is set to On, the flash cannot be used. Self-timer AF area mode (A37) Smile timer (A50) When set to Subject tracking, the self-timer is not available. When shooting with Smile timer - Nikon COOLPIX S9300 | Reference Manual - Page 92
is too close to the camera. Try shooting with Macro mode (A64) or Close-up scene mode (A45). • When shooting in A (auto) mode or continuous shooting mode, you can set the way the focus area is determined using the AF area mode (A37). • The camera may be unable to focus on the subjects for which - Nikon COOLPIX S9300 | Reference Manual - Page 93
in which the subject is facing. • In some rare cases, such as those described in "Autofocus" (A29), the subject may not be in focus even though the double border turns green. If the camera does not focus, try "Focus Lock" (A76). C Viewing Pictures Taken Using Face Detection • During playback, the - Nikon COOLPIX S9300 | Reference Manual - Page 94
shutter-release button halfway. • Subject is in focus and the focus area lights in green. • Exposure is also locked. 3 Continue holding down the shutter- release button halfway and recompose the picture. • Be sure to maintain the same distance between the camera and the subject. 4 Press the shutter - Nikon COOLPIX S9300 | Reference Manual - Page 95
This chapter describes how to select certain types of images for playback as well as some of the features available when playing back images. 15/05/2012 15:30 0004.JPG 4 132 Playback menu Quick retouch D-Lighting Skin softening Filter effects Print order Slide show Protect Playback Features 77 - Nikon COOLPIX S9300 | Reference Manual - Page 96
according to the type of images you want to view. Available Playback Modes c Play A30 All images are played back without selecting types of images. When you switch from shooting mode to playback mode, this mode is selected. h Favorite pictures E9 Play back only the images added to an album - Nikon COOLPIX S9300 | Reference Manual - Page 97
album, category, or shooting date and then press the k button. • h See "Favorite Pictures Mode" (E9) for more information. Portraits • F See "Auto Sort Mode" (E13) for more information. • C See "List by Date Mode" (E15) for more information. • To select the album, category, or shooting date - Nikon COOLPIX S9300 | Reference Manual - Page 98
in pictures taken and creates a copy with softer facial skin E19 tones. Apply a variety of effects using digital filter. The available effects are Soft, Selective color, Cross screen, E20 Fisheye, Miniature effect and Painting. When using a printer to print images saved on the memory card, the - Nikon COOLPIX S9300 | Reference Manual - Page 99
in Playback Mode (Playback Menu) Option Description A E Voice memo2 Use the camera's microphone to record voice memos and attach them to the picture taken. Playback and deletion of voice memos can also be performed. E50 h Copy5 Copy images between the internal memory and a memory card. This - Nikon COOLPIX S9300 | Reference Manual - Page 100
computer before you connect the camera to it. Connecting the camera and other USB-powered devices to the same computer simultaneously may cause a camera malfunction or excessive power supply from the computer, which could damage the camera or memory card. Printing images without using a computer - Nikon COOLPIX S9300 | Reference Manual - Page 101
Pack 1) • Windows Vista Home Basic/Home Premium/Business/Enterprise/Ultimate (Service Pack 2) • Windows XP Home Edition/Professional (Service Pack 3) Macintosh • Mac OS X (version 10.5.8, 10.6.8, 10.7.2) Refer to the Nikon website for the latest information on operating system compatibility. 1 Start - Nikon COOLPIX S9300 | Reference Manual - Page 102
Begin download.. • Follow the on-screen instructions to install the software. 5 Exit the installer when the installation completion screen is displayed. • Windows: Click Yes. • Mac OS: Click OK. The following software is installed: • ViewNX 2 (consisting of the three modules below) - Nikon Transfer - Nikon COOLPIX S9300 | Reference Manual - Page 103
, follow the steps below to select Nikon Transfer 2. 1 Under Import pictures and videos, click Change program. A program selection dialog will be displayed; select Import File using Nikon Transfer 2 and click OK. 2 Double-click Import File. If the memory card contains a large number of images, it - Nikon COOLPIX S9300 | Reference Manual - Page 104
" title bar of Nikon Transfer 2 (1). • Click Start Transfer (2). 1 2 • At default settings, all the images on the memory card will be copied to the computer. 3 Terminate the connection. • If the camera is connected to the computer, turn the camera off and then disconnect the USB cable. • If you are - Nikon COOLPIX S9300 | Reference Manual - Page 105
Recording and Playing Back Movies You can record movies by simply pressing the b (D movie-record) button. 2299m 09ss 1 13480 In playback mode, press the k button to play a movie. 15/05/2012 15:30 0004.MOV 10m16s 7m23s 7m42s Recording and Playing Back Movies 87 - Nikon COOLPIX S9300 | Reference Manual - Page 106
2 Press the b (e movie-record) button to start movie recording. • The camera focuses on the subject at the center of the frame. Focus areas are not displayed during recording. • When recording with an aspect ratio setting of 16:9 in the movie options (e.g., Movie options is d HD 1080pP (1920×1080 - Nikon COOLPIX S9300 | Reference Manual - Page 107
not open the battery-chamber/memory card slot cover or remove the battery or memory card while an indicator is flashing. Doing this could result in loss of data, or in damage to the camera or the memory card. B Notes on Movie Recording • When saving a movie onto a memory card, a memory card with an - Nikon COOLPIX S9300 | Reference Manual - Page 108
space on the memory card. The maximum movie recording time for a single movie is displayed on the monitor during recording. C Functions Available in Movie Recording • The creative slider, white balance (for A (auto mode) and continuous shooting mode) and the exposure compensation settings are also - Nikon COOLPIX S9300 | Reference Manual - Page 109
can be selected. When Full-time AF is selected, the sound of the camera focusing may be heard in recorded movies. If you want to prevent the sound of the camera focusing from being recorded, select Single AF. E57 Set whether or not to reduce wind noise during movie recording. During playback, not - Nikon COOLPIX S9300 | Reference Manual - Page 110
or rewound by rotating the multi selector. To delete a movie, use full-frame playback mode (A30) or thumbnail playback mode (A31) to select a movie and press the l button (A32). B Note on Movie Playback Movies recorded with cameras other than COOLPIX S9300/S9200 cannot be played back on this 92 - Nikon COOLPIX S9300 | Reference Manual - Page 111
Using GPS/Electronic Compass (COOLPIX S9300 only) Using GPS/Electronic Compass (COOLPIX S9300 only) The Global Positioning System (GPS) is a satellite-based navigation system using the electro-magnetic waves of a network of GPS satellites placed into orbit. It allows users to determine their - Nikon COOLPIX S9300 | Reference Manual - Page 112
(COOLPIX S9300 only) Starting GPS Data Recording The camera's internal GPS receives signals from the GPS satellites and calculates its current time and position. Calculation of the position is known as positioning. The position information (latitude and longitude) can be recorded on the pictures to - Nikon COOLPIX S9300 | Reference Manual - Page 113
Compass (COOLPIX S9300 only) Starting GPS Data Recording B Notes on GPS • When positioning for the first time, when positioning was unable to be performed for about two hours, or after the battery was changed, it takes a few minutes to obtain the position information. • If Record GPS data is set to - Nikon COOLPIX S9300 | Reference Manual - Page 114
GPS/Electronic Compass (COOLPIX S9300 only) Starting GPS Data Recording C GPS Reception Indicator and Point of Interest (POI) Information • Operate in an open-air area when starting to receive signals from GPS satellites. GPS Display POI is set to On, recorded on a picture can be checked on - Nikon COOLPIX S9300 | Reference Manual - Page 115
: Signals from the GPS satellite are used to set the date and time of the camera's internal clock (only when Record GPS data in GPS options of the GPS options menu is set to On). Update A-GPS file: A memory card is used to update the A-GPS (assist GPS) file. Using the latest A-GPS file can shorten - Nikon COOLPIX S9300 | Reference Manual - Page 116
a memory card using End log in Create log. E63 • To delete a log, select it and press l. Compass display: When set to On, the direction the camera is pointing is displayed on the shooting screen. When the monitor faces upward, the compass indicator switches to a circle compass with a red arrow - Nikon COOLPIX S9300 | Reference Manual - Page 117
Welcome screen Time zone and date Monitor settings Print date 29m 0s Vibration reduction Motion detection 1140 AF assist • See "Using Menus (the d Button)" (A11) for more information about using the camera's menus. • For further details about each setting, refer to "The Setup Menu" in the - Nikon COOLPIX S9300 | Reference Manual - Page 118
welcome screen when the camera is turned on. Select COOLPIX to display the COOLPIX logo. Select Select an image to use a picture taken with the camera as the welcome screen. The default setting is None. Set settings related to the camera's date and time. The Time zone setting allows you to specify - Nikon COOLPIX S9300 | Reference Manual - Page 119
speed to reduce blurring. The default setting is Auto. The r indicator lights in green when the camera detects camera shake or subject movement and increases shutter speed. • When using certain shooting modes or settings, motion is not detected. In this case the r indicator is not displayed. E74 - Nikon COOLPIX S9300 | Reference Manual - Page 120
an audio/video cable but no picture is displayed on the television, set Video mode to NTSC or PAL according to the type of signal compatible with the television. • HDMI settings can be set. When set to Auto (default setting), you can charge the camera's battery by connecting the camera to a computer - Nikon COOLPIX S9300 | Reference Manual - Page 121
The Shooting Menu (for A (Auto) Mode, Continuous Shooting Mode E33 The Smart Portrait Menu E41 The Playback Menu E43 The Movie Menu ...E53 GPS Options (COOLPIX S9300 only E58 The Setup Menu...E66 Additional Information File and Folder Names E89 Optional Accessories E91 Error Messages ...E92 E1 - Nikon COOLPIX S9300 | Reference Manual - Page 122
and Playing Back) Taking Pictures with Easy Panorama Rotate the mode dial to y M d button M V Easy panorama 1 Select the shooting range from W Normal (180°) or X Wide (360°), and press the k button. Easy panorama Normal (180°) Wide (360°) • The image sizes (W × H) when the camera is held in - Nikon COOLPIX S9300 | Reference Manual - Page 123
showing the shooting point reaches the end, the shooting ends. Example of moving the camera Guide • The user, without shifting position, moves the camera, from end to end of the guide, horizontally or vertically in an arc. • If about 15 seconds (in W Normal (180°)) or 30 seconds (in X Wide (360 - Nikon COOLPIX S9300 | Reference Manual - Page 124
playback mode. * Scrolling can also be performed by rotating the multi selector. Reference Section B Note on Viewing Pictures Recorded with Easy Panorama Panorama pictures recorded with functions other than easy panorama of the COOLPIX S9300/S9200 may not be scrolled or zoomed on this camera. E4 - Nikon COOLPIX S9300 | Reference Manual - Page 125
TV or monitor. Rotate the mode dial to y M d button M s 3D photography 1 Frame the subject. • The focus area that the camera focuses on can be moved to areas other than the center of the frame. To move the focus area, press the k button before taking the first picture, and then rotate the multi - Nikon COOLPIX S9300 | Reference Manual - Page 126
) seen in the saved picture will be narrower than that seen on the monitor at the time of shooting. • Pictures taken under dim lighting may appear grainy with noise. • If the camera does not take the second picture and cancels the shooting even when you align the guide with the subject, try shooting - Nikon COOLPIX S9300 | Reference Manual - Page 127
when Sequence display options is set to Individual pictures, the F icon is displayed on the monitor. • Pictures captured continuously with cameras other than COOLPIX S9300/S9200 cannot be displayed as a sequence. C Changing Key Picture in Sequence A sequence's key picture can be changed using Choose - Nikon COOLPIX S9300 | Reference Manual - Page 128
Mode (Sequence) C Playback Menu Options Available When Using Sequence When the d button is pressed during an image sequence playback, the following menu operations are available settings to individual images. Deleting Images in a Sequence When Sequence display options (E52) is set to Key picture - Nikon COOLPIX S9300 | Reference Manual - Page 129
favorite pictures mode. • set the chosen images. 3 Use the multi selector to choose the album to which the images will be added and press the k button. • The selected images are added and the camera switches to the playback menu. • To add the same image to multiple albums, select h Favorite pictures - Nikon COOLPIX S9300 | Reference Manual - Page 130
pictures mode, images are played back by retrieving the images that correspond to the file names added to the albums. If an image is deleted while using favorite pictures mode, the image will be removed from the album and it will be permanently deleted from the internal memory or the memory card - Nikon COOLPIX S9300 | Reference Manual - Page 131
Removing Images From Albums Select favorite pictures mode M Select an album from which images are removed (E10) M switch back to full-frame playback mode, or toward f (h) to display thumbnails. 2 Display y for all images to be removed and press the k button to set the chosen images. 3 Choose Yes - Nikon COOLPIX S9300 | Reference Manual - Page 132
mode) M d button M N tab (A78) M h Favorite pictures Set the album icons separately for the internal memory and for the memory card. • To change the album icons for the internal memory, first remove the memory card from the camera. • The default setting for the icon is the number icon (black - Nikon COOLPIX S9300 | Reference Manual - Page 133
categories, such as portraits, landscape, and movie. Press the c button (Playback mode) M d button M N tab (A78) M F Auto sort Use the scenes selected category. • When viewing images in full-frame playback mode or thumbnail playback mode, if you press the d button to display the menu and then - Nikon COOLPIX S9300 | Reference Manual - Page 134
be sorted to a category by using normal playback mode (A30) or list by date mode (E15). • Images or movies copied from the internal memory or a memory card cannot be displayed in auto sort mode. • Images or movies saved by a camera other than COOLPIX S9300/S9200 cannot be played back in auto sort - Nikon COOLPIX S9300 | Reference Manual - Page 135
picture taken on the selected date is displayed. • The following operations can be performed while List by date 20/05/2012 4 18/05/2012 11 16/ will be combined under Others. • The 9,000 most recent images can be displayed in list by date mode. • Pictures taken when the camera's date is not set - Nikon COOLPIX S9300 | Reference Manual - Page 136
created using the COOLPIX S9300/S9200 is viewed on a different digital camera, it may not be possible to display the picture properly or transfer it to a computer. • Editing functions are not available when there is not enough free space in the internal memory or on the memory card. • For a sequence - Nikon COOLPIX S9300 | Reference Manual - Page 137
. Skin softening Quick retouch, D-Lighting, Filter effects, Small picture or Crop can be used. Small picture Crop No additional editing functions can . • Even if the pictures that are marked for Print order (E43) or Protect (E47) are used for editing, these settings are not reflected on the - Nikon COOLPIX S9300 | Reference Manual - Page 138
Select a picture (A30) M d button M k Quick retouch Press the multi selector H or I to choose the setting level, mode. Quick retouch Normal Amount 15/05/2012 15:30 0004.JPG Reference Section 4 132 I D-Lighting: Enhancing Brightness and Contrast Select a picture (A30) M d button M I D-Lighting - Nikon COOLPIX S9300 | Reference Manual - Page 139
Softening Skin Tones Select a picture (A30) M d button M e Skin softening 1 Press the multi selector H or I to choose the setting level, and press the 15/05/2012 15:30 recognized by the E icon displayed in playback mode. 0004.JPG 4 132 Reference Section B Notes on Skin Softening • Depending - Nikon COOLPIX S9300 | Reference Manual - Page 140
Gently soften the focus of the image from the center to the edge. In pictures taken with face detection (A75) or pet detection (A48) selected, areas around faces will be blurred. Keep only the selected image color and make other colors black-and-white. Produce star-like rays of light that radiate - Nikon COOLPIX S9300 | Reference Manual - Page 141
. • A new, smaller copy is created. • The compression ratio of the created image is 1:16. • Copies created by editing with small picture editing function are displayed with a black frame. Create small picture file? Yes No Reference Section C More Information See "File and Folder Names" (E89) for - Nikon COOLPIX S9300 | Reference Manual - Page 142
When the image size is resized to 320×240 or 160×120 by cropping, a black frame appears around the picture during playback, and the C small picture icon is displayed on the left side of the monitor. C Cropping the Picture in its Current "Tall" Orientation Use the Rotate image option (E49) to rotate - Nikon COOLPIX S9300 | Reference Manual - Page 143
available HDMI cable to play back pictures. 1 Turn off the camera. 2 Connect the camera to the TV. When connecting using the included audio/video cable • Connect the yellow plug to the video-in jack on the TV, and the red and white plugs to the audio-in jacks. Yellow White Red Reference - Nikon COOLPIX S9300 | Reference Manual - Page 144
to turn on the camera. • The camera enters playback mode, and the recorded pictures are displayed on the TV. • While the camera is connected to the TV, the monitor remains off. B Notes on Connecting an HDMI Cable An HDMI cable is not included. Use a commercially available HDMI cable to connect the - Nikon COOLPIX S9300 | Reference Manual - Page 145
the camera off and disconnect the USB cable B Notes on Power Source • When connecting the camera to a printer, use a fully charged battery to prevent the camera from turning off unexpectedly. • If the AC Adapter EH-62F (available separately) (E91) is used, COOLPIX S9300/S9200 can be powered from - Nikon COOLPIX S9300 | Reference Manual - Page 146
. Then the Print selection screen (2) is displayed. 1 2 Print selection 15/05 2012 NO. 32 32 B If the PictBridge Startup Screen Is Not Displayed Turn the camera off and disconnect the USB cable. Set the Charge by computer option (E80) in the camera's setup menu to Off and reconnect the - Nikon COOLPIX S9300 | Reference Manual - Page 147
to a Printer (Direct Print) Printing Individual Images After connecting the camera to the printer correctly (E26), print pictures by following the procedure below. 1 Use the multi selector to choose the picture to be printed, and press the k button. Print selection 15/05 • Rotate the zoom - Nikon COOLPIX S9300 | Reference Manual - Page 148
Connecting the Camera to a Printer (Direct Print) 5 Choose the desired paper size and press the k button. • To specify the paper size using the printer settings, choose number of prints After connecting the camera to the printer correctly (E26), print pictures by following the procedure below. 1 - Nikon COOLPIX S9300 | Reference Manual - Page 149
for which no copies have been specified and these pictures are not printed. • Rotate the zoom control toward g (i) to switch to full-frame playback mode, or f (h) to switch to 12 thumbnail display. • Press the k button when setting is complete. • When the menu shown on the right is displayed - Nikon COOLPIX S9300 | Reference Manual - Page 150
the Camera to a Printer (Direct Print) Print all images All pictures stored in the internal memory or on the memory card are printed Cancel Current print/total number of prints Reference Section C Paper Size The camera supports the following paper sizes: Default (the default paper size for the - Nikon COOLPIX S9300 | Reference Manual - Page 151
the zoom control g/f. Use the multi selector to fast forward or rewind. To stop the preview playback, press the k button again. 5 After finishing the settings, press H or I to choose m (Save) and press the k button. 6 Choose Yes and press the k button. • The edited movie is saved. • To cancel the - Nikon COOLPIX S9300 | Reference Manual - Page 152
charged battery to prevent the camera from turning off during editing. When the battery level set start point and end point. Sections shorter than two seconds cannot be extracted. • Editing functions are not available when there is not enough free space in the internal memory or on the memory card - Nikon COOLPIX S9300 | Reference Manual - Page 153
• See "Changing the Image Size (Image Mode)" (A71) for more information on Image mode. • Other than Continuous (E36), items share the same settings with A (auto) mode and continuous shooting mode, and the settings are saved in the camera's memory even if the camera is turned off. • Continuous can be - Nikon COOLPIX S9300 | Reference Manual - Page 154
k button to measure the white balance value. • The shutter is released and the new white balance preset value is set (no picture is recorded). B Note on Preset Manual The camera cannot measure a white balance value for when the flash fires. When shooting with the flash, set White balance to Auto or - Nikon COOLPIX S9300 | Reference Manual - Page 155
as "metering." Use this option to choose how the camera meters exposure. Option G Matrix (default setting) q Center-weighted Description The camera uses a wide area of the screen for metering. This metering mode provides the appropriate exposure for a variety of shooting conditions. Recommended - Nikon COOLPIX S9300 | Reference Manual - Page 156
speeds, and blurring caused by camera shake and subject movement can be reduced. • Setting the ISO sensitivity to a high level is effective when shooting dark subjects, not using the flash, shooting at the telephoto zoom position and similar situations, but the pictures taken may be slightly grainy - Nikon COOLPIX S9300 | Reference Manual - Page 157
are photographed, or a subject with Focus area which no face can be detected is framed, AF area mode is set to Auto. The camera automatically selects the focus areas (up to nine) that contain the subject closest to the camera. The camera automatically selects the focus areas (up to nine) that - Nikon COOLPIX S9300 | Reference Manual - Page 158
J or K to move the focus area to where the subject is, and take a picture. FFooccuussaarreeaa Selectable areas • To adjust the following settings, press the k button to temporarily cancel focus area selection, and then adjust each setting. - Flash mode, macro mode, self-timer or creative slider - Nikon COOLPIX S9300 | Reference Manual - Page 159
the settings and return to the shooting screen. AF area mode Face priority Auto Manual Center Subject tracking 2 Frame the subject at the center of the border, and press the k button. • The subject is registered. • When the camera is unable to focus on the subject, the border lights in red. Change - Nikon COOLPIX S9300 | Reference Manual - Page 160
(for A (Auto) Mode, Continuous Shooting Mode) B Notes on Subject Tracking • The digital zoom is not available. • Set the zoom position, flash mode, creative slider, or menu settings before registering a subject. If any of these are changed after a subject is registered, the subject will be canceled - Nikon COOLPIX S9300 | Reference Manual - Page 161
(A6). When Off is selected, an icon for the current setting is not displayed. The effects of skin softening are not visible when framing pictures for shooting. Check the degree of skin softening performed in playback mode. Reference Section Smile Timer Display the shooting screen in smart portrait - Nikon COOLPIX S9300 | Reference Manual - Page 162
blink proof. Flash cannot be used when On is selected. If the camera saved an image in which the subject's eyes may have been closed, the dialog shown on the right is displayed for a few seconds. k Off (default setting) Disables blink proof. A blink was detected in the picture just taken. When - Nikon COOLPIX S9300 | Reference Manual - Page 163
on a memory card, the pictures to print and the number of copies can be set in advance on the memory card. • Printing with a DPOF-compatible (F22) printer that is equipped with a card slot. • Ordering the prints to a digital photo lab that has a DPOF service. • Printing by connecting the camera to - Nikon COOLPIX S9300 | Reference Manual - Page 164
. Pictures with the print orders are recognized by the w icon displayed in playback mode. Print cable, for DPOF printing (E30). • Date and Info are reset each time the Print order menu is displayed. • The date and time printed on the picture are the same as those set on the camera when the picture - Nikon COOLPIX S9300 | Reference Manual - Page 165
pictures mode or auto sort mode Yes No List by date mode Additionally, if there are more than 99 pictures as a result of adding the current print order setting, the screen shown below will do not support printing of the date and time. Only the date and time of print date on the pictures are printed - Nikon COOLPIX S9300 | Reference Manual - Page 166
the c button (Playback mode) M d button (A11) M b Slide show View pictures stored in the internal memory or on a memory card in an automatic slide For sequences (E7) whose sequence display options are set to Key picture only, only the key picture is displayed. • Images captured using easy panorama - Nikon COOLPIX S9300 | Reference Manual - Page 167
a picture and set or cancel protection. See "The Image Selection Screen" (E48) for more information. Note, however, that formatting the camera's internal memory or the memory card (E78) permanently erases the protected files. Protected pictures are recognized by the s icon in playback mode (A8 - Nikon COOLPIX S9300 | Reference Manual - Page 168
Playback menu: Rotate image (E49), Choose key picture (E52) • Setup menu: Select an image the zoom control toward g (i) to switch to fullframe playback mode, or f (h) to switch to 12 thumbnail display. • selected, proceed to step 3. 2 Press H or I to set ON or OFF images (or the number of copies). • - Nikon COOLPIX S9300 | Reference Manual - Page 169
Image Rotation • Images captured with cameras other than COOLPIX S9300/S9200 cannot be rotated. • Images captured using 3D photography cannot be rotated. • While only the key picture of a sequence is displayed, images cannot be rotated. Apply the setting after displaying individual images (E7, E52 - Nikon COOLPIX S9300 | Reference Manual - Page 170
memo must be deleted before a new voice memo can be recorded. • Voice memos cannot be attached to pictures taken with cameras other than COOLPIX S9300/ S9200. • Voice memos of the images with the Protect setting (E47) cannot be deleted. C More Information See "File and Folder Names" (E89) for more - Nikon COOLPIX S9300 | Reference Manual - Page 171
mode) M d button (A11) M h Copy Copy pictures between the internal memory and a memory card. 1 Use the multi selector to select an option from the copy screen, and press the k button. • Camera to card: Copy pictures from the internal memory to the memory card. • Card to camera: Copy pictures - Nikon COOLPIX S9300 | Reference Manual - Page 172
If there are no pictures stored on the memory card when playback mode is selected, the message, Memory contains no images.., is displayed. Press the d button and select Copy from the playback menu to copy the pictures stored in the camera's internal memory to the memory card. C More Information See - Nikon COOLPIX S9300 | Reference Manual - Page 173
of 16:9 are recorded. It is one of the formats supported by Apple Inc. • Movie bitrate: 20.8 Mbps • Frame rate: approx. 30 frames per second When using the camera's internal memory for recording, the movie recording may end unexpectedly depending on the composition of the image. Using a memory card - Nikon COOLPIX S9300 | Reference Manual - Page 174
movies with an aspect ratio of 16:9 are recorded. • Max. with an aspect ratio of 16:9 are recorded. • Max. Mode Setting mode while Soft or Nostalgic sepia is selected for the special effects shooting mode, i HS 60 fps (1280×720) is automatically selected for Movie options when the mode dial setting - Nikon COOLPIX S9300 | Reference Manual - Page 175
begins. • When the Open with HS footage (E54) in the movie menu is set to Off, normal speed movies are recorded when recording begins. Press the k button to switch to HS movie recording at the point where the camera should record for slow motion or fast motion playback. • If recording time for - Nikon COOLPIX S9300 | Reference Manual - Page 176
on HS Movie • The sound is not recorded. • Zoom position, focus, exposure and white balance are locked when the b (e movie-record) button played back at about 30 frames per second. When Movie options (E53) in the movie menu is set to h HS 120 fps (640×480) or i HS 60 fps (1280×720), movies that can - Nikon COOLPIX S9300 | Reference Manual - Page 177
Display the shooting screen M d button M e (Movie) tab (A11) M Autofocus mode Choose how the camera focuses when recording normal speed movies (E53). Option Description A Single AF (default setting) Lock on the focus when the b (e movie-record) button is pressed to start recording. Select this - Nikon COOLPIX S9300 | Reference Manual - Page 178
GPS Options (COOLPIX S9300 only) GPS Settings Press the d button M z (GPS options) tab (A11) M GPS options Option Record GPS data Synchronize Update A-GPS file Description When set to On, signals are being received from the GPS satellite, and positioning starts (A94). • The default setting is Off. - Nikon COOLPIX S9300 | Reference Manual - Page 179
com/agps/index.html • The A-GPS file for COOLPIX S9300 is only available from the website above. 1 Download the latest A-GPS file to the computer from the website. 2 Use a card reader or other devices to copy the downloaded file to the "NCFL" folder of the memory card. • The "NCFL" folder is located - Nikon COOLPIX S9300 | Reference Manual - Page 180
GPS Options (COOLPIX S9300 only) Points of Interest (POI) (Recording and Displaying Location Name Information) Press the d button M z (GPS options) tab (A11) M Points of interest (POI) This shows how to set the POI (point of interest, location name information). Option Embed POI Display POI Level - Nikon COOLPIX S9300 | Reference Manual - Page 181
GPS Options (COOLPIX S9300 only) Create Log (Record the Log of Moving Information) Press the d button M z (GPS options) tab ( to a memory card. 1 Use the multi selector to select Start log, and press the k button. Create log Start log End log 2 Select the duration that the log will be recorded, - Nikon COOLPIX S9300 | Reference Manual - Page 182
memory card. End log Save log Erase log Reference Section B Notes on Log Recording • If the date and time are not set, the log cannot be recorded. • Use a fully charged battery to prevent the camera from turning off unexpectedly during log recording. When the battery power becomes exhausted, log - Nikon COOLPIX S9300 | Reference Manual - Page 183
GPS Options (COOLPIX S9300 only) View Log Press the d button M z (GPS options) tab (A11) M View log Confirm or delete the log data saved in the memory card using Create log (E61). To Erase Log Data Press the l button and select either function. View log 2012/05/27 2012/05/26 2012/05/ - Nikon COOLPIX S9300 | Reference Manual - Page 184
GPS Options (COOLPIX S9300 only) Electronic Compass Press the d button M z (GPS options) tab (A11) M Electronic compass Option Compass display Description When set to On, a compass is displayed on the shooting screen. • The default setting is Off. • The direction the camera is pointing is - Nikon COOLPIX S9300 | Reference Manual - Page 185
GPS Options (COOLPIX S9300 only) B Notes on Using the Electronic Compass • The electronic compass is not displayed when the camera lens is facing upwards. • Do not use the electronic compass in this camera for mountain climbing and other specialized applications. The displayed information is - Nikon COOLPIX S9300 | Reference Manual - Page 186
when the camera is turned on. Option Description None Display the shooting or playback screen without displaying the (default setting) welcome screen. COOLPIX Display the welcome screen before displaying the shooting or playback screen. Select an image Select a picture taken to display - Nikon COOLPIX S9300 | Reference Manual - Page 187
the d button M z tab (A11) M Time zone and date Option Date and time Date format Time zone Description Set the camera clock to the current date and time. Use the multi selector to set the date and time. Date and time • Choose an item: Press K or J D M Y (selected in the following order - Nikon COOLPIX S9300 | Reference Manual - Page 188
screen is displayed. Time zone Tokyo, Seoul 16/05/2012 0:30 Home time zone Travel destination camera in an area where daylight saving time is in effect, turn on the daylight saving setting with H. When set is displayed on the monitor when the camera is in shooting mode. Time difference 10:30 EDT: - Nikon COOLPIX S9300 | Reference Manual - Page 189
The Setup Menu C Time Zones The camera supports the time zones listed below. For time differences not listed below, set the camera clock using Time zone and date. UTC +/-11 -10 -9 -8 -7 -6 -5 -4.5 -4 -3 -2 -1 ±0 Location Midway, Samoa Hawaii, Tahiti Alaska, Anchorage PST (PDT): Los Angeles, - Nikon COOLPIX S9300 | Reference Manual - Page 190
Press the d button M z tab (A11) M Monitor settings Option Photo info Image review Brightness Description Select information displayed on the monitor during shooting and playback modes. On (default setting): Picture is displayed on the monitor immediately after shooting and the monitor display - Nikon COOLPIX S9300 | Reference Manual - Page 191
Setup Menu Playback mode 15/05/2012 15:30 0004.JPG Framing grid+auto info 29m 0s 1140 4 132 In addition to information shown with The same information as in Auto info Auto info above, a framing grid is is displayed. displayed to help frame pictures. It is not displayed while recording movies - Nikon COOLPIX S9300 | Reference Manual - Page 192
pictures at the time of shooting. This information can be printed even from printers that do not support picture has been taken. • Dates cannot be imprinted in the following situations. - When the scene mode (A38) is set 3D photography - When Continuous in continuous shooting mode (A53) is set - Nikon COOLPIX S9300 | Reference Manual - Page 193
reduction to Off. • When On is selected, an icon for this setting is displayed on the monitor (A6). Reference Section B Notes on Vibration Reduction • After the power is turned on or the camera enters shooting mode from playback mode, wait until the display stabilizes before shooting. • Due to the - Nikon COOLPIX S9300 | Reference Manual - Page 194
Easy panorama - Pet portrait - 3D photography • In C (continuous) shooting mode k Off Motion detection is not enabled. When Auto is selected, an icon for this setting is displayed on the monitor (A6). The motion detection icon lights in green when the camera detects any vibration and increases - Nikon COOLPIX S9300 | Reference Manual - Page 195
6 in.) at the maximum telephoto position. • For some focus areas and scene modes such as Museum (A46), Pet portrait (A48), AF-assist illuminator does not turn on even if Auto is set. AF-assist illuminator does not light. The camera may be unable to focus if lighting is dim. Reference Section E75 - Nikon COOLPIX S9300 | Reference Manual - Page 196
effect, the camera focuses at the center of the frame. • Digital zoom cannot be used with the following shooting modes. - When the scene mode is x (Scene auto selector), Portrait, Night portrait, j (Night landscape), o (Backlighting) with HDR set to On, Easy panorama, Pet portrait, or 3D photography - Nikon COOLPIX S9300 | Reference Manual - Page 197
is turned off to save power and the camera enters standby mode (A21). This option sets the amount of time allowed to elapse before the camera enters standby mode. Choose from 30 s, 1 min (default setting), 5 min and 30 min. Reference Section C Auto Off Setting • In the following situations, the - Nikon COOLPIX S9300 | Reference Manual - Page 198
important pictures to a computer before formatting. Formatting the Internal Memory To format the internal memory, remove the memory card from the camera. The Format memory option is displayed on the setup menu. Formatting Memory Cards When a memory card is inserted in the camera, the memory card can - Nikon COOLPIX S9300 | Reference Manual - Page 199
is connected with an HDMI cable. When set to On (default setting), the television remote control can be used to operate the camera during playback. See "Using the TV's Remote Control (HDMI Device Control)" (E24) for more information. Set the method used to output 3D pictures to HDMI devices. Select - Nikon COOLPIX S9300 | Reference Manual - Page 200
to a computer. In this case, use the Charging AC Adapter EH-69P (A16) to charge the battery and then set the camera's date and time. • If the camera is turned off, charging will also stop. • If the computer enters sleep mode while charging, charging will stop and the camera may be turned off. • When - Nikon COOLPIX S9300 | Reference Manual - Page 201
the USB cable is connected correctly and replace the battery if necessary. • The computer is in sleep mode and is not supplying power. Wake up the computer. • The battery cannot be charged because the computer cannot supply power to the camera, due to the computer's settings or its specifications - Nikon COOLPIX S9300 | Reference Manual - Page 202
modes. • A (Auto) mode (when Face priority (E37) is selected for AF area mode) • In the following scene modes: setting) Description The Did someone blink? screen is displayed on the monitor if the camera detects that a human subject may have closed the eyes immediately after taking a picture - Nikon COOLPIX S9300 | Reference Manual - Page 203
. • y: Eye-Fi upload enabled but no images available for upload. • z: An error occurred. The camera cannot control the Eye-Fi card. C Supported Eye-Fi Cards As of November 2011, the following Eye-Fi cards can be used. Be sure that Eye-Fi card firmware has been updated to the latest version. • Eye-Fi - Nikon COOLPIX S9300 | Reference Manual - Page 204
memory or on the memory card. • For favorite pictures, auto sort, or list by date playback mode, the selected album, category, or shooting date must have at least ten images. Reference Section Reset All Press the d button M z tab (A11) M Reset all When Reset is selected, the camera settings - Nikon COOLPIX S9300 | Reference Manual - Page 205
value P 4608×3456 Auto Matrix Continuous H Auto Face priority Single AF Option Scene menu (A38) Night portrait (A43) Hue adjustment in Food mode (A45) Easy panorama (A47) Pet portrait (A48) Default value Portrait Tripod Center Normal (180°) Pet portrait auto release: ON Continuous: Continuous - Nikon COOLPIX S9300 | Reference Manual - Page 206
mode (E57) Wind noise reduction (E57) Default value d HD 1080pP (1920×1080) On Single AF Off GPS Options Menu (COOLPIX S9300 only) Option Record GPS info (E70) Image review (E70) Brightness (E70) Print date (E72) Vibration reduction (E73) Motion detection (E74) AF assist (E75) Digital zoom (E76) - Nikon COOLPIX S9300 | Reference Manual - Page 207
from the lowest number available in the internal memory or the memory card. If Reset all is performed after all pictures are deleted from the internal memory or memory card (A32), the file numbers for the next pictures taken start from 0001. • The following settings remain unaffected even if - Nikon COOLPIX S9300 | Reference Manual - Page 208
The Setup Menu Firmware Version Press the d button (A11) M z tab M Firmware version Displays the current camera firmware version. COOLPIX S9300 Ver.X.X Back E88 Reference Section - Nikon COOLPIX S9300 | Reference Manual - Page 209
. The next file number is set automatically to "0001." • Voice memo file names have the same identifier and file number as the picture to which the voice memo is attached. • When image files or voice files are copied to or from the internal memory or memory card (E51), the file naming conventions - Nikon COOLPIX S9300 | Reference Manual - Page 210
File and Folder Names • When the current folder is numbered 999, if there are 200 files in the folder or if a file is numbered 9999, no further pictures can be shot until the internal memory or memory card is formatted (E78), or a new memory card is inserted. E90 Reference Section - Nikon COOLPIX S9300 | Reference Manual - Page 211
closing the batterychamber/memory card slot cover, properly align the power connector cord in the battery chamber groove. If part of the cord runs out of the grooves, the cover or cord may be damaged when the cover is closed. USB cable USB Cable UC-E61 Audio/video cable Audio Video Cable EG-CP161 - Nikon COOLPIX S9300 | Reference Manual - Page 212
press the power switch to turn it off manually. The camera will turn off to prevent overheating. Inside of the camera has become hot. The camera turns off automatically. Leave the camera off until the inside of the camera has cooled and then turn it on again. Q (flashes red) Camera cannot focus - Nikon COOLPIX S9300 | Reference Manual - Page 213
of memory. Memory card is full. • Change the image mode. • Delete pictures and movies. • Replace memory card. • Remove memory card and use internal memory. 71 32, 92 18 19 Error occurred while recording picture. Format the internal memory or memory card. 18 Image cannot be saved. Camera has - Nikon COOLPIX S9300 | Reference Manual - Page 214
Destination in same time zone as home. E69 Mode dial is not in Mode dial is between two modes. the proper position. Rotate the mode dial to select the desired mode. 24 Could not obtain GPS data. COOLPIX S9300 only The camera clock is not set correctly. Change the location or time and determine - Nikon COOLPIX S9300 | Reference Manual - Page 215
than the A-GPS file saved in the camera • Whether the A-GPS file is still valid COOLPIX S9300 only Unable to update A-GPS file. The A-GPS file may be corrupted. Download the file from the website once more. E59 A memory card is not inserted. Insert a memory card. 18 COOLPIX S9300 only 100 log - Nikon COOLPIX S9300 | Reference Manual - Page 216
printing.* Printer error: file corrupt An error caused by the image file has occurred. Select Cancel and press the k button to cancel printing. - * See the instruction manual provided with your printer for further guidance and information. Reference Section E96 - Nikon COOLPIX S9300 | Reference Manual - Page 217
for the Products F2 The Camera...F2 The Battery...F3 Charging AC Adapter F4 The Memory Cards F5 Caring for the Camera F6 Cleaning...F6 Storage ...F6 USER LICENSE AGREEMENT FOR LOCATION NAME DATA (COOLPIX S9300 only F7 Troubleshooting F11 Specifications F19 Supported Standards F22 Index F23 - Nikon COOLPIX S9300 | Reference Manual - Page 218
other strong light sources for extended periods when using or storing the camera. Intense light may cause case or a plastic bag before exposing it to sudden changes in temperature. B Turn the Product off Before Removing or Disconnecting the Power Source or the Memory Card Do not remove the battery - Nikon COOLPIX S9300 | Reference Manual - Page 219
the battery. • Check the battery level before using the camera and replace or charge the battery if necessary. Do not continue charging once the battery is fully charged as this will result in reduced battery performance. Whenever possible, carry a fully charged spare battery when taking pictures on - Nikon COOLPIX S9300 | Reference Manual - Page 220
exhausted can result in reduced battery life. When the battery level is low, be sure to charge the battery before using it. • Recharge the battery at least once every six months and completely exhaust it before returning it to storage. • After removing the battery from the camera or battery charger - Nikon COOLPIX S9300 | Reference Manual - Page 221
all data in the memory card. Be sure to transfer important pictures to a computer before formatting. • If the error message "Card is not formatted. Format card?" is displayed when you insert a memory card into this camera, the memory card must be formatted. If the memory card contains images you - Nikon COOLPIX S9300 | Reference Manual - Page 222
this precaution could result in damage or trouble. If this fails, clean the lens using a cloth lightly dampened with commercial lens cleaner. Monitor agents. Storage Remove the battery if the camera will not be used for an extended period. Do not store the camera with naphtha or camphor moth - Nikon COOLPIX S9300 | Reference Manual - Page 223
(COOLPIX S9300 only) The location name data that is stored in this digital camera ("Data") is provided for your personal, internal use only and not for resale. It is protected by copyright, and is subject to the following terms and conditions which are agreed to by you, on the one hand, and Nikon - Nikon COOLPIX S9300 | Reference Manual - Page 224
USER LICENSE AGREEMENT FOR LOCATION NAME DATA (COOLPIX S9300 any such export laws, rules or regulations prohibit Nikon and its licensors from complying with any of its ii) the United Nations Convention for Contracts for the International Sale of Goods, which is explicitly excluded; provided that in - Nikon COOLPIX S9300 | Reference Manual - Page 225
USER LICENSE AGREEMENT FOR LOCATION NAME DATA (COOLPIX S9300 only) Notices related to licensed software copyright holders. • Location name data for Japan © 2011 ZENRIN CO., LTD.. All rights reserved. This service uses POI data of ZENRIN CO., LTD.. "ZENRIN" is a registered trademark of ZENRIN CO., - Nikon COOLPIX S9300 | Reference Manual - Page 226
USER LICENSE AGREEMENT FOR LOCATION NAME DATA (COOLPIX S9300 only) Switzerland Topografische Grundlage: © Bundesamt für Landestopographie Canada This data includes information taken with permission from Canadian authorities, including © Her Majesty, © Queen's Printer for Ontario, © ® Canada - Nikon COOLPIX S9300 | Reference Manual - Page 227
is off. • Battery is exhausted. • Standby mode for saving power: Press the power switch, shutter-release button, c button or b (e movie-record) button, or rotate the mode dial. • When flash lamp flashes, wait until flash has charged. • Camera and computer are connected via USB cable. • Camera and TV - Nikon COOLPIX S9300 | Reference Manual - Page 228
strong external static charge. Turn the camera off, remove and replace the battery, then turn the camera on again. Note that disconnecting the power source as described above may result in the loss of any data not recorded on the internal memory or memory card at the time the problem occurred. Data - Nikon COOLPIX S9300 | Reference Manual - Page 229
camera is in playback mode, press the c button, 30 No picture can be taken. shutter-release button or b (e movie-record) button. • When menus are displayed, press the d button. • Battery is exhausted. 11 20 • When flash lamp flashes slowly, flash is charging. 60 Cannot take 3D pictures In - Nikon COOLPIX S9300 | Reference Manual - Page 230
Troubleshooting Problem Cause/Solution • Flash is set to W (off ). Flash does not fire. • A shooting mode that cannot turn on flash is selected. • Another function that is set now is restricting the flash. A 61 59 73 • Off is selected for Digital zoom in the setup menu. 101, E76 • When x ( - Nikon COOLPIX S9300 | Reference Manual - Page 231
options setting. 81, E52 • Playback zoom cannot be used with movies, small pictures, or cropped copies of size 320 × 240 pixels or smaller. Cannot zoom in on • Playback zoom may not be available for pictures taken with picture. cameras other than COOLPIX S9300/S9200. • 3D pictures cannot - Nikon COOLPIX S9300 | Reference Manual - Page 232
Troubleshooting Problem Cause/Solution A Pictures not displayed on television. • Video mode or HDMI is not correctly set in the TV settings setup menu. • Cables are connected to both the HDMI mini connector and USB/audio video connector. • Memory card contains no pictures. Replace memory card. - Nikon COOLPIX S9300 | Reference Manual - Page 233
Troubleshooting Problem Cannot select paper size with camera. Cause/Solution Paper size cannot be selected from the camera in the following situations, even for PictBridge compatible printers. Use the printer to select paper size. • The paper size selected using the camera is not compatible with - Nikon COOLPIX S9300 | Reference Manual - Page 234
Troubleshooting GPS (COOLPIX S9300 only) Problem Cause/Solution A • The camera may not be able to identify the location in some 95 Unable to identify shooting environments. To use the GPS feature, use the the location or it camera as much as possible in an open-air area. takes time to • - Nikon COOLPIX S9300 | Reference Manual - Page 235
(COOLPIX S9300: approx. 26 MB) (COOLPIX S9200: approx. 25 MB) SD/SDHC/SDXC memory card File system DCF, Exif 2.3, DPOF, MPF compliant File formats Image size (pixels) Still pictures: JPEG 3D pictures: MPO Sound files (voice memo): WAV Movies: MOV (Video: H.264/MPEG-4 AVC, Audio: AAC stereo) • 16 - Nikon COOLPIX S9300 | Reference Manual - Page 236
Self-timer Built-in flash Range (approx.) (ISO sensitivity: Auto) Flash control Interface Data transfer protocol Video output HDMI output I/O terminal Electronic compass (COOLPIX S9300 only) GPS (COOLPIX S9300 only) Supported languages Power sources Charging time Battery life (EN-EL12) Tripod socket - Nikon COOLPIX S9300 | Reference Manual - Page 237
) COOLPIX S9300 Approx. 215 g (7.6 oz.) (including battery and SD memory card) COOLPIX S9200 Approx. 209 g (7.4 oz.) (including battery and SD memory card) 0°C to 40°C (32°F to 104°F) 85% and below (no condensation) • Unless otherwise stated, all figures are for a camera with a fully-charged - Nikon COOLPIX S9300 | Reference Manual - Page 238
is an industry-wide standard that allows pictures to be printed at a digital photo lab or with a household printer from print orders stored on the memory card. • Exif version 2.3: This camera supports Exif (Exchangeable Image File Format for Digital Still Cameras) version 2.3, a standard that allows - Nikon COOLPIX S9300 | Reference Manual - Page 239
with red-eye reduction 61, 62 Autofocus 29, 64, 89 Autofocus mode 37, E40 AV cable 82, E23, E91 B Backlighting 41 Battery 14, 16, E91 Battery chamber 3 Battery charger 17, E91 Battery latch 14 Battery level 20 Battery-chamber/memory card slot cover 14, 18 Beach Z 44 Best shot selector 46, 56 Black - Nikon COOLPIX S9300 | Reference Manual - Page 240
60 F24 Flash lamp 60 Flash mode 60 Focus 28, E37, E40 Focus area E37 Focus lock 76 Folder name E89 Food u 45 Format 18, 101, E78 Format the internal memory 101, E78 Formatting a memory card 18, 101, E78 Framing grid E71 FSCN E89 Full-frame playback 30 Full-time AF 91, E57 G GPS settings E58 H HDMI - Nikon COOLPIX S9300 | Reference Manual - Page 241
battery 14, 16, E91 List by date mode 78, E15 Lithium-ion type battery 14 M Macro 64 Maximum movie length 88, 90 Memory capacity 20 Memory card 18, 19, 72 Memory card slot 18 Metering 37, E35 Microphone 2, 81, E50 Mode dial 2, 38 Monitor 6, 8, F6 Monitor brightness 100, E70 Monitor settings - Nikon COOLPIX S9300 | Reference Manual - Page 242
Small picture 80, E21 Smart portrait menu 51, E41 Smart portrait mode 51 Smile timer 51, E41 Snow z 44 Sound settings 101, E77 Special effects mode 25, TV settings 102, E79 U USB cable 16, 82, E26, E91 USB/audio/video output connector 16, 82, E23, E26 V Vibration reduction 101, E73 Video mode E79 - Nikon COOLPIX S9300 | Reference Manual - Page 243
F27 - Nikon COOLPIX S9300 | Reference Manual - Page 244
No reproduction in any form of this manual, in whole or in part (except for brief quotation in critical articles or reviews), may be made without written authorization from NIKON CORPORATION. © 2012 Nikon Corporation FX2B02(11) 6MM19911-02
-
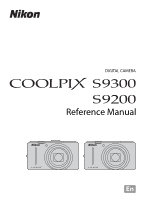 1
1 -
 2
2 -
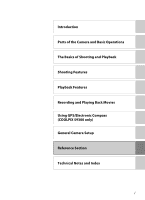 3
3 -
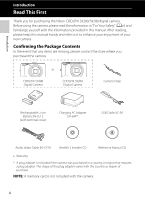 4
4 -
 5
5 -
 6
6 -
 7
7 -
8
-
9
-
10
-
11
-
12
-
13
-
14
-
15
-
16
-
17
-
18
-
19
-
20
-
21
-
22
-
23
-
24
-
25
-
26
-
27
-
28
-
29
-
30
-
31
-
32
-
33
-
34
-
35
-
36
-
37
-
38
-
39
-
40
-
41
-
42
-
43
-
44
-
45
-
46
-
47
-
48
-
49
-
50
-
51
-
52
-
53
-
54
-
55
-
56
-
57
-
58
-
59
-
60
-
61
-
62
-
63
-
64
-
65
-
66
-
67
-
68
-
69
-
70
-
71
-
72
-
73
-
74
-
75
-
76
-
77
-
78
-
79
-
80
-
81
-
82
-
83
-
84
-
85
-
86
-
87
-
88
-
89
-
90
-
91
-
92
-
93
-
94
-
95
-
96
-
97
-
98
-
99
-
100
-
101
-
102
-
103
-
104
-
105
-
106
-
107
-
108
-
109
-
110
-
111
-
112
-
113
-
114
-
115
-
116
-
117
-
118
-
119
-
120
-
121
-
122
-
123
-
124
-
125
-
126
-
127
-
128
-
129
-
130
-
131
-
132
-
133
-
134
-
135
-
136
-
137
-
138
-
139
-
140
-
141
-
142
-
143
-
144
-
145
-
146
-
147
-
148
-
149
-
150
-
151
-
152
-
153
-
154
-
155
-
156
-
157
-
158
-
159
-
160
-
161
-
162
-
163
-
164
-
165
-
166
-
167
-
168
-
169
-
170
-
171
-
172
-
173
-
174
-
175
-
176
-
177
-
178
-
179
-
180
-
181
-
182
-
183
-
184
-
185
-
186
-
187
-
188
-
189
-
190
-
191
-
192
-
193
-
194
-
195
-
196
-
197
-
198
-
199
-
200
-
201
-
202
-
203
-
204
-
205
-
206
-
207
-
208
-
209
-
210
-
211
-
212
-
213
-
214
-
215
-
216
-
217
-
218
-
219
-
220
-
221
-
222
-
223
-
224
-
225
-
226
-
227
-
228
-
229
-
230
-
231
-
232
-
233
-
234
-
235
-
236
-
237
-
238
-
239
-
240
-
241
-
242
-
243
-
244
 |
 |

En
Reference Manual
DIGITAL CAMERA