Nokia Advanced Car Kit CK-7W User Guide - Page 14
Loudspeaker, Microphone, Connect the loudspeaker or a compatible car radio system to - advanced
 |
View all Nokia Advanced Car Kit CK-7W manuals
Add to My Manuals
Save this manual to your list of manuals |
Page 14 highlights
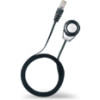
Installation To mount the remote control button, use the hook and loop tape provided. First detach the two parts of the pads from each other. Attach the pad with the loops first: peel off the protective sheet from the adhesive side (A) and attach the pad to the desired location in your car (B). Make sure that the surface where you intend to attach the pad is dry and free from dirt and dust. Attach the pad with the hooks next: peel off the protective sheet from the adhesive side (C) and attach the pad to the underside of the remote control button. Press the remote control button (D) firmly onto the loop pad mounted in the car. Loudspeaker To ensure good acoustic quality, mount the loudspeaker so that it is pointed in the user's direction. We recommend that you mount the loudspeaker a minimum distance of 1 metre away from the microphone to avoid feedback. The Advanced Car Kit also supports connection to a compatible car radio system. If you wish to use the car radio installed in your vehicle with the Advanced Car Kit for audio output, ask your service technician for professional advice. Connect the loudspeaker or a compatible car radio system to the "SPEAKER" output. Microphone Careful selection of the mounting location of the microphone can increase the quality of voice transmission. Mount the microphone approx. 30 cm from the driver's head, and position it so that it points towards the driver's mouth. Experience has shown that the best locations are near the rearview mirror or the sun visor. We recommend that you keep the microphone a minimum distance of 1 metre away from the Advanced Car Kit phone loudspeaker to avoid feedback. 14


