Nokia IP1220 Installation Guide - Page 99
Replacing or Upgrading Memory, Before You Begin
 |
View all Nokia IP1220 manuals
Add to My Manuals
Save this manual to your list of manuals |
Page 99 highlights
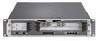
Replacing or Upgrading Memory Replacing or Upgrading Memory The Nokia IP1200 Series appliance has four dual inline memory-module (DIMM) sockets. This section describes how to upgrade or replace the memory by using a Nokia-approved memory upgrade kit. The IP1200 Series appliances come with different memory configurations. Contact Nokia customer support for more information on the supported memory configurations. Nokia products only support memory kits purchased from Nokia or Nokia-approved resellers. For further information, contact the appropriate Nokia customer support site listed in "Nokia Contact Information" on page 3. The DIMM sockets are located on the left rear of the IP1200 Series mother board, as you look at the appliance from the front, as Figure 23 shows. Figure 23 DIMM Socket Locations DIMM sockets 00325.2 Note You must install DIMMs in pairs starting from the left. Insert a pair of DIMMS into adjacent slots J5/J6 and/or J7/J8, otherwise the DIMMS do not work. You can also use all four slots at one time. Before You Begin To upgrade or replace your Nokia IP1200 Series appliance memory, you need: „ Physical access to the appliance „ Nokia memory upgrade kit and accompanying documentation „ Access to the appliance by using Nokia Network Voyager or Lynx IP1220 and IP1260 Security Platforms Installation Guide 99
-
 1
1 -
2
-
3
-
4
-
5
-
6
-
7
-
8
-
9
-
10
-
11
-
12
-
13
-
14
-
15
-
16
-
17
-
18
-
19
-
20
-
21
-
22
-
23
-
24
-
25
-
26
-
27
-
28
-
29
-
30
-
31
-
32
-
33
-
34
-
35
-
36
-
37
-
38
-
39
-
40
-
41
-
42
-
43
-
44
-
45
-
46
-
47
-
48
-
49
-
50
-
51
-
52
-
53
-
54
-
55
-
56
-
57
-
58
-
59
-
60
-
61
-
62
-
63
-
64
-
65
-
66
-
67
-
68
-
69
-
70
-
71
-
72
-
73
-
74
-
75
-
76
-
77
-
78
-
79
-
80
-
81
-
82
-
83
-
84
-
85
-
86
-
87
-
88
-
89
-
90
-
91
-
92
-
93
-
 94
94 -
 95
95 -
 96
96 -
 97
97 -
 98
98 -
 99
99 -
 100
100 -
 101
101 -
 102
102 -
 103
103 -
 104
104 -
105
-
106
-
107
-
108
-
109
-
110
-
111
-
112
-
113
-
114
-
115
-
116
-
117
-
118
-
119
-
120
-
121
-
122
-
123
-
124
-
125
-
126
-
127
-
128
 |
 |
