NordicTrack Audiostride 800 Elliptical English Manual - Page 9
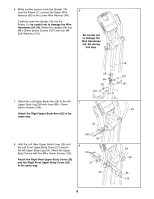
Attach the Left Link Arm 30 to the left Upper
 |
View all NordicTrack Audiostride 800 Elliptical manuals
Add to My Manuals
Save this manual to your list of manuals |
Page 9 highlights
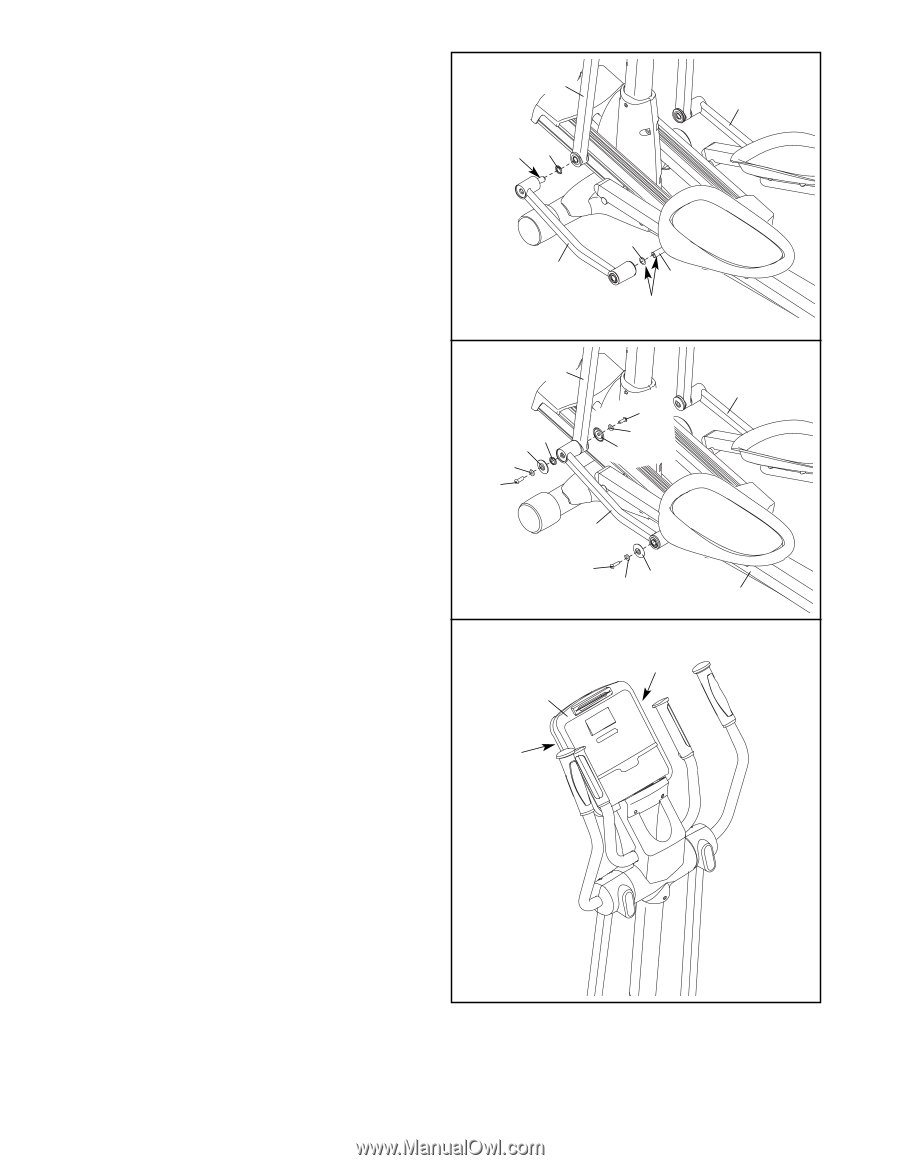
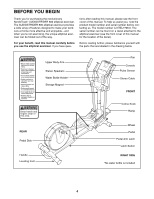
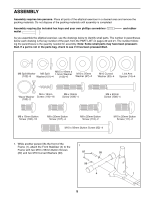
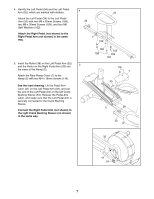
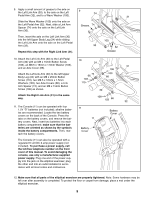
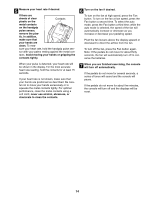
9. Apply a small amount of grease to the axle on the Left Link Arm (30), to the axle on the Left 9 24 Pedal Arm (32), and to a Wave Washer (100). 31 Slide the Wave Washer (100) onto the axle on the Left Pedal Arm (32). Next, slide a Link Arm Spacer (74) onto the axle on the Left Link Arm (30). Grease 74 Then, insert the axle on the Left Link Arm (30) into the left Upper Body Leg (24) while sliding the Left Link Arm onto the axle on the Left Pedal Arm (32). Repeat this step with the Right Link Arm (31). 100 30 32 Grease 10. Attach the Left Link Arm (30) to the Left Pedal 10 Arm (32) with an M8 x 15mm Button Screw 24 (106), an M8.5 x 16mm x 1.5mm Washer (103), and an Axle Cover (66). 31 106 Attach the Left Link Arm (30) to the left Upper Body Leg (24) with an M8 x 25mm Button Screw (110), two M8.5 x 16mm x 1.5mm Washers (103), two Axle Covers (66), a Link Arm Spacer (74), and an M8 x 15mm Button Screw (106) as shown. 74 66 103 110 103 66 30 Attach the Right Link Arm (31) in the same way. 106 103 66 32 11. The Console (11) can be operated with four 1.5V "D" batteries (not included); alkaline batteries are recommended. Locate the two battery covers on the back of the Console. Press the tabs on the battery covers, and remove the battery covers. Next, insert two batteries into each battery compartment; make sure that the batteries are oriented as shown by the symbols inside the battery compartments. Then, reattach the battery covers. 11 11 Battery Cover Battery Cover The Console (11) can also be operated with a regulated 6-volt DC 2-amp power supply (not included). To purchase a power supply, call the toll-free telephone number on the front cover of this manual. To avoid damaging the console, use only a manufacturer-supplied power supply. Plug one end of the power supply into the jack on the elliptical exerciser; plug the other end into an outlet installed in accordance with all local codes and ordinances. 12. Make sure that all parts of the elliptical exerciser are properly tightened. Note: Some hardware may be left over after assembly is completed. To protect the floor or carpet from damage, place a mat under the elliptical exerciser. 9
-
 1
1 -
2
-
3
-
 4
4 -
 5
5 -
 6
6 -
 7
7 -
 8
8 -
 9
9 -
 10
10 -
 11
11 -
 12
12 -
 13
13 -
 14
14 -
15
-
16
-
17
-
18
-
19
-
20
-
21
-
22
-
23
-
24
 |
 |