NordicTrack T 6.3 Treadmill User Manual - Page 15
slide the Left and Right Base Covers 82, 83
 |
View all NordicTrack T 6.3 Treadmill manuals
Add to My Manuals
Save this manual to your list of manuals |
Page 15 highlights
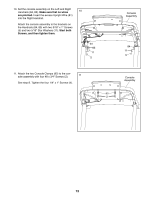
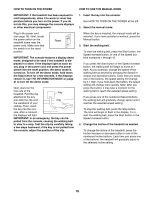
14. Firmly tighten all six 3/8" x 4" Screws (7). Then, 14 slide the Left and Right Base Covers (82, 83) downward. 82 7 83 7 15. Make sure that all parts are properly tightened before you use the treadmill. If there are sheets of plastic on the treadmill decals, remove the plastic. To protect the floor or carpet, place a mat under the treadmill. Note: Extra hardware may be included. Keep the included hex key in a secure place; the hex key is used to adjust the walking belt (see pages 24 and 25). 15
-
 1
1 -
2
-
3
-
4
-
5
-
6
-
7
-
8
-
9
-
 10
10 -
 11
11 -
 12
12 -
 13
13 -
 14
14 -
 15
15 -
 16
16 -
 17
17 -
 18
18 -
 19
19 -
 20
20 -
21
-
22
-
23
-
24
-
25
-
26
-
27
-
28
-
29
-
30
-
31
-
32
 |
 |
15
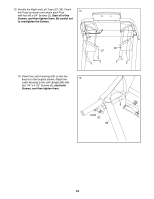
14.
Firmly tighten all six 3/8" x 4" Screws (7). Then,
slide the Left and Right Base Covers (82, 83)
downward.
14
7
7
82
83
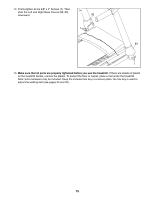
15.
Make sure that all parts are properly tightened before you use the treadmill.
If there are sheets of plastic
on the treadmill decals, remove the plastic. To protect the floor or carpet, place a mat under the treadmill.
Note: Extra hardware may be included. Keep the included hex key in a secure place; the hex key is used to
adjust the walking belt (see pages 24 and 25).