Oki B431dn B411 B431 Setup Guide (English, Fran栩s, Espa?ol, Portugu - Page 9
Software, Installation - okidata
 |
View all Oki B431dn manuals
Add to My Manuals
Save this manual to your list of manuals |
Page 9 highlights
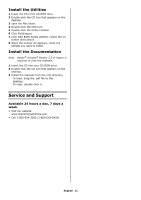
Software Installation Windows Setup Models B411dn and B431dn: Install the Driver on a Network First, Print the Menu Map Model B411dn 1 Click on Start > All Programs > Okidata > Configuration Tool and select Configuration Tool. 2 Click the B411 icon in the left panel. 3 Click the Device Setting tab. 4 Click the Menu Setting button. 5 Click USER MENU. 6 Click INFORMATION MENU. 7 Click the EXECUTE button beside PRINT MENU MAP. The Menu Map prints. Keep these sheets handy: they contain information you need to set up the printer on your network. Model B431dn 1 Press Menu ▲ or ▼ on the control panel to select the Information Menu. 2 Press OK button. 3 Press the ▲ or ▼ button to select Network. 4 Press OK button to print the Menu Map. Keep these sheets handy: they contain information you need to set up the printer on your network. Second, Install the Driver Models B411dn, B431dn 1 Insert the CD in the CD-ROM drive. The CD will autorun. 2 Select your language. Click Next. 3 If you accept the license agreement, select I Accept. 4 Select the Driver Setup tab then click Install Driver. 5 Select nNetwork printer. 6 Select Directly to the network using TCP/IP. 7 Enter the IP address (locate the address on the Print Menu Map in the Network Menu) or select Search Address to locate the printer on the network. 8 Follow the on-screen instructions. Third, Test the Printer Driver Installation Models B411dn, B431dn To make sure the printer driver is correctly installed, print a test page: 1 On the Windows taskbar click Start/Settings/ Printers. 2 Right-click the printer model then click Properties. 3 Click the Print Test Page button. Reinstall the driver if the installation failed. Configure Settings Using a Web Browser (optional) Models B411dn, B431dn If you are working in a TCP/IP-enabled environment, you can use a web browser to display the printer or job printing status, and to change settings on an embedded web page. 1 Activate your web browser (Microsoft Explorer®/™, Netscape Navigator™ 4.4 or higher, Mozilla®, Firefox®). 2 Enter the IP Address for the printer. (Locate the address on the Print Menu Map in the Network Menu. 3 When the web page appears, select from the categories in the menu list. Models B411d and B431d: Install the Driver on a USB or Parallel Setup Install the Driver 1 Insert the CD in the CD-ROM drive. The CD will autorun. 2 Select your language. Click Next. 3 If you accept the license agreement, select I Agree. 4 Select the Driver Setup tab then click Install Driver. 5 Select Local Printer. Click Next. 6 Select the Port: USB or LPT1 (Parallel). Click Next. English 9
-
 1
1 -
2
-
3
-
 4
4 -
 5
5 -
 6
6 -
 7
7 -
 8
8 -
 9
9 -
 10
10 -
 11
11 -
 12
12 -
 13
13 -
 14
14 -
15
-
16
-
17
-
18
-
19
-
20
-
21
-
22
-
23
-
24
-
25
-
26
-
27
-
28
-
29
-
30
-
31
-
32
-
33
-
34
-
35
-
36
-
37
-
38
-
39
-
40
 |
 |
