Oki B710n B710, B720, B730 Setup Guide (English, Fran栩s, Espa?ol, P - Page 11
Installing the Printer on a, USB Port - user guide
 |
View all Oki B710n manuals
Add to My Manuals
Save this manual to your list of manuals |
Page 11 highlights
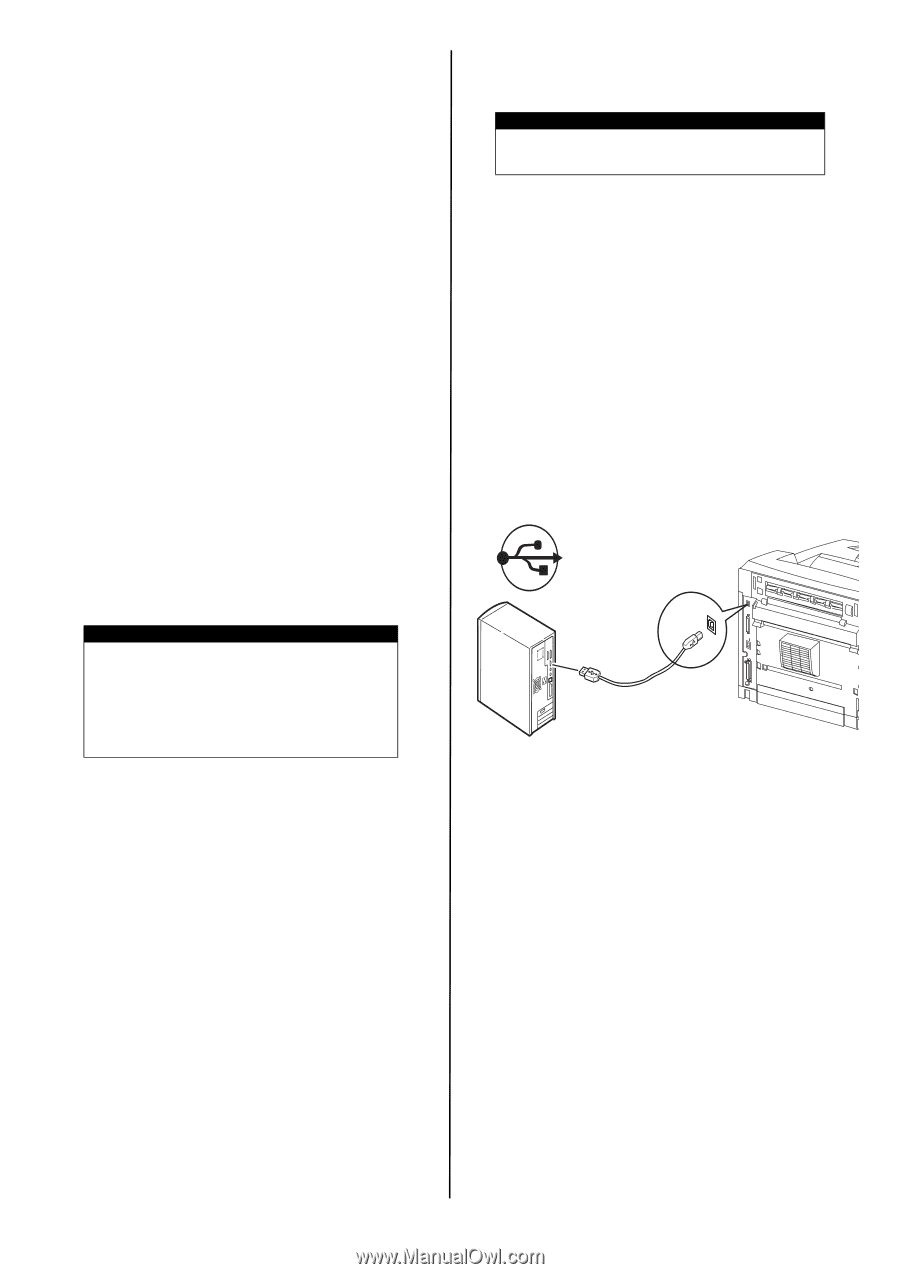
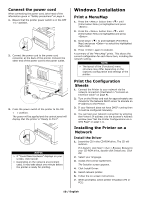
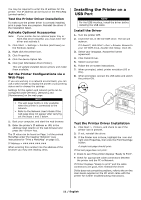
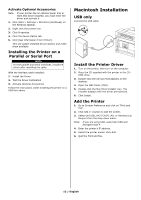
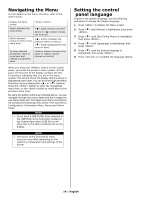
You may be required to enter the IP address for the printer. The IP address can be found on the MenuMap (printed earlier). Test the Printer Driver Installation To make sure the printer driver is correctly installed, print a page from any program. Reinstall the driver if the installation failed. Activate Optional Accessories Note: If your printer has an optional paper tray or Hard Disk Drive installed, you must enter the driver and activate it. 1. Click Start > Settings > Printers (and Faxes) on the Windows taskbar. 2. Right click the printer icon. 3. Click Properties. 4. Click the device Option tab. 5. Click [Get Information From Printer]. This will update installed device options and make them available. Set the Printer Configurations via a Web Page If you are working in a network environment, you can use a web browser to display the printer or job printing status and to change the settings. Settings for the system and network ports can be configured under [Printer], [Network] and [Maintenance] on the web page. NOTE > The web page facility is only available when the printer is connected to the network. > Refer to the Network User's Guide if the web page does not appear after carrying out the steps 1 and 2 below. 1. Boot your computer, and start the web browser. 2. Enter the printer's IP address or URL in the address input column on the web browser and press the key. The IP value can be found on Page 1 of the printed MenuMap under the heading "Network" (see instructions for "Print a MenuMap" on page 10). IP Address When entering this number into the address of the browser you may omit leading zeros. Installing the Printer on a USB Port NOTE For the USB interface, install the driver before installing the USB cable. Install the Driver 1. Turn the printer OFF. 2. Insert the CD, in the CD-ROM drive. The CD will autorun. If it doesn't, click Start > Run > Browse. Browse to your CD-ROM drive, double-click Setup. Click OK. 3. Select your language. Accept the license agreement. 4. Click Install Driver. 5. Select local printer. 6. Follow the on-screen instructions. 7. When prompted, select printer emulation (PS or PCL). 8. When prompted, connect the USB cable and switch the printer ON. Test the Printer Driver Installation 1. Click Start > Printers, and check to see if the printer icon is present. 2. If not, reinstall the driver. 3. If the Printer icon is there, highlight the icon and right click Properties, then click the Print Test Page button. A single test page should print. If the test page does not print: • Check to see if the printer displays "Ready to Print". • Check for appropriate cable connections between the printer and the PC or Network. If Printer Displays "Ready to print" and the cable connections are good, then reinstall the driver. If this does not correct the problem, refer to the on-line User Guide supplied on the CD which came with the printer for further troubleshooting instructions. 11 / English
-
 1
1 -
2
-
3
-
4
-
5
-
 6
6 -
 7
7 -
 8
8 -
 9
9 -
 10
10 -
 11
11 -
 12
12 -
 13
13 -
 14
14 -
 15
15 -
 16
16 -
17
-
18
-
19
-
20
-
21
-
22
-
23
-
24
-
25
-
26
-
27
-
28
-
29
-
30
-
31
-
32
-
33
-
34
-
35
-
36
-
37
-
38
-
39
-
40
-
41
-
42
-
43
-
44
-
45
-
46
-
47
-
48
 |
 |