Oki B710n B710, B720, B730 Setup Guide (English, Fran栩s, Espa?ol, P - Page 12
Macintosh Installation - oki drivers
 |
View all Oki B710n manuals
Add to My Manuals
Save this manual to your list of manuals |
Page 12 highlights
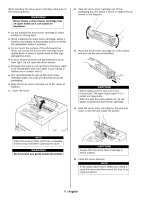
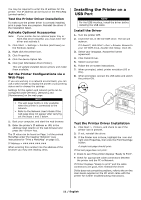
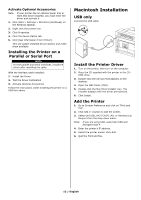
Activate Optional Accessories Note: If your printer has an optional paper tray or Hard Disk Drive installed, you must enter the driver and activate it. 1. Click Start > Settings > SPrinters (and Faxes) on the Windows taskbar. 2. Right click the printer icon. 3. Click Properties. 4. Click the device Option tab. 5. Click [Get Information From Printer]. This will update installed device options and make them available. Installing the Printer on a Parallel or Serial Port NOTE For the parallel and serial interfaces, install the driver after installing the cable. With the interface cable installed: 1. Install the Driver 2. Test the Driver Installation 3. Activate Optional Accessories Follow the instructions under Installing the printer on a USB Port above. Macintosh Installation USB only Connect the USB cable Install the Printer Driver 1. Turn on the printer, then turn on the computer. 2. Place the CD supplied with the printer in the CD- ROM drive. 3. Double-click the CD icon that appears on the desktop. 4. Open the MAC folder (OSX). 5. Double-click the Mac B7x0 Installer icon. The Installer displays with the driver pre-selected. 6. Click Install. Add the Printer 1. Go to System Preference and click on "Print and Fax". 2. Click Add (+) button to add the printer. 3. Select OKI USB, OKI TCP/IP, LPD, or Rendezvous/ Bonjour from the drop-down menu. Note: If you are using USB, select OKI USB and disregard step 4. 4. Enter the printer's IP address. 5. Select the printer model. Click Add. 6. Quit the Print and Fax. 12 / English
-
 1
1 -
2
-
3
-
4
-
5
-
6
-
 7
7 -
 8
8 -
 9
9 -
 10
10 -
 11
11 -
 12
12 -
 13
13 -
 14
14 -
 15
15 -
 16
16 -
 17
17 -
18
-
19
-
20
-
21
-
22
-
23
-
24
-
25
-
26
-
27
-
28
-
29
-
30
-
31
-
32
-
33
-
34
-
35
-
36
-
37
-
38
-
39
-
40
-
41
-
42
-
43
-
44
-
45
-
46
-
47
-
48
 |
 |