Oki C9300nccs Software Install Setup Guide - Page 5
Install Printer Software for TCP/IP
 |
View all Oki C9300nccs manuals
Add to My Manuals
Save this manual to your list of manuals |
Page 5 highlights
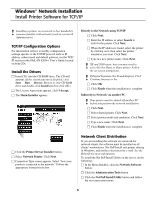
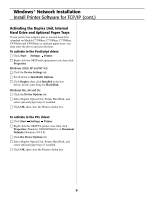
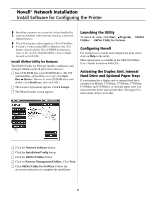
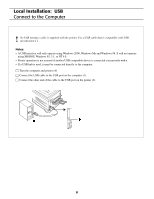
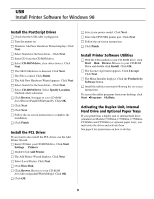
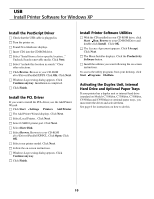
Windows® Network Installation Install Printer Software for TCP/IP ! Installing a printer on a network is best handled by someone familiar with networks (such as a network Administrator). TCP/IP Configuration Options For information on how to modify configuration settings specific to the TCP/IP protocol such as IP address, subnet mask and default gateway, see the TCP/ IP section in the OkiLAN 6200e+ User's Guide located on both CDs. Install the Drivers □ Insert CD1 into the CD-ROM drive. The CD will ® ® autorun. (If the system autorun is disabled, click Start Run Browse. Browse to your CD-ROM drive and double-click Install.exe then click OK.) □ The License Agreement appears, click I Accept. □ The Menu Installer appears. Directly to the Network using TCP/IP □ Click Next. □ Enter the IP address or select Search to look for the printer. Click Next. □ When the IP address is found, select the printer by clicking on it, then select the printer emulation you want. Click Next. □ Type in a new printer name. Click Next. ! XP and 2000 users: here you may need to select Do Not Share or Share printer. Follow the on-screen instructions. ! If Digital Signature Not Found displays, Click Continue Anyway or Yes. □ Click OK. □ Click Finish when the installation is complete. Indirectly to Network via another PC ! Your printer must be shared off another PC before you perform the network installation. □ Click Next. □ Select shared printer. Click Next. □ Select printer model and emulation. Click Next. □ Type a new name. Click Next. □ Click Finish when the installation is complete. □ Click the Printer Driver Installer button. □ Select Network Printer. Click Next. □ Connection Type screen appears. Select "how your printer is connected to the network." Follow the appropriate instructions below: Network Client Distribution If you are installing the software on a network for network clients, the software must be installed on all clients' workstations. Net PnP Install sets printer sharing in Windows, and notifies client users by e-mail. See the Help file for more information. To install the Net PnP Install Utility on the server, do the following: □ In the Menu Installer, click the Network Software button. □ Click the Administration Tools button. □ Click the Net PnP Install Utility button and follow the on-screen instructions. 5
-
 1
1 -
 2
2 -
 3
3 -
 4
4 -
 5
5 -
 6
6 -
 7
7 -
 8
8 -
 9
9 -
 10
10 -
 11
11 -
12
-
13
-
14
-
15
-
16
-
17
-
18
-
19
-
20
 |
 |
