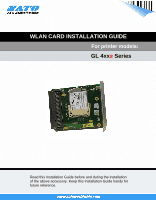
Oki GL408e GL408e/GL412e WLAN Card Install Guide - Page 6
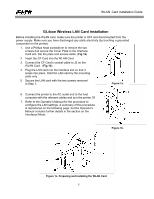
GL4xxe Wireless LAN Antenna Installation
 |
View all Oki GL408e manuals
Add to My Manuals
Save this manual to your list of manuals |
Page 6 highlights
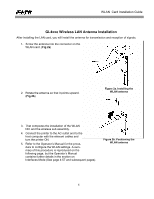
WLAN Card Installation Guide GL4xxe Wireless LAN Antenna Installation After installing the LAN card, you will install the antenna for transmission and reception of signals. 1. Screw the antenna into the connector on the WLAN card. (Fig 2a) 2. Rotate the antenna so that it points upward. (Fig 2b) Figure 2a. Installing the WLAN antenna 3. That completes the installation of the WLAN NIC and the wireless sub assembly. 4. Connect the printer to the AC outlet and to the host computer with the relevant cables and turn the printer ON. 5. Refer to the Operator's Manual for the procedure to configure the WLAN settings. A summary of this procedure is reproduced on the following page, but the Operator's Manual contains further details in the section on Interfaces Mode (See page 4-57 and subsequent pages). Figure 2b. Positioning the WLAN antenna 6
-
 1
1 -
 2
2 -
 3
3 -
 4
4 -
 5
5 -
 6
6 -
 7
7 -
 8
8 -
 9
9 -
 10
10 -
 11
11 -
 12
12 -
13
-
14
 |
 |
