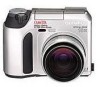
Olympus C 700 C-700 UZ Reference Manual (10.2 MB) - Page 35
Taking still pictures - memory card
 |
UPC - 050332133938
View all Olympus C 700 manuals
Add to My Manuals
Save this manual to your list of manuals |
Page 35 highlights
Taking still pictures 1 Press the POWER switch to turn on 2 Press the (flash) switch to raise the camera. The lens locks into place the flash. The flash pops up and the viewfinder turns on. automatically. To shoot without the flash, close the flash manually. 2 3 Point the camera towards the subject and compose the picture. 4 Gently and slowly press the Shutter button. The AF confirmation mark lights. This state means that the Shutter button is pressed halfway. The focus and exposure are locked. At this moment, do not release the Shutter button. AF confirmation mark lights. Number of storable still pictures (P.113) 5 Press the Shutter button all the way from the position pressed halfway. This state means that the Shutter button is pressed fully. Shooting starts. AF target mark ●The lower memory gauge lights up, the card access lamp blinks, and the camera begins storing pictures on the card. ●If you take pictures continuously and the memory fills up, the memory gauge lights up all the way. If this occurs, you cannot take any more pictures (P. 15). ~ Continued on next page 35
-
 1
1 -
2
-
3
-
4
-
5
-
6
-
7
-
8
-
9
-
10
-
11
-
12
-
13
-
14
-
15
-
16
-
17
-
18
-
19
-
20
-
21
-
22
-
23
-
24
-
25
-
26
-
27
-
28
-
29
-
 30
30 -
 31
31 -
 32
32 -
 33
33 -
 34
34 -
 35
35 -
 36
36 -
 37
37 -
 38
38 -
 39
39 -
 40
40 -
41
-
42
-
43
-
44
-
45
-
46
-
47
-
48
-
49
-
50
-
51
-
52
-
53
-
54
-
55
-
56
-
57
-
58
-
59
-
60
-
61
-
62
-
63
-
64
-
65
-
66
-
67
-
68
-
69
-
70
-
71
-
72
-
73
-
74
-
75
-
76
-
77
-
78
-
79
-
80
-
81
-
82
-
83
-
84
-
85
-
86
-
87
-
88
-
89
-
90
-
91
-
92
-
93
-
94
-
95
-
96
-
97
-
98
-
99
-
100
-
101
-
102
-
103
-
104
-
105
-
106
-
107
-
108
-
109
-
110
-
111
-
112
-
113
-
114
-
115
-
116
-
117
-
118
-
119
-
120
-
121
-
122
-
123
-
124
-
125
-
126
-
127
-
128
-
129
-
130
-
131
-
132
-
133
-
134
-
135
-
136
-
137
-
138
-
139
-
140
-
141
-
142
-
143
-
144
-
145
-
146
-
147
-
148
-
149
-
150
-
151
-
152
-
153
-
154
-
155
-
156
-
157
-
158
-
159
-
160
-
161
-
162
-
163
-
164
-
165
-
166
-
167
-
168
-
169
-
170
-
171
-
172
-
173
-
174
-
175
-
176
-
177
-
178
-
179
-
180
-
181
-
182
-
183
-
184
-
185
-
186
-
187
-
188
-
189
-
190
-
191
-
192
-
193
-
194
-
195
-
196
-
197
-
198
-
199
 |
 |
