Olympus MR500i User Manual - Page 90
Touch NONE, DATE or DATE&TIME in DATE, if you selected PRINT ALL
 |
UPC - 050332149861
View all Olympus MR500i manuals
Add to My Manuals
Save this manual to your list of manuals |
Page 90 highlights
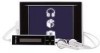
Printing photos Printing with a PictBridge-compatible printer 2 Touch at the bottom of the screen. The "SELECT PRINT MODE" screen appears. SELECT PRINT MODE PRINT MULTI PRINT PRINT ALL INDEX PRINT 3 Touch "PRINT ALL" or "INDEX PRINT." The "PRINT INFO" screen appears. PRINT INFO # OF PRINTS 36 1 / DATE NONE DATE DATE&TIME 4 Set the number of copies in "# OF PRINTS" using (increase) or (decrease). 5 Touch "NONE," "DATE" or "DATE&TIME" in "DATE," if you selected "PRINT ALL" in step 3. • "NONE": prints only photos. • "DATE": prints the shooting date. • "DATE&TIME" prints the shooting date and time. Tip If you select "INDEX PRINT" in step 3, you cannot print the shooting date or time. 90
-
 1
1 -
2
-
3
-
4
-
5
-
6
-
7
-
8
-
9
-
10
-
11
-
12
-
13
-
14
-
15
-
16
-
17
-
18
-
19
-
20
-
21
-
22
-
23
-
24
-
25
-
26
-
27
-
28
-
29
-
30
-
31
-
32
-
33
-
34
-
35
-
36
-
37
-
38
-
39
-
40
-
41
-
42
-
43
-
44
-
45
-
46
-
47
-
48
-
49
-
50
-
51
-
52
-
53
-
54
-
55
-
56
-
57
-
58
-
59
-
60
-
61
-
62
-
63
-
64
-
65
-
66
-
67
-
68
-
69
-
70
-
71
-
72
-
73
-
74
-
75
-
76
-
77
-
78
-
79
-
80
-
81
-
82
-
83
-
84
-
 85
85 -
 86
86 -
 87
87 -
 88
88 -
 89
89 -
 90
90 -
 91
91 -
 92
92 -
 93
93 -
 94
94 -
 95
95 -
96
-
97
-
98
-
99
-
100
-
101
-
102
-
103
-
104
-
105
-
106
-
107
-
108
-
109
-
110
-
111
-
112
-
113
-
114
-
115
-
116
-
117
 |
 |

90
Printing photos
Printing with a PictBridge-compatible printer
2
Touch
at the bottom of the screen.
The “SELECT PRINT MODE” screen appears.
3
Touch “PRINT ALL” or “INDEX PRINT.”
The “PRINT INFO” screen appears.
4
Set the number of copies in “# OF PRINTS” using
(increase) or
(decrease).
5
Touch “NONE,” “DATE” or “DATE&TIME” in “DATE,” if you selected “PRINT ALL” in
step 3.
•
“NONE”: prints only photos.
•
“DATE”: prints the shooting date.
•
“DATE&TIME” prints the shooting date and time.
Tip
If you select “INDEX PRINT” in step 3, you cannot print the shooting date or time.
INDEX PRINT
PRINT ALL
MULTI PRINT
PRINT
SELECT PRINT MODE
DATE&TIME
DATE
NONE
PRINT INFO
# OF PRINTS
/
DATE
1
36