Olympus SP-560 UZ SP-560UZ Instruction Manual with Olympus Wireless RC Flash S - Page 61
Click Add Language in
 |
UPC - 050332161429
View all Olympus SP-560 UZ manuals
Add to My Manuals
Save this manual to your list of manuals |
Page 61 highlights
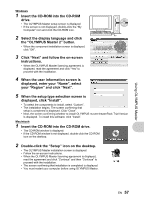
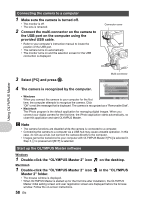
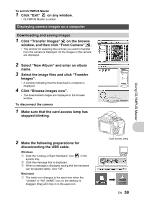
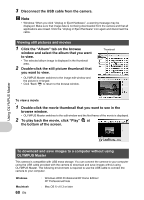
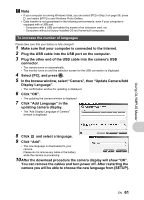
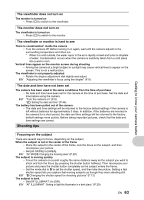
Using OLYMPUS Master Note • If your computer is running Windows Vista, you can select [PC] in Step 3 on page 58, press 3, and select [MTP] to use Windows Photo Gallery. • Data transfer is not guaranteed in the following environments, even if your computer is equipped with a USB port. - Computers with a USB port added by means of an extension card, etc. - Computers without a factory-installed OS and home-built computers To increase the number of languages Please take care that your battery is fully charged! 1 Make sure that your computer is connected to the Internet. 2 Plug the USB cable into the USB port on the computer. 3 Plug the other end of the USB cable into the camera's USB connector. • The camera turns on automatically. • The monitor turns on and the selection screen for the USB connection is displayed. 4 Select [PC], and press o. 5 In the browse window, select "Camera", then "Update Camera/Add Display Language". • The confirmation window for updating is displayed. 6 Click "OK". • The updating the camera window is displayed. 7 Click "Add Language" in the updating camera display. • The "Add Display Language of Camera" window is displayed. 8 Click and select a language. 9 Click "Add". • The new language is downloaded to your camera. Please do not remove any cable or the battery while the camera is processing. 10After the download procedure the camera display will show "OK". You can remove the cables and turn power off. After restarting the camera you will be able to choose the new language from [SETUP]. EN 61
-
 1
1 -
2
-
3
-
4
-
5
-
6
-
7
-
8
-
9
-
10
-
11
-
12
-
13
-
14
-
15
-
16
-
17
-
18
-
19
-
20
-
21
-
22
-
23
-
24
-
25
-
26
-
27
-
28
-
29
-
30
-
31
-
32
-
33
-
34
-
35
-
36
-
37
-
38
-
39
-
40
-
41
-
42
-
43
-
44
-
45
-
46
-
47
-
48
-
49
-
50
-
51
-
52
-
53
-
54
-
55
-
 56
56 -
 57
57 -
 58
58 -
 59
59 -
 60
60 -
 61
61 -
 62
62 -
 63
63 -
 64
64 -
 65
65 -
 66
66 -
67
-
68
-
69
-
70
-
71
-
72
-
73
-
74
-
75
-
76
-
77
-
78
-
79
-
80
-
81
-
82
-
83
-
84
-
85
-
86
-
87
-
88
-
89
-
90
-
91
-
92
-
93
-
94
-
95
-
96
-
97
-
98
-
99
-
100
-
101
 |
 |
