Olympus VG-110 VG-110 Instruction Manual (English) - Page 33
Adjusting to a natural color scheme, White balance, Selecting the ISO sensitivity, button to set.
 |
UPC - 050332177666
View all Olympus VG-110 manuals
Add to My Manuals
Save this manual to your list of manuals |
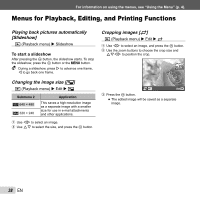
Page 33 highlights
Adjusting to a natural color scheme (White balance) For more natural coloring, choose a white balance option suited to the scene. 1 Select the white balance option in the function menu. WB P WB Auto 4 12M NORM 0.0 WB AUTO ISO AUTO 2 Use HI to select the setting option, and press the Q button to set. Option WB Auto 5 Sunny 3 Cloudy 1 Incandescent > Fluorescent Description The camera automatically adjusts the white balance according to the shooting scene. For shooting outdoors under a clear sky. For shooting outdoors under a cloudy sky. For shooting under tungsten lighting. For shooting under white fluorescent lighting (offices, etc.). Selecting the ISO sensitivity 1 Select the ISO setting option in the function menu. P ISO 200 0.0 WB AUTO ISO ISO ISO 100 200 400 1/400 F2.9 2 Use HI to select the setting option, and press the Q button to set. Option ISO Auto Value Description The camera automatically adjusts the sensitivity according to the shooting scene. The ISO sensitivity is fixed to the selected value. "ISO" is short for "International Organization for Standardization." ISO standards specify the sensitivity for digital cameras and film, thus codes such as "ISO 100" are used to represent sensitivity. In the ISO setting, although smaller values result in less sensitivity, sharp images can be taken under fully lit conditions. Larger values result in higher sensitivity, and images can be taken at fast shutter speeds even under low light conditions. However, high sensitivity introduces noise into the resulting picture, which may give it a grainy appearance. EN 33
-
 1
1 -
2
-
3
-
4
-
5
-
6
-
7
-
8
-
9
-
10
-
11
-
12
-
13
-
14
-
15
-
16
-
17
-
18
-
19
-
20
-
21
-
22
-
23
-
24
-
25
-
26
-
27
-
 28
28 -
 29
29 -
 30
30 -
 31
31 -
 32
32 -
 33
33 -
 34
34 -
 35
35 -
 36
36 -
 37
37 -
 38
38 -
39
-
40
-
41
-
42
-
43
-
44
-
45
-
46
-
47
-
48
-
49
-
50
-
51
-
52
-
53
-
54
-
55
-
56
-
57
-
58
-
59
-
60
-
61
-
62
-
63
-
64
-
65
-
66
-
67
-
68
-
69
-
70
-
71
-
72
-
73
-
74
 |
 |
