Onkyo TX-DS777 Owner Manual - Page 58
Troubleshooting guide - problems
 |
View all Onkyo TX-DS777 manuals
Add to My Manuals
Save this manual to your list of manuals |
Page 58 highlights
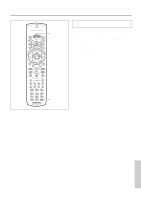
Troubleshooting guide If a problem occurs while you are using the remote controller, first try to operate the front panel controls on the main unit to make sure that it is not due to a malfunction (or worn out batteries) in the remote controller. Trouble POWER Power shut off immediately after power on. No power. Power on but no sound. The sound of the playback source is not heard. No picture appears on the TV screen (or monitor) SPEAKERS No sound from the center speaker, or very minimal sound. No sound or quiet sound from subwoofer PHONO Hum, low-frequency noise. Howling when the volume is turned up. Rough or scratchy sound. High range is not clear. FM/AM AM stations cannot be received. Buzzing noise on AM (particularly conspicuous at night or with weak stations). High-pitched noise or buzzing noise on AM. Crackling noise on AM, FM. 58 Cause Remedy See page • Amplifier protection circuitry has been activated. • Power cord is disconnected. • There is external noise in the computer circuits of this unit. • AC fuse blown. • "Muting" is displayed. • The digital/analog input setting is incorrect. • Bad connections. • Amplifier protection circuitry has been acti- vated. • The input selector is not set properly. • Remove the AC plug from the outlet immediately. Then contact your Onkyo service center. • Connect power cord. • Turn the power button off and then on again or remove the AC plug from the outlet and then plug it again. • Contact your Onkyo Service Center. • Press the MUTING button on the remote controller to turn it off. • Select the correct input. • Check connections, speaker leads, etc. • Contact your Onkyo Service Center. • Set it to the playback source. - 13 13 31 23, 29 6~15 - 26, 27 • The TV (or monitor) is not set to receive the out- • Set the TV (or monitor) to the receiver input. 8 put signals from the reciver. • The video cable is not connected securely. • Check the connections. 8 • Only S video connection is made. • Make also video connection. 8 • Speaker cable is not corrected. • Listening mode is set to Stereo or Direct. • CENTER level is set to minimum. • CENTER SPEAKER is set to None. • Subwoofer is set to No. • Subwoofer speakers output level setting is im- proper. • Check the connection between the amplifier and the speaker. • Set the Listening mode to any mode other than Stereo or Direct. • Set the CENTER level to the appropriate volume. • Set CENTER SPEAKER to Large or Small. • Check the speaker setting. • Check the output level of the Subwoofer using the test tone. 11 34~38 21 18, 19 12 22 • Poor or no input ground. • Check outer conductor of input plugs. 6 • Poor or no phono motor ground. • Check for proper ground connection. 6 • The placement of the audio connection cables • Adjust the placement of the cable to reduce hum. - on the rear panel is incorrect. • Turntable and speakers are too close together. • Move them farther apart. - • Stylus of turntable pick-up is worn. • Replace. - • Turntable stylus tip is dirty. • Clean. - • Treble control too high. • Turn treble control down. 31 • AM loop antenna is not attached. • Connect the included AM loop antenna to the AM an- 14 tenna terminals. • Noise from electrical apparatus such as fluores- • Move the AM loop antenna to different position. 15 cent lamp. • Set up an outdoor AM antenna. 15 • Noise from TV set. • Place the AM loop antenna as far as possible from the 15 TV. • Move unit away from TV set. - • Noise caused by turning fluorescent lamp on • Move antenna as far as possible from the fluorescent 15 and off. lamp. • Noise from automobile ignition. • Install an FM outdoor antenna as far as possible from 15 the road. • Change the position or direction of the outdoor an- 15 tenna.
-
 1
1 -
2
-
3
-
4
-
5
-
6
-
7
-
8
-
9
-
10
-
11
-
12
-
13
-
14
-
15
-
16
-
17
-
18
-
19
-
20
-
21
-
22
-
23
-
24
-
25
-
26
-
27
-
28
-
29
-
30
-
31
-
32
-
33
-
34
-
35
-
36
-
37
-
38
-
39
-
40
-
41
-
42
-
43
-
44
-
45
-
46
-
47
-
48
-
49
-
50
-
51
-
52
-
 53
53 -
 54
54 -
 55
55 -
 56
56 -
 57
57 -
 58
58 -
 59
59 -
 60
60 -
 61
61 -
 62
62 -
 63
63 -
64
 |
 |
