Optoma DS305 User Manual - Page 38
Ceiling Mount Installation
 |
View all Optoma DS305 manuals
Add to My Manuals
Save this manual to your list of manuals |
Page 38 highlights
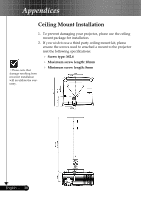
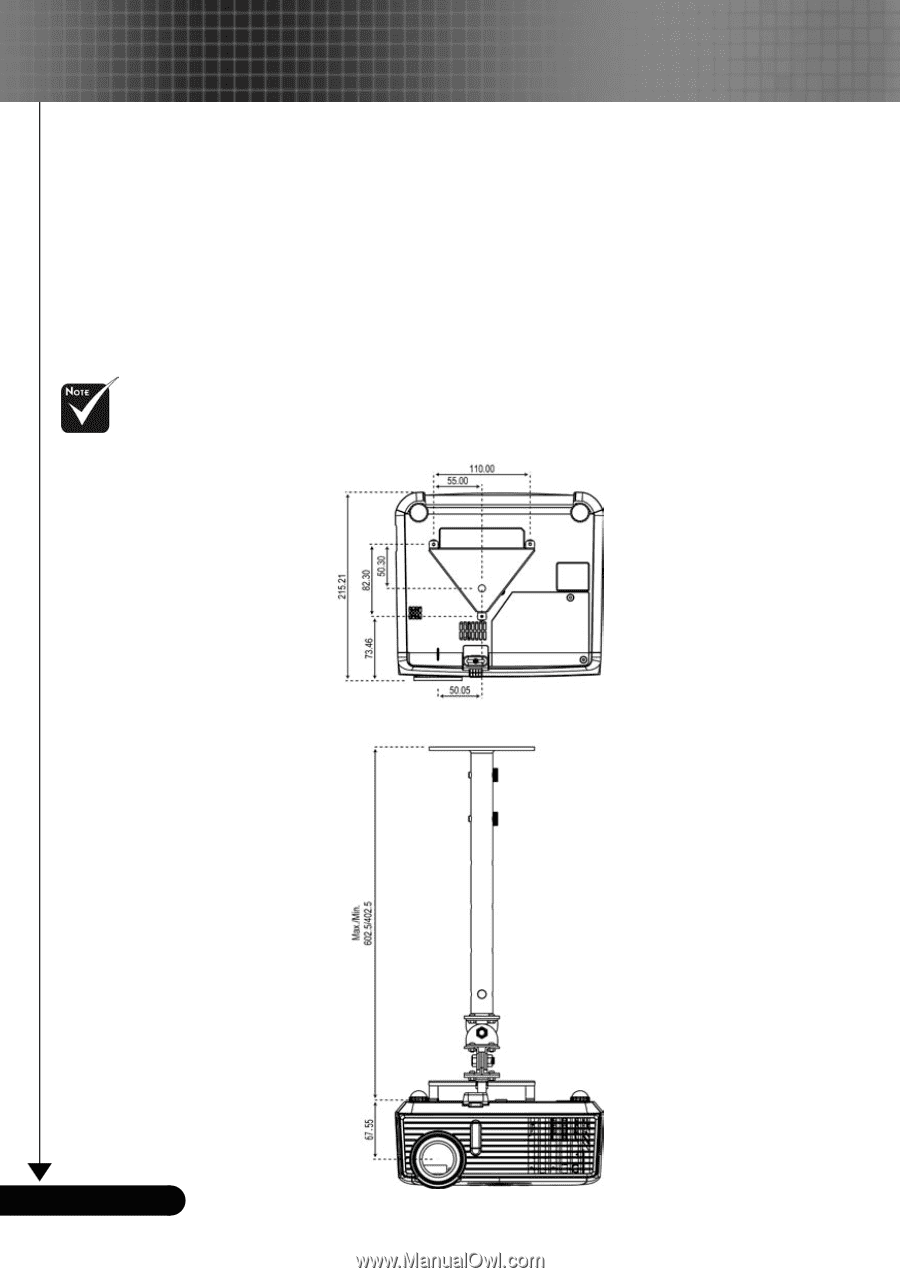
Appendices Ceiling Mount Installation 1. To prevent damaging your projector, please use the ceiling mount package for installation. 2. If you wish to use a third party ceiling mount kit, please ensure the screws used to attached a mount to the projector met the following specifications: Please note that damage resulting from incorrect installation will invalidate the warranty. Screw type: M2.6 Maximum screw length: 10mm Minimum screw length: 8mm English ... 38
-
 1
1 -
2
-
3
-
4
-
5
-
6
-
7
-
8
-
9
-
10
-
11
-
12
-
13
-
14
-
15
-
16
-
17
-
18
-
19
-
20
-
21
-
22
-
23
-
24
-
25
-
26
-
27
-
28
-
29
-
30
-
31
-
32
-
 33
33 -
 34
34 -
 35
35 -
 36
36 -
 37
37 -
 38
38
 |
 |
38
English ...
Appendices
Please note that
damage resulting from
incorrect installation
will invalidate the war-
ranty.
Ceiling Mount Installation
1.
To prevent damaging your projector, please use the ceiling
mount package for installation.
2.
If you wish to use a third party ceiling mount kit, please
ensure the screws used to attached a mount to the projector
met the following specifications:
Screw type: M2.6
Maximum screw length: 10mm
Minimum screw length: 8mm