Optoma HD7100 User Manual - Page 57
Removing and Installing the Lamp Unit
 |
UPC - 796435218140
View all Optoma HD7100 manuals
Add to My Manuals
Save this manual to your list of manuals |
Page 57 highlights
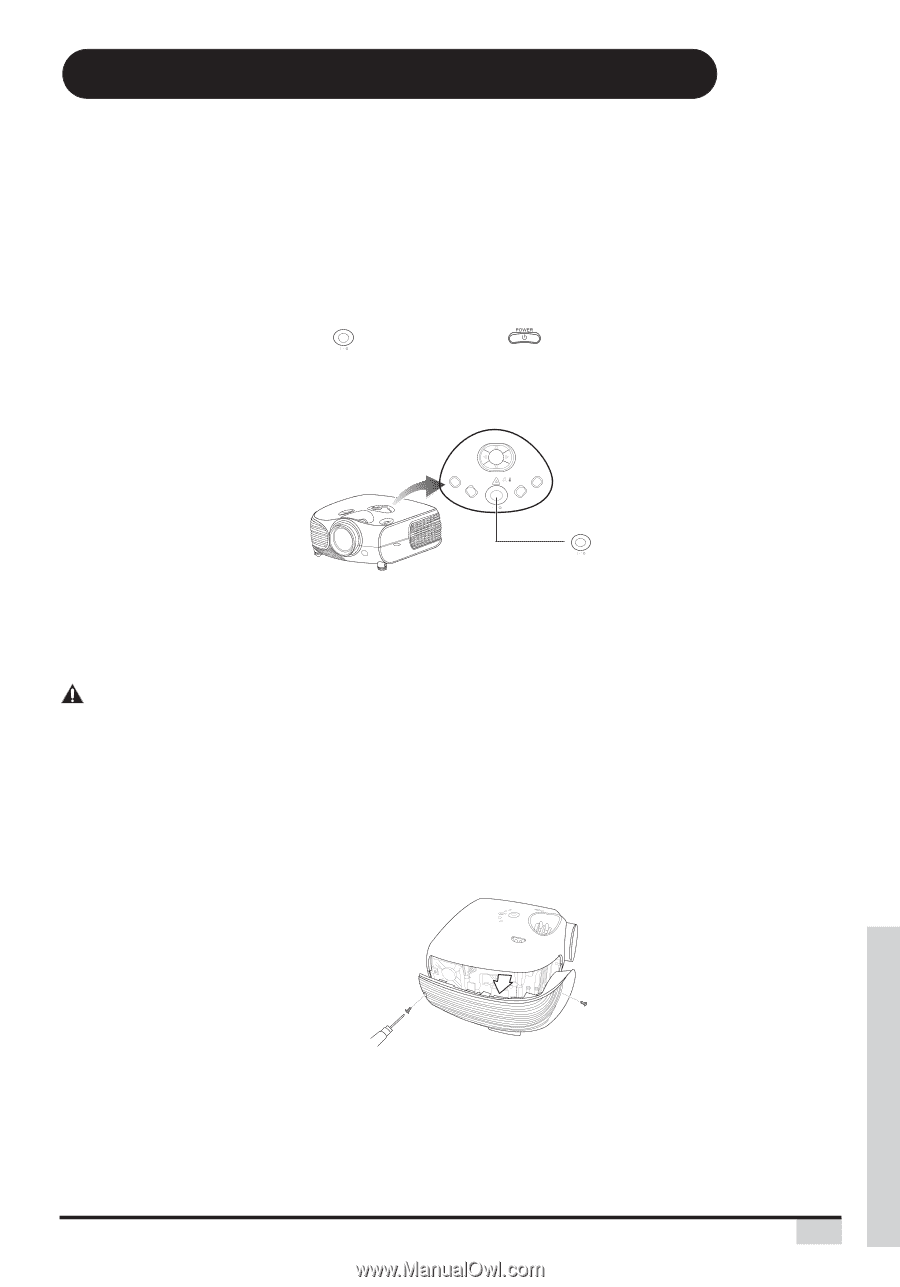
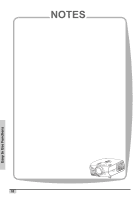
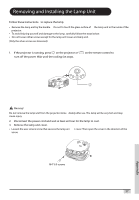
Removing and Installing the Lamp Unit Follow these instructions to replace the lamp. • Remove the lamp unit by the handle. Do not to touch the glass surface of the lamp unit or the inside of the projector. • To avoid injuring yourself and damage to the lamp, carefully follow the steps below. • Do not loosen other screws except for the lamp unit cover and lamp unit. (Only the silver screws are loosened). 1. If the projector is running, press on the projector or turn off the power. Wait until the cooling fan stops. on the remote control to ENTER EXIT ECO STATUS INPUT MENU Warning! Do not remove the lamp unit from the projector imme diately after use. The lamp will be very hot and may cause injury. 2. Disconnect the power cord and wait at least an hour for the lamp to cool. 3. Remove the lamp unit cover. • Loosen the user service screw that secures the lamp uni t cover. Then open the cover in the direction of the arrow. Appendix M4* 8.9 screws 57
-
 1
1 -
2
-
3
-
4
-
5
-
6
-
7
-
8
-
9
-
10
-
11
-
12
-
13
-
14
-
15
-
16
-
17
-
18
-
19
-
20
-
21
-
22
-
23
-
24
-
25
-
26
-
27
-
28
-
29
-
30
-
31
-
32
-
33
-
34
-
35
-
36
-
37
-
38
-
39
-
40
-
41
-
42
-
43
-
44
-
45
-
46
-
47
-
48
-
49
-
50
-
51
-
 52
52 -
 53
53 -
 54
54 -
 55
55 -
 56
56 -
 57
57 -
 58
58 -
 59
59 -
 60
60 -
 61
61 -
 62
62 -
63
-
64
 |
 |