Optoma STA200 STA200 UserManual - Page 4
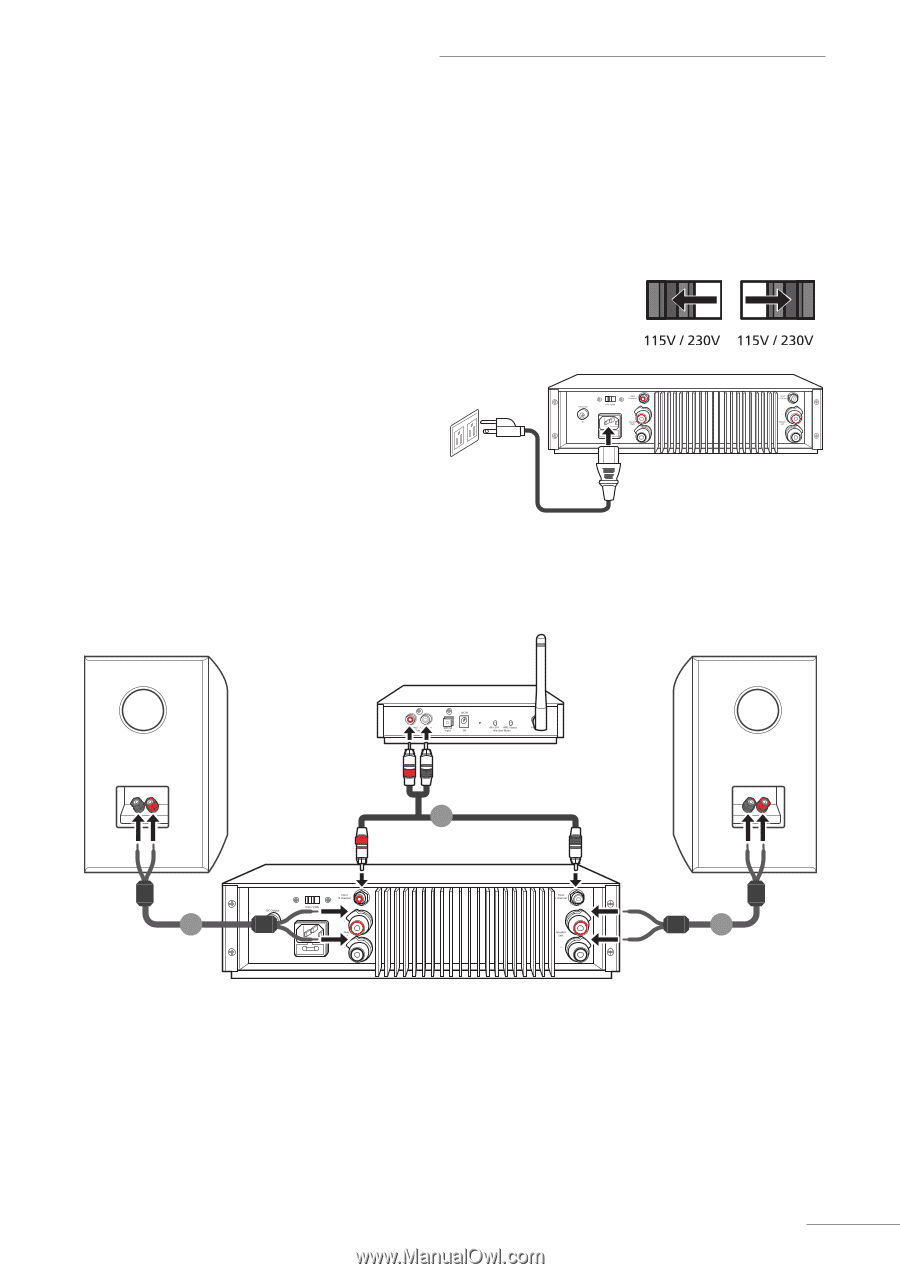
Connecting the Power Cord, Connecting the Optoma NuForce WDC200 Wireless DAC
 |
View all Optoma STA200 manuals
Add to My Manuals
Save this manual to your list of manuals |
Page 4 highlights
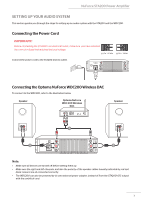
NuForce STA200 Power Amplifier SETTING UP YOUR AUDIO SYSTEM This section guides you through the steps for setting up an audio system with the STA200 and the WDC200. Connecting the Power Cord IMPORTANT! Before connecting the STA200 to an electrical outlet, make sure you have selected the correct voltage that matches the local voltage. Connect the power cord to the STA200 and AC outlet. Connecting the Optoma NuForce WDC200 Wireless DAC To connect to the WDC200, refer to the illustration below. Speaker Optoma NuForce WDC-200 Wireless DAC Speaker 1 2 2 Note: • Make sure all devices are turned off before setting them up. • Make sure the right and left channels, and also the polarity of the speaker cables (usually indicated by red and black colours) are all connected correctly. • The WDC200 can also be powered by its own external power adapter, instead of from the STA200's DC output with the umbilical cord. 3
-
 1
1 -
 2
2 -
 3
3 -
 4
4 -
 5
5 -
 6
6
 |
 |