Oreck Little Hero Owners Guide - Page 6
Parts
 |
View all Oreck Little Hero manuals
Add to My Manuals
Save this manual to your list of manuals |
Page 6 highlights
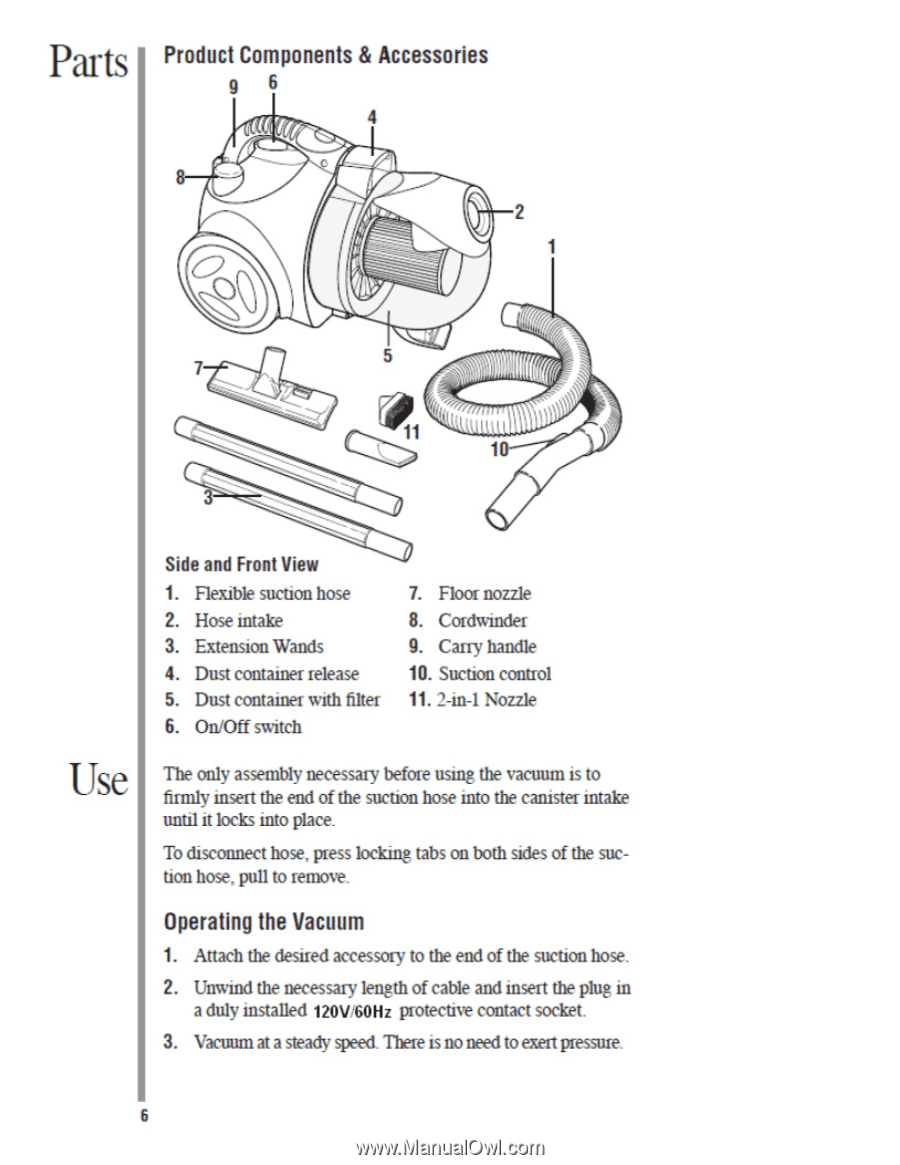
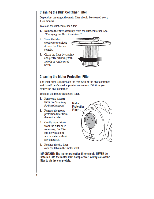
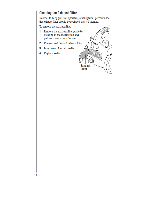
Parts Product Components & Accessories 9 6 4 C 2 7 5 11 3 Side and Front View 1. Flexible suction hose 2. Hose intake 3. Extension Wands 4. Dust container release 5. Dust container with filter 6. On/Off switch 7. Floor nozzle 8. Cordwinder 9. Carry handle 10. Suction control 11. 2-in-1 Nozzle Use The only assembly necessary before using the vacuum is to firmly insert the end of the suction hose into the canister intake until it locks into place. To disconnect hose, press locking tabs on both sides of the suction hose, pull to remove. Operating the Vacuum 1. Attach the desired accessory• to the end of the suction hose. 2. Unwind the necessary length of cable and insert the plug in a duly installed 120T60Hz protective contact socket. 3. Vacuum at a steady speed. There is no need to exert pressure.
-
 1
1 -
 2
2 -
 3
3 -
 4
4 -
 5
5 -
 6
6 -
 7
7 -
 8
8 -
 9
9 -
 10
10 -
 11
11 -
 12
12
 |
 |