Oreck Little Hero Owners Guide - Page 7
Maintenance
 |
View all Oreck Little Hero manuals
Add to My Manuals
Save this manual to your list of manuals |
Page 7 highlights
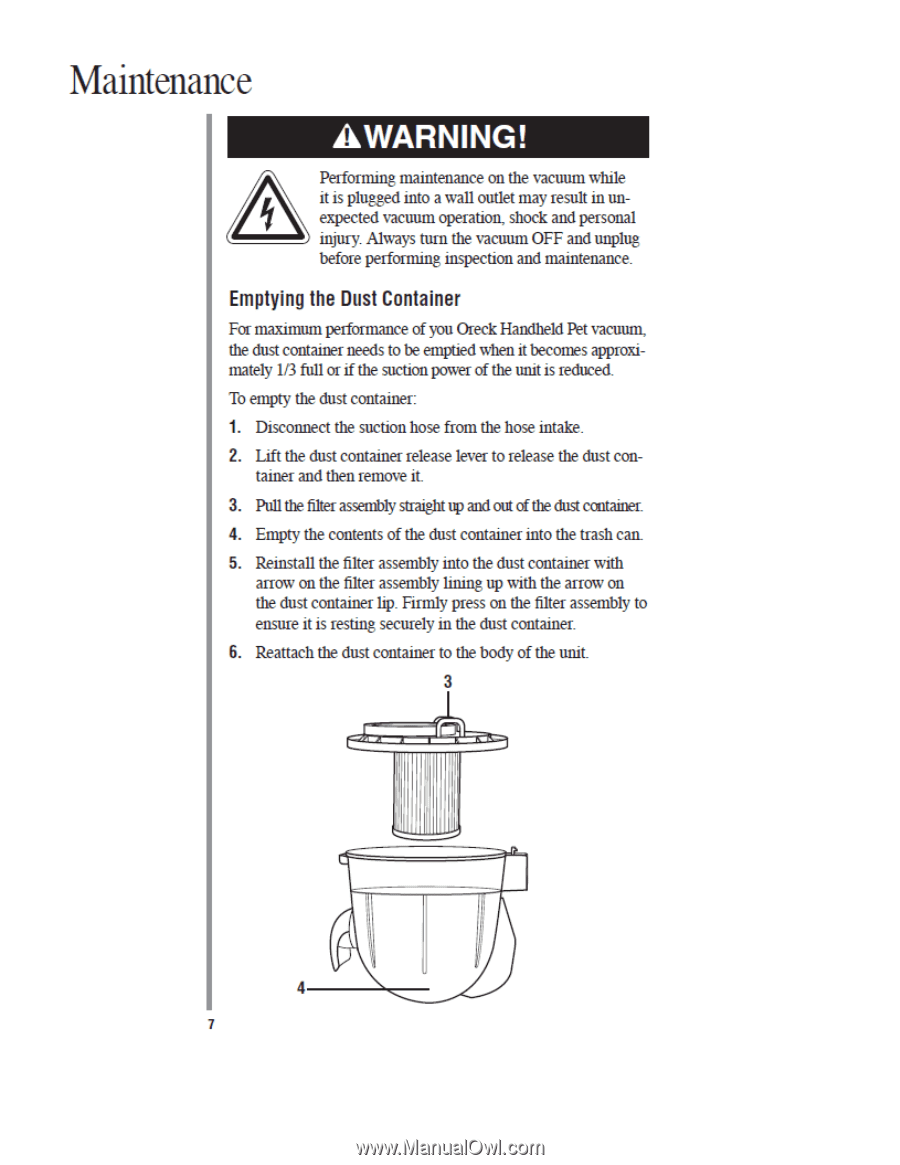
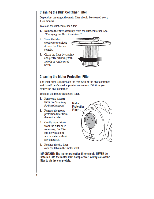
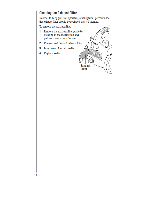
Maintenance AWARNING! Performing maintenance on the vacuum while it is plugged into a wall outlet may result in unexpected vacuum operation, shock and personal injury. Always turn the vacuum OFF and unplug before performing inspection and maintenance. Emptying the Dust Container For maximum performance of you Oreck Handheld Pet vacuum, the dust container needs to be emptied when it becomes approximately 1/3 full or if the suction power of the unit is reduced. To empty the dust container: 1. Disconnect the suction hose from the hose intake. 2. Lift the dust container release lever to release the dust container and then remove it. 3. Pull the filter assembly straight up and out of the dust container. 4. Empty the contents of the dust container into the trash can. 5. Reinstall the filter assembly into the dust container with arrow on the filter assembly lining up with the arrow on the dust container lip. Firmly press on the filter assembly to ensure it is resting securely in the dust container. 6. Reattach the dust container to the body of the unit. 3
-
 1
1 -
 2
2 -
 3
3 -
 4
4 -
 5
5 -
 6
6 -
 7
7 -
 8
8 -
 9
9 -
 10
10 -
 11
11 -
 12
12
 |
 |