Oreck XL Shield Power User Guide - Page 8
To Clean Carpet Cleaner, To Store Cleaner, Things To Do, To Replace Belt, To Clean Power Nozzle
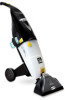 |
View all Oreck XL Shield Power manuals
Add to My Manuals
Save this manual to your list of manuals |
Page 8 highlights
• Cleaning upholstery which is covered with fabrics that are not compatible with wet cleaning may result in damage to the fabric. Know what the fabric is and how it may be cleaned before using the Oreck Steemer cleaner. • Check the stuffing material if possible. Look inside cushions and underneath the furniture. If the filling is colored, it may bleed through and discolor the furniture. Most modern stuffing material is light colored and colorfast. • To remove loose dirt, vacuum upholstery thoroughly with a vacuum cleaner. • If the upholstery is being cleaned for the first time, CHECK FOR COLORFASTNESS. Test a small area several hours before starting to clean upholstery. Pour a small amount of Steemer Full Release® Professional Upholstery Shampoo on a clean white cloth and blot upholstery. Examine the cloth for color removal. If color appears on cloth, the upholstery is not colorfast and should not be cleaned with wet extraction methods. Let test area dry completely. Inspect for changes in color, bleeding, stretching or shrinkage. Test another area if in doubt. This product is not recommended for use on silk, velvet, wool and some cotton blends. To Clean Upholstery & Small Spill Pick-Ups: Plug cord into an electrical outlet. fig. 12 Turn the Shampoo/Rinse switch to the "SHAMPOO" position. fig. 5 Test and reset A.L.C.I. on the plug. fig. 11 Insert a specially formulated Steemer Full Release® Professional Upholstery Cleaner Cartridge. fig. 13 Turn cleaner on by placing the On/Off power switch in the "ON" position. fig. 14 Lock the cleaner spray button by pressing and sliding the button forward on the main handle. fig. 18 Depress the dispensing trigger on the hand-held nozzle and slowly drag the nozzle towards you. Make a second pass at right angles to the first. This will minimize any streaking or uneven appearance. To Clean Carpet Cleaner WARNING: To reduce the risk of electric shock or injury from moving parts, unplug before servicing. Before turning the cleaner off, tilt the cleaner back, raising the nozzle off the carpet for 15-20 seconds. This prevents extracted water in the nozzle from dripping back onto the carpet after you turn the cleaner off. fig. 13 Place the power switch in the "OFF" position. Unplug the power cord from the outlet. fig. 11 Remove the cleaner cartridge by rotating the locking lever upwards. Do not store with a cleaner cartridge installed. fig. 8 Remove and empty the tank. Rinse out the lower recovery tank with warm water. fig. 19 Wipe off the inlet screen to remove accumulated dirt, lint and debris. fig. 10 Replace tank. fig. 20 If you have been operating the cleaner at length, it may be necessary to clean the nozzle from time to time, particularly if the carpet is brand new or very dirty, or if long-haired pets frequently use the carpeted area. Unplug cleaner and examine several areas on the power nozzle to see if debris has built up: a. Extractor slots b. Brush roll chamber c. Spray Tips fig. 20 To clean the Steemer extractor slots, place a cloth or towel over the motor cover to shield and protect the motor from water damage. Run hot tap water through the nozzle until clean. To clean the brush chamber and spray tips, take a towel or damp cloth and wipe clean. To Store Cleaner fig. 6 Pull the wheel assembly forward toward nozzle for compact storage. NOTE: Do not store the cleaner in freezing conditions. Do not store the cleaner with water in the tank. Do not store the cleaner with cleaner cartridge installed. Turn the squeegee upside down for storage. Squeegee will deform if left in position while in storage. Things To Do • Use only manufacturer's recommended attachments and accessories. • Keep free of dust, lint, and hair. • Turn off all controls before unplugging. • Test the A.L.C.I. plug with every use. • Empty the recovery tank when full and whenever clean water is added to the supply tank. • Keep young children and pets away from cleaned carpets until dry. • Check carpets and upholstery for color fastness. • Clean nozzle periodically. To Replace Belt WARNING: To reduce the risk of electric shock or injury from moving parts, unplug before servicing. Replacement belts (53364-01) for Oreck Steemers are available from Oreck. Call Toll-Free 1-800-989-3535 (US) or 1-888-676-7325 (Canada). fig. 4 Unplug the power nozzle cord leading from the power head to the rear of the main cleaner. fig. 3 Remove the power nozzle from the main cleaner. fig. 21 Disassemble Power Nozzle: a. Remove screw from belt cover. b. Remove two (2) screws holding the brush roll clamp in place and remove clamp. c. Remove and replace the old belt if broken or if excessive wear is noted. To Install a New Belt: fig. 21 Remove brush roll and insert the new belt into the rectangular cavity. Using a long screwdriver, loop belt around motor shaft. Pull and stretch belt over crowned end of the brush roll. Rotate brush to properly align belt. fig. 21 Replace belt cover, brush roll clamp and screws. fig. 3 Reattach power nozzle to unit. fig. 4 Reconnect power nozzle cord and power cord. fig. 5 Test and reset A.L.C.I. on the plug. To Clean Power Nozzle Cover fig. 23 Remove two screws from top of cover a. Tilt cover forward and pull down to unhook tabs from slots in Power Nozzle Housing. b. Clean cover and housing to remove debris. c. Hook cover tabs into slots on Power Nozzle Housing. d. Pivot cover backward and fasten with two screws. ©2008 Oreck Holdings, LLC. All Rights Reserved. All word mark, logos, product configurations, and registered trademarks are owned and used under the authority of Oreck Holdings, LLC. Printed in U.S.A. 53436-01 REV A 10/08 ECN# R9208
-
 1
1 -
2
-
 3
3 -
 4
4 -
 5
5 -
 6
6 -
 7
7 -
 8
8
 |
 |
