Oregon Scientific RMR500A User Manual - Page 4
Getting Started, Insert Batteries, Name Tags, Remote Sensors
 |
View all Oregon Scientific RMR500A manuals
Add to My Manuals
Save this manual to your list of manuals |
Page 4 highlights
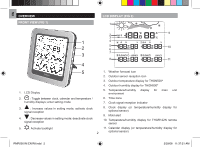
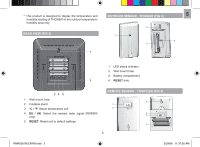
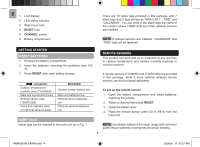
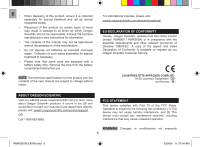
EN 1. LCD display 2. LED status indicator 3. Wall mount hole 4. RESET hole 5. CHANNEL switch 6. Battery compartment There are 10 name tags provided in this package, with 7 blank tags and 3 tags printed as "MAIN UNIT", "TIME" and "CALENDAR". You can write in the blank tags the name of the location where THGR122N and other optional sensors are installed. NOTE If optional sensors are installed, "CALENDAR" and "TIME" tags will be replaced. GETTING STARTED INSERT BATTERIES 1. Remove the battery compartment. 2. Insert the batteries, matching the polarities (see FIG 3). REMOTE SENSORS This product can work with up to 4 sensors at any one time to capture temperature and relative humidity readings in various locations. 3. Press RESET after each battery change. LOCATION Outdoor temperature/ humidity area (THGN500) Main unit environment area Remote sensor area (THGR122N) Clock and calendar area (or optional sensors area) MEANING Outdoor sensor battery low Main unit batteries low Remote sensor batteries low Optional sensors batteries low 2 remote sensors (THGN500 and THGR122N) are provided in this package, while 2 more optional wireless remote sensors can be purchased separately. To set up the remote sensor: 1. Open the battery compartment and insert batteries, matching the polarity. 2. Select a channel then press RESET. 3. Close the battery door. 4. Place the remote sensor within 30 m (98 ft) from the main unit. NAME TAGS Name tags can be inserted in the main unit as in Fig. 1. NOTE Use alkaline batteries for longer usage and consumer grade lithium batteries in temperatures below freezing. 4 RMR500 IM EN R8.indd 4 2/29/08 11:37:27 AM
-
 1
1 -
 2
2 -
 3
3 -
 4
4 -
 5
5 -
 6
6 -
 7
7 -
 8
8 -
 9
9
 |
 |