Oster FPSTFP4010 Instruction Manual - Page 9
How to Slice or Shred - 4 cup
 |
UPC - 034264434097
View all Oster FPSTFP4010 manuals
Add to My Manuals
Save this manual to your list of manuals |
Page 9 highlights
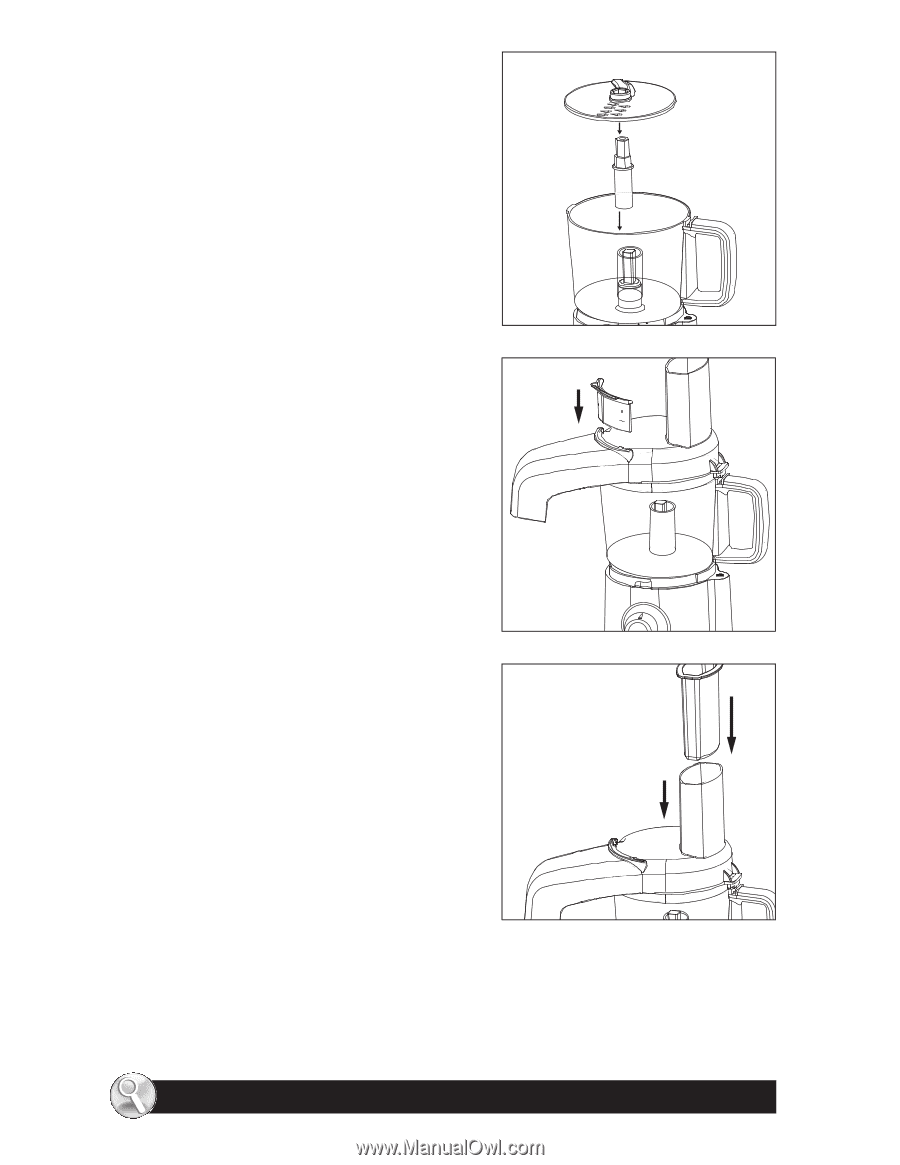
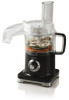
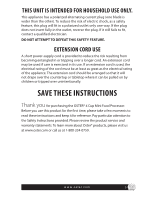
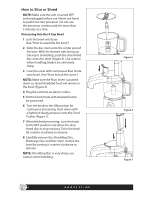
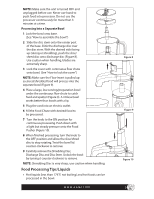
How to Slice or Shred NOTE: Make sure the unit is turned OFF and unplugged before use. Never use hand to push food into processor. Do not use the processor continuously for more than 3 minutes at a time. Processing Into the 4 Cup Bowl 1 Lock the bowl onto base. (See "How to assemble the bowl") 2 Slide the disc stem onto the center post of the base. With the desired side facing up (slicing or shredding), push the slice/shred disc onto disc stem (Figure 5). Use caution when handling, blades are extremely sharp. 3 Lock the cover with continuous flow chute onto bowl. (See "How to lock the cover") NOTE: Make sure the Flow Insert is pushed down so sliced/shredded food will remain in the bowl (Figure 6). 4 Plug the cord into an electric outlet. 5 Fill the Food Chute with desired food to be processed. 6 Turn the knob to the ON position for continuous processing. Push down with a light but steady pressure onto the Food Pusher (Figure 7). 7 When finished processing, turn the knob to the OFF position and allow the slice/ shred disc to stop rotating. Twist the bowl lid counter-clockwise to remove. 8 Carefully remove the Shredding Disc, Discharge Disc and Disc Stem. Unlock the bowl by turning it counter-clockwise to remove. NOTE: Shredding Disc is very sharp, use caution when handling. OCK Figure 5 Figure 6 Figure 7 8 www.oster.com
-
 1
1 -
2
-
3
-
 4
4 -
 5
5 -
 6
6 -
 7
7 -
 8
8 -
 9
9 -
 10
10 -
 11
11 -
 12
12 -
 13
13 -
 14
14 -
15
-
16
-
17
-
18
-
19
-
20
-
21
-
22
 |
 |