Palsonic TFTV1950DT Owners Manual - Page 20
Advanced, Auto Adjust, Auto Adjust, Image Pos, Image Pos, Phase, Phase, Clock, Clock, Auto Color,
 |
View all Palsonic TFTV1950DT manuals
Add to My Manuals
Save this manual to your list of manuals |
Page 20 highlights
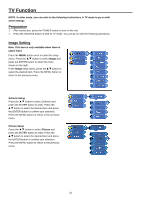
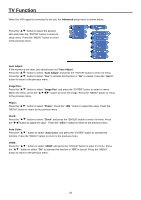
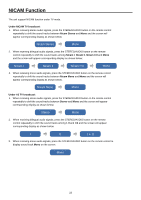
TV Function When the VGA signal is connected to the unit, the Advanced setup menu is shown below: Press the " " button to select the desired item and press the "ENTER" button to enter it's setup menu. Press the "MENU" button to return to the previous menu. Auto Adjust: If the monitor is not clear, you should carry out "Auto Adjust". Press the " " button to select "Auto Adjust" and press the "ENTER" button to enter it's menu. Press the " " button to select "Yes" to activate this function or "No" to cancel. Press the "MENU" button to return to the previous menu. Image Pos: Press the " " button to select "Image Pos" and press the "ENTER" button to enter it's menu Within the menu, press the " " button to move the image. Press the "MENU" button to return to the previous menu. Phase: Press the " " button to select "Phase". Press the " "MENU" button to return to the previous menu. " button to adjust the value. Press the Clock: Press the " " button to select "Clock" and press the "ENTER" button to enter it's menu. Press the " "button to adjust the value . Press the "MENU" button to return to the previous menu. Auto Color: Press the " " button to select "Auto Color" and press the "ENTER" button to activate this function. Press the "MENU" button to return to the previous menu. sRGB : Press the " " button to select "sRGB" and press the "ENTER" button to enter it's menu. Press the " " button to select "On" to activate this function or "Off" to cancel. Press the "MENU" button to return to the previous menu. 18
-
 1
1 -
2
-
3
-
4
-
5
-
6
-
7
-
8
-
9
-
10
-
11
-
12
-
13
-
14
-
 15
15 -
 16
16 -
 17
17 -
 18
18 -
 19
19 -
 20
20 -
 21
21 -
 22
22 -
 23
23 -
 24
24 -
 25
25 -
26
-
27
-
28
-
29
-
30
-
31
-
32
-
33
-
34
-
35
-
36
-
37
-
38
-
39
-
40
-
41
-
42
-
43
-
44
-
45
-
46
-
47
-
48
-
49
-
50
 |
 |
