Panasonic A-44-IR-V2 A-44-V2 Quick Start Guide - Page 13
Drill Template
 |
View all Panasonic A-44-IR-V2 manuals
Add to My Manuals
Save this manual to your list of manuals |
Page 13 highlights
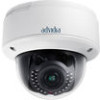
A-44 V2/A-54 V2 · Quick Start Guide ● Dust or grease on the dome cover will cause IR reflection. Please do not remove the dome cover film until the installation is finished. If there is dust or grease on the dome cover, clean the dome cover with clean soft cloth and isopropyl alcohol. ● Make sure that there is no reflective surface too close to the camera lens. The IR light from the camera may reflect back into the lens causing reflection. ● The foam ring around the lens must be seated flush against the inner surface of the bubble to isolate the lens from the IR LEDS. Fasten the dome cover to camera body so that the foam ring and the dome cover are attached seamlessly. Steps: 1. Drill the screw holes and the cable hole according to the supplied drill template. 2 1 Hole 1 1 BOTTOM 1 2 Figure 2-1 Drill Template (Optional)Routing the cable from the side outlet instead of the cable hole drilled on the ceiling is supported. Use pliers to remove 13
-
 1
1 -
2
-
3
-
4
-
5
-
6
-
7
-
 8
8 -
 9
9 -
 10
10 -
 11
11 -
 12
12 -
 13
13 -
 14
14 -
 15
15 -
 16
16 -
 17
17 -
 18
18 -
19
-
20
-
21
-
22
-
23
-
24
-
25
-
26
 |
 |
