Panasonic DVDLV65 DVDLV65 User Guide - Page 17
Using This Unit With Other Equipment, Press [dvd/sd/aux] To Select Aux.
 |
View all Panasonic DVDLV65 manuals
Add to My Manuals
Save this manual to your list of manuals |
Page 17 highlights
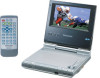
Using this unit with other equipment Using this unit with a television Connection AUDIO IN L R Television S VIDEO 7V*%ID&E0O white red yellow black Audio/video cable (included) S video cable§ Either of these yellow S VIDEO input terminal: achieves a more vivid picture than the VIDEO input terminal. ≥When making this connection, ensure you connect the audio cables to the corresponding audio input terminals on the television. VOL AUDIO OPT OUT VIDEO This unit (Right side) §S video cable is not included §Available from Panasonic dealers. Part number: RFX4139 Note ≥The unit's speaker does not have magnetic shielding. Do not place the unit near televisions, personal computers or other devices easily influenced by magnetism. Do not keep this unit and magnetized cards (bank cards, commuter passes, etc.) close together. ≥Volume may be lower when playing DVDs than when playing other discs or during TV broadcasts. If you turn the volume up, reduce it again so that a sudden increase in output does not occur. Do not connect the player through your video cassette recorder The picture may not be played back correctly due to the copy guard. Advanced Operations RQT6536 32 Advanced Operations Selecting TV screen type 3,4, 2, 1, ENTER SETUP PLAY MODE ∫ ; TOP MENU ANGLE 1 DISPLAY SUBTITLE MENU ENTER AUDIO RETURN A.SRD CANCEL SETUP RETURN Preparations Turn on your television and switch the video input mode on the television to suit the connection for the unit. 1 Press [SETUP] to show the menus. SETUP Disc Audio Subtitle Menus SELECT TAB Ratings English Automatic English Level 8 2 Press [2, 1] to select the Video tab. 3 Press [3, 4] to select "TV Aspect" and press [ENTER]. 4 Press [3, 4] to select the item and press [ENTER]. ≥4:3 Pan & Scan ≥Regular television (to view 16:9 software in the pan and scan style a). ≥4:3 Letterbox ≥Regular television (to view 16:9 software in the letterbox style b). ≥16:9 (factory preset) ≥Wide-screen television. ≥Use the television's screen modes to change the way the picture is shown. a b 5 Press [SETUP] to end the settings. To return to the previous menu Press [RETURN]. Note ≥Press [MENU] on the main unit to access the SETUP menus while stopped (unless a DVD-RAM is loaded). ≥16:9 software prohibited from being shown in the Pan & Scan style will appear in the letterbox style despite the setting here. Watching video from a video camera 1 Connect the video camera to this unit. This unit (Right side) yellow Audio/video cable (included) yellow VOL AUDIO OPT OUT VIDEO black white red Video camera 2 Press [DVD/SD/AUX] to select "AUX". RQT6536 Note ≥"AUX" mode is canceled when this unit is turned off. ≥Auto standby function (➡ page 13) does not work while the "AUX" mode is on. Turn the unit off when you have finished using it. 33
-
 1
1 -
2
-
3
-
4
-
5
-
6
-
7
-
8
-
9
-
10
-
11
-
 12
12 -
 13
13 -
 14
14 -
 15
15 -
 16
16 -
 17
17 -
 18
18 -
 19
19 -
 20
20 -
 21
21 -
 22
22
 |
 |
