Panasonic F85S DVDF85 User Guide - Page 6
CONNECTION, For better pictures, Basic connection to a, television, Power connection
 |
UPC - 037988407392
View all Panasonic F85S manuals
Add to My Manuals
Save this manual to your list of manuals |
Page 6 highlights
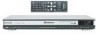
Getting started Connection Before connection ≥Disconnect the AC power supply cord. ≥Turn off all equipment and read the appropriate operating instructions. Connection to a television ≥The equipment connections described are examples. ≥Peripheral equipment and optional cables sold separately unless otherwise indicated. This page explains how to connect the unit to a television and set it up so you hear the audio through the television's speakers. To get the full benefit from the powerful multi-channel audio found on DVDs, you should connect an amplifier and speakers. Do not place the unit on amplifiers or equipment that may become hot. The heat can damage the unit. Basic connection to a television Television AUDIO VIDEO IN IN L R Connect your unit directly to your television. Do not connect the unit through your video cassette recorder when setting up your home entertainment system, because the picture may not be played correctly due to the copy guard. red white yellow Audio/video cable (included) red white yellow You can connect the audio cable to the 2-channel audio input terminals of an analog amplifier or system component to enjoy stereo or Dolby Pro Logic. DIGITAL AUDIO OUT (PCM/BITSTREAM) 5.1ch L AUDIO OUT L OPTICAL CENTER 2ch L COMPONENT VIDEO OUT (480P/480I) PB Y AC IN SUB- R R R WOOFER SURROUND FRONT PR VIDEO OUT S VIDEO OUT For better pictures Television's COMPONENT VIDEO IN terminals Video cable (not included) COMPONENT VIDEO OUT terminal These terminals can be used for either interlace or progressive output (➜ page 9) and provide a purer picture than the S VIDEO OUT terminal. Connection using these terminals outputs the color difference signals (PB/PR) and luminance signal (Y) separately in order to achieve high fidelity in reproducing colors.The description of the component video input terminals depends on the television or monitor (e.g. Y/PB/PR, Y/B-Y/R-Y, Y/CB/CR). Connect to terminals of the same color. ≥After making this connection, change the black level for a better picture. (➜ page 20, Video-Black Level Control) Television's S VIDEO IN terminal S video cable (not included) S VIDEO OUT terminal The S video terminal achieves a more vivid picture than the VIDEO OUT terminal by separating the chrominance (C) and luminance (Y) signals. (Actual results depend on the television.) When making this connection, ensure you connect the audio cables to the corresponding audio input terminals on the television. ∫ Power connection Conserving power This unit consumes a small amount of power, even when it is turned off (approx. 0.6 W). To save power when the unit is not to be used for a long time, unplug it from the household AC outlet. Household AC outlet (AC 120 V, 60 Hz) AC power supply cord (included) AC IN RQT6977 6
-
 1
1 -
 2
2 -
 3
3 -
 4
4 -
 5
5 -
 6
6 -
 7
7 -
 8
8 -
 9
9 -
 10
10 -
 11
11 -
 12
12 -
13
-
14
-
15
-
16
-
17
-
18
-
19
-
20
-
21
-
22
-
23
-
24
-
25
-
26
-
27
-
28
 |
 |
