Panasonic HDC SD5 Hd Sd Camcorder - Multi Language - Page 84
Set the mode dial to, to turn on the power. - burner
 |
UPC - 037988831883
View all Panasonic HDC SD5 manuals
Add to My Manuals
Save this manual to your list of manuals |
Page 84 highlights
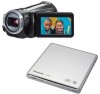
With other products ª About the time it takes to copy The time it takes to copy differs depending on the number of scenes recorded on the SD card, the type of disc etc. Also, it takes time to automatically check the copied data. For this reason, it may take longer to copy than the recording time on the SD card. ≥ It takes even longer to copy to DVD-R DL than other discs because there are two layers of recording surface on one side. ¬ Connect the AC adaptor supplied with the DVD burner to the DVD burner. (You cannot supply power to the DVD burner from this unit.) ≥ Please read the operating instructions of the DVD burner for how to use it. 1 Connect this unit to the AC adaptor. ≥ If a battery is used, operation is not possible when this unit is connected to a DVD burner. 2 Set the mode dial to to turn on the power. 3 Connect this unit to the DVD burner. B A Mini A Mini B A Mini AB USB Connection Cable (supplied with the DVD burner) B DVD burner (optional) ≥ Connect the Mini A terminal to this unit and the Mini B terminal to the DVD burner. ≥ Insert the plugs as far as they will go. ≥ [ ] (disc playback) tab C appears. C ≥ If [ ] (disc playback) tab does not appear even when the DVD burner is connected, disconnect and then reconnect the Mini AB USB Connection Cable. ≥ "PLEASE CHECK EXTERNAL DRIVE OR DISC." appears when a disc is not inserted in the DVD burner. 4 Insert the disc in the DVD burner. 84 VQT1H62
-
 1
1 -
2
-
3
-
4
-
5
-
6
-
7
-
8
-
9
-
10
-
11
-
12
-
13
-
14
-
15
-
16
-
17
-
18
-
19
-
20
-
21
-
22
-
23
-
24
-
25
-
26
-
27
-
28
-
29
-
30
-
31
-
32
-
33
-
34
-
35
-
36
-
37
-
38
-
39
-
40
-
41
-
42
-
43
-
44
-
45
-
46
-
47
-
48
-
49
-
50
-
51
-
52
-
53
-
54
-
55
-
56
-
57
-
58
-
59
-
60
-
61
-
62
-
63
-
64
-
65
-
66
-
67
-
68
-
69
-
70
-
71
-
72
-
73
-
74
-
75
-
76
-
77
-
78
-
 79
79 -
 80
80 -
 81
81 -
 82
82 -
 83
83 -
 84
84 -
 85
85 -
 86
86 -
 87
87 -
 88
88 -
 89
89 -
90
-
91
-
92
-
93
-
94
-
95
-
96
-
97
-
98
-
99
-
100
-
101
-
102
-
103
-
104
-
105
-
106
-
107
-
108
-
109
-
110
-
111
-
112
-
113
-
114
-
115
-
116
-
117
-
118
-
119
-
120
-
121
-
122
-
123
-
124
-
125
-
126
-
127
-
128
-
129
-
130
-
131
-
132
-
133
-
134
-
135
-
136
-
137
-
138
-
139
-
140
-
141
-
142
-
143
-
144
 |
 |
