Panasonic KX-TGA641T Digital Cordless Handset Installation - Page 5
Display language, Belt clip, Wall mounting - instructions
 |
UPC - 037988481231
View all Panasonic KX-TGA641T manuals
Add to My Manuals
Save this manual to your list of manuals |
Page 5 highlights
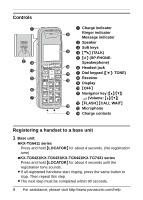
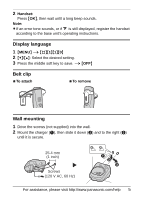
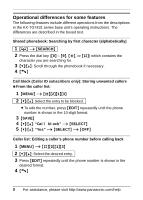
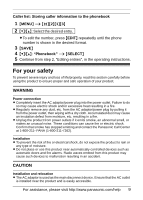
2 Handset: Press {OK}, then wait until a long beep sounds. Note: L If an error tone sounds, or if _ is still displayed, register the handset according to the base unit's operating instructions. Display language 1 {MENU} i {#}{1}{1}{0} 2 {V}/{^}: Select the desired setting. 3 Press the middle soft key to save. i {OFF} Belt clip N To attach N To remove Wall mounting 1 Drive the screws (not supplied) into the wall. 2 Mount the charger (A), then slide it down (B) and to the right (C) until it is secure. 25.4 mm (1 inch) Screws (120 V AC, 60 Hz) A B C For assistance, please visit http://www.panasonic.com/help 5
-
 1
1 -
 2
2 -
 3
3 -
 4
4 -
 5
5 -
 6
6 -
 7
7 -
 8
8 -
 9
9 -
 10
10 -
 11
11 -
12
-
13
 |
 |

For assistance, please visit http://www.panasonic.com/help
5
2
Handset:
Press
{
OK
}
, then wait until a long beep sounds.
Note:
L
If an error tone sounds, or if
_
is still displayed, register the handset
according to the base unit’s operating instructions.
Display language
1
{
MENU
}
i
{#}{
1
}{
1
}{
0
}
2
{V}
/
{^}
: Select the desired setting.
3
Press the middle soft key to save.
i
{
OFF
}
Belt clip
Wall mounting
1
Drive the screws (not supplied) into the wall.
2
Mount the charger (
A
), then slide it down (
B
) and to the right (
C
)
until it is secure.
N
To attach
N
To remove
25.4 mm
(1 inch)
Screws
(120 V AC, 60 Hz)
A
B
C