Panasonic KX-TGA710B Operating Instructions - Page 8
Getting Started, Setting up, Connections
 |
View all Panasonic KX-TGA710B manuals
Add to My Manuals
Save this manual to your list of manuals |
Page 8 highlights
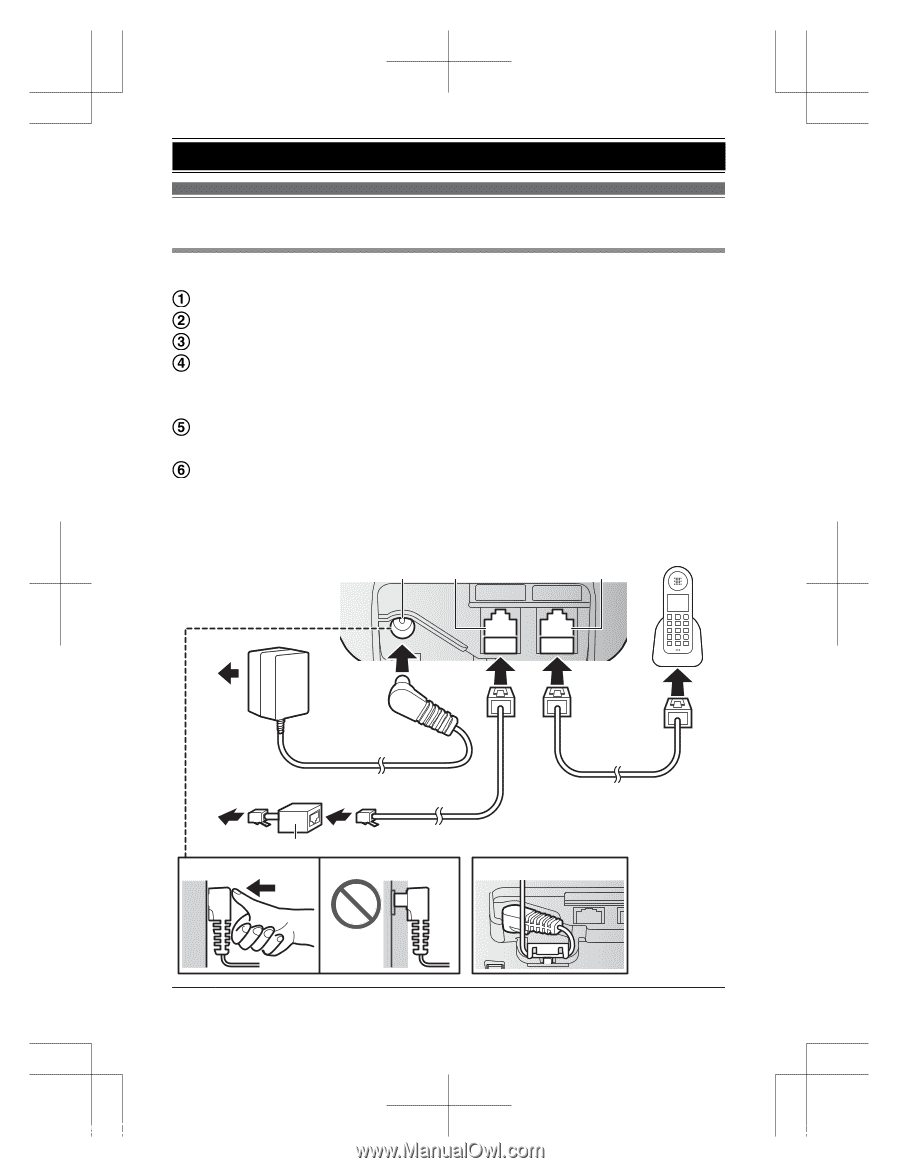
Getting Started Setting up Connections Connect the AC adaptor to the unit by pressing the plug firmly. Fasten the cord by hooking it. Connect the AC adaptor to the power outlet. Connect the telephone line cord for your external phone (not supplied) to the unit ("LINE IN" port), then to the single-line telephone jack (RJ11C) until you hear a click. A DSL/ADSL filter (not supplied) is required if you have a DSL/ADSL service. Connect the supplied telephone line cord to the unit ("PHONE" port), then connect to your external phone. Note: R Use only the supplied Panasonic AC adaptor PNLV226. 14 6 LINE IN PHONE 6 3 To single-line telephone jack (RJ11C) 4 5 1 2 To external phone 8 For assistance, please visit http://shop.panasonic.com/support PNQX8877ZA_0115_ver101.pdf 8 2019/01/15 17:09:23
-
 1
1 -
2
-
 3
3 -
 4
4 -
 5
5 -
 6
6 -
 7
7 -
 8
8 -
 9
9 -
 10
10 -
 11
11 -
 12
12 -
 13
13 -
14
-
15
-
16
-
17
-
18
-
19
-
20
-
21
-
22
-
23
-
24
-
25
-
26
-
27
-
28
-
29
-
30
-
31
-
32
 |
 |