Panasonic MW10 Multi-media Audio System - Page 20
Using with your PC, Installation of this unit, AA BC CB DE ED
 |
UPC - 037988984480
View all Panasonic MW10 manuals
Add to My Manuals
Save this manual to your list of manuals |
Page 20 highlights
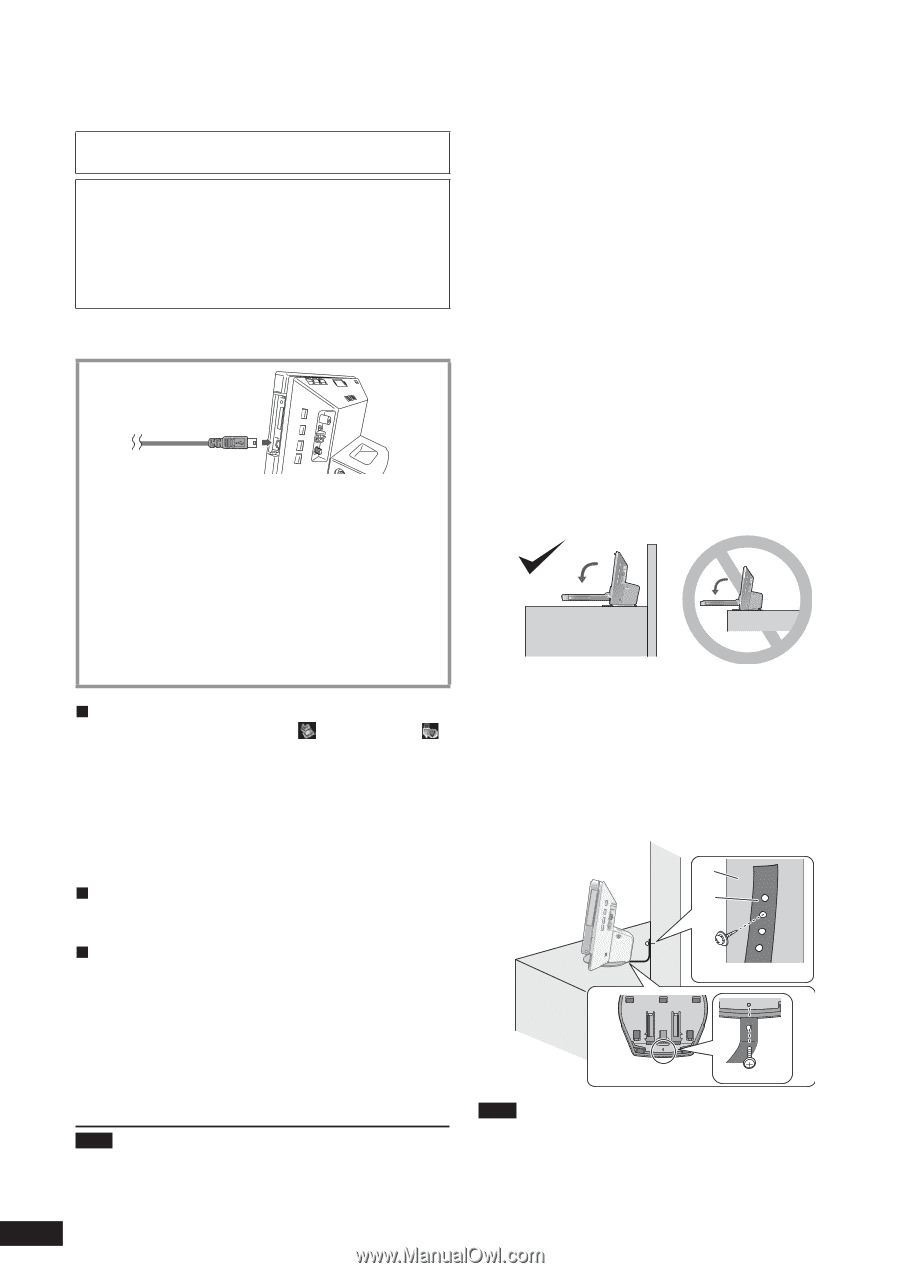
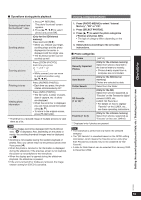
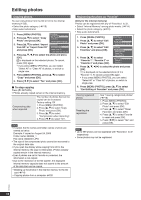
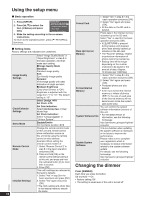
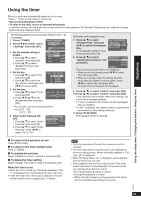
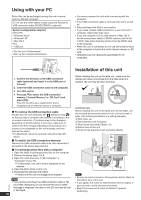
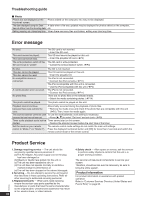
Using with your PC Photo files can be exchanged among this unit's internal memory, SD and computer. Do not use any other cables except a genuine Panasonic USB connection cable (K2KZ4CB00015; optional). System configurations required OS for PC • Windows Vista® • Windows® XP • Mac OS X Port • USB port • Turn the unit off beforehand. • Start up the computer beforehand. • You cannot operate this unit while connecting with the computer. • If the USB connection cable is removed, this unit is turned off. • Data exchange with iPod is not possible. • If you make multiple USB connections or use hubs with 1 computer, malfunction may occur. • If you are using the 10.2 or older version of Mac OS X, set the write-protect switch of SDHC memory card to the "LOCK" side when importing photos from the SDHC card to the computer. • When this unit is connected, do not use the format function of the computer to format this unit's internal memory or SD card. • Operations are not necessarily guaranteed for all computers. Installation of this unit RQT9522 1. Confirm the direction of the USB connection cable (optional) and insert it to the USB port of this unit. 2. Insert the USB connection cable to the computer. 3. Turn this unit on. 4. Press [e, r] to select the USB connection memory ("Internal Memory" or "SD Card") and press [OK]. This unit functions as a reader/writer and is recognised as an external device of computer. „ To remove the USB connection cable Double-click the icon (Windows XP: , Windows Vista: ) on the task tray of computer and remove it according to the on-screen instruction. (The above may not be displayed depending on the OS setting. In this case, make sure to confirm that the message indicating communication is in process is not displayed on this unit's display, and then remove the cable.) • For Macintosh, follow the removal method for Mac OS device. „ To switch the USB connection memory Remove the USB connection cable once, then reconnect it and perform the above steps 3 and 4. „ To exchange photo files with a computer 1. Open the folder to exchange photo files on the computer. 2. Perform the above steps 1 to 4. 3. Open this unit's drive icon in "My Computer" or "Computer" of your PC. • For Macintosh, this unit's drive is displayed on the desktop. 4. Open the photo folder on this unit. 5. Exchange files between the folders. • Folders and files can be dragged and dropped. Note • If you remove and insert the USB connection cable or SD card while "Accessing. Do not remove the card or cable." message is displayed, the data on the SD card may be lost or damaged. 20 When installing the unit on the table, etc., make sure the display part does not protrude from the table when it is opened. The unit may fall down and drop. To fix the unit When installing the unit on the table with narrow depth, use the included fall-prevention belt to fix the unit to the wall or pillar. (The following illustration is a setting example.) A Wall, pillar, etc. B Fall-prevention belt (included) C Wood screw (included) (Black), etc. D Bottom face of this unit E Screw for fall-prevention belt (included) (Silver) A B C D E Note • Be sure to use the screw for fall-prevention belt to attach to the bottom face of this unit. • If you tighten the screw for fall-prevention belt too tightly, it goes around in circle and cannot be fixed. • Keep the screws out of reach of children to prevent swallowing.
-
 1
1 -
2
-
3
-
4
-
5
-
6
-
7
-
8
-
9
-
10
-
11
-
12
-
13
-
14
-
 15
15 -
 16
16 -
 17
17 -
 18
18 -
 19
19 -
 20
20 -
 21
21 -
 22
22 -
 23
23 -
 24
24
 |
 |