Panasonic PT56DLX76 PT56DLX76 User Guide - Page 11
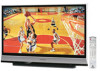
Rear View <Model PT-56DLX76 unit shown>, Notes
 |
View all Panasonic PT56DLX76 manuals
Add to My Manuals
Save this manual to your list of manuals |
Page 11 highlights
Getting Started Rear View 1 3 5 7 9 11 12 14 17 18 Vent Vent 2 4 6 8 10 13 15 16 19 20 1 S-Video/Video Input Connector 1 Connect from other component. (Video 1) 2 Audio Input Connector 1 Connect from other component. (Video 1) 3 S-Video/Video Input Connector 2 Connect from other component. (Video 2) 4 Audio Input Connector 2 Connect from other component. (Video 2) 5 Video Out Connector Output video signal. 6 Audio Out Connector Output audio signal. (Analog) 7 Component Video Input Connector 1 Connect from other component. (Component 1) 8 Audio Input Connector 1 Connect from other component. (Component 1) 9 Component Video Input Connector 2 Connect from other component. (Component 2) 10 Audio Input Connector 2 Connect from other component. (Component 2) 11 Audio 1 HDMI Input 12 Terminal 1 Audio/ Video 1 13 Audio 2 HDMI Input 14 Terminal 2 Audio/ Video 2 15 PC (RGB) Input Connector 16 Audio Input Connector Connect from other component. (HDMI 1) Connect from other component. (HDMI 1) Connect from other component. (HDMI 2) Connect from other component. (HDMI 2) Connect from PC. (PC) Connect from PC. (PC) 17 G-LINK Connector Connect the IR Blaster. 18 CableCARD™ INTERFACE 19 DIGITAL AUDIO OUT 20 VHF/UHF Cable In Insert CableCARD™. Output audio signal. (Digital) Input terminal for an antenna or cable box signal. Notes: • Make sure the vents are not blocked. (This could cause damage.) • Indication on the back panel may change without notice. 11
-
 1
1 -
2
-
3
-
4
-
5
-
 6
6 -
 7
7 -
 8
8 -
 9
9 -
 10
10 -
 11
11 -
 12
12 -
 13
13 -
 14
14 -
 15
15 -
 16
16 -
17
-
18
-
19
-
20
-
21
-
22
-
23
-
24
-
25
-
26
-
27
-
28
-
29
-
30
-
31
-
32
-
33
-
34
-
35
-
36
-
37
-
38
-
39
-
40
-
41
-
42
-
43
-
44
-
45
-
46
-
47
-
48
-
49
-
50
-
51
-
52
-
53
-
54
-
55
-
56
-
57
-
58
-
59
-
60
-
61
-
62
-
63
-
64
-
65
-
66
-
67
-
68
-
69
-
70
-
71
-
72
-
73
-
74
-
75
-
76
-
77
-
78
-
79
-
80
-
81
-
82
-
83
-
84
-
85
-
86
-
87
-
88
-
89
-
90
-
91
-
92
 |
 |
