Panasonic PVVM202 PVVM202 User Guide - Page 34
Special Features, Dv Camera Style And Sd Camera Style, Attaching The Battery Adaptor Unit
 |
View all Panasonic PVVM202 manuals
Add to My Manuals
Save this manual to your list of manuals |
Page 34 highlights
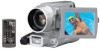
2 5 1 4 Special Features DV Camera Style and SD Camera Style 3 This is a Digital Video Camera which can be used in two ways depending on the situation. One is the DV Camera Style 1 which combines the Camera Unit 2 and Video Unit 3, and the other is the SD Camera Style 4 which combines the Camera Unit 2 and the supplied Battery Adaptor Unit 5. DV Camera Style ≥Both Tape and Card can be used. SD Camera Style ≥It is easy to carry, because it's small and lightweight. ≥Tape cannot be used. 2 2 OPEN 1 2, 3 1 CAMERA RELEASE 1 3 CAMERA RELEASE 3 2 1 Attaching the Battery Adaptor Unit Mounting the Battery Adaptor Unit allows the Palmcorder to be compact as well as light and portable. ≥Please carry out the Attachment/Removal of the Battery Adaptor Unit while the Palmcorder switch is off. Do not remove the Unit while the operation mode lamp is lit. 1 While sliding the [CAMERA RELEASE] Lever 1, pull the Camera Unit straight out in the direction of the lens. 2 Match the mark 2 and place the Camera Unit on the Battery Adaptor Unit. 3 Slide the Camera Unit until it locks with a click. Removing the Battery Adaptor Unit While sliding the [CAMERA RELEASE] Lever 1, pull the Camera Unit straight out in the direction of the lens. ≥When the red portion 3 of the [CAMERA RELEASE] Lever shows or the Camera Unit is not completely installed, the Palmcorder cannot be powered on. The Camera Unit must be shifted to the end again and locked. Attaching the Battery 1 Slide the [OPEN] Lever upwards to open the Battery Door 1. 2 Insert the battery completely. 3 Close the Battery Door. Removing the Battery Slide the [OPEN] Lever to open the Battery Door, and then slide the Battery Eject Lever 2. Finally slide the Battery to remove it. ≥For other notes, see page 62. 34
-
 1
1 -
2
-
3
-
4
-
5
-
6
-
7
-
8
-
9
-
10
-
11
-
12
-
13
-
14
-
15
-
16
-
17
-
18
-
19
-
20
-
21
-
22
-
23
-
24
-
25
-
26
-
27
-
28
-
 29
29 -
 30
30 -
 31
31 -
 32
32 -
 33
33 -
 34
34 -
 35
35 -
 36
36 -
 37
37 -
 38
38 -
 39
39 -
40
-
41
-
42
-
43
-
44
-
45
-
46
-
47
-
48
-
49
-
50
-
51
-
52
-
53
-
54
-
55
-
56
-
57
-
58
-
59
-
60
-
61
-
62
-
63
-
64
-
65
-
66
-
67
-
68
-
69
-
70
-
71
-
72
-
73
-
74
-
75
-
76
-
77
-
78
-
79
-
80
-
81
-
82
-
83
-
84
-
85
-
86
-
87
-
88
-
89
-
90
-
91
-
92
-
93
-
94
-
95
-
96
-
97
-
98
-
99
-
100
-
101
-
102
-
103
-
104
-
105
-
106
-
107
-
108
-
109
-
110
-
111
-
112
-
113
-
114
-
115
-
116
-
117
-
118
-
119
-
120
-
121
-
122
-
123
-
124
-
125
-
126
-
127
-
128
-
129
-
130
-
131
-
132
-
133
-
134
-
135
-
136
-
137
-
138
-
139
-
140
-
141
-
142
-
143
-
144
-
145
-
146
-
147
-
148
-
149
-
150
-
151
-
152
-
153
-
154
-
155
-
156
-
157
-
158
-
159
-
160
 |
 |
