Panasonic SAAK20 SAAK20 User Guide - Page 46
Convenient Functions, Using Headphones (not Included), Press [-display/-demo]., Press [dimmer].
 |
View all Panasonic SAAK20 manuals
Add to My Manuals
Save this manual to your list of manuals |
Page 46 highlights
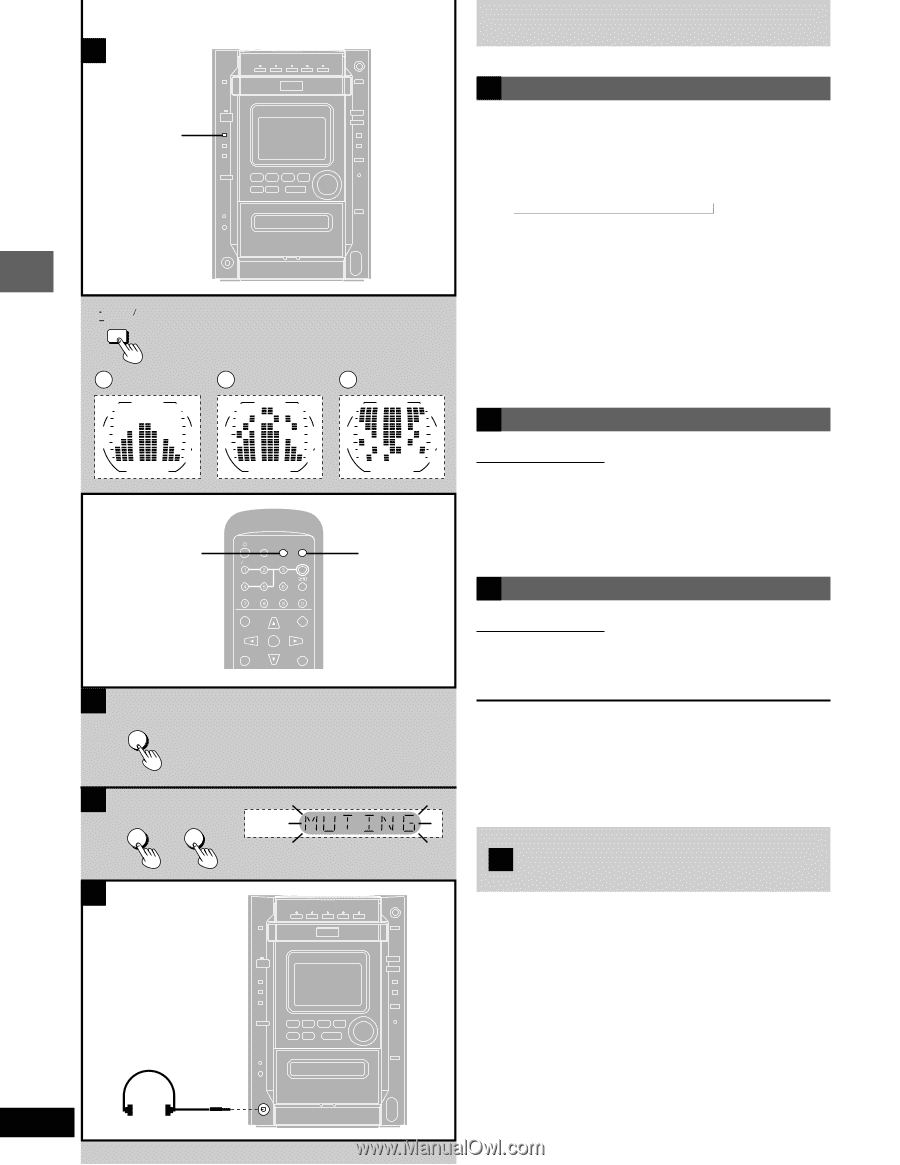
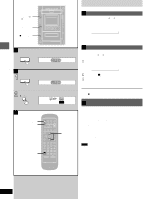
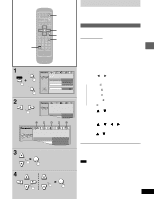
Timer and others ¡ A -DISPLAY/ -DEMO DISPLAY DEMO a b c DIMMER TV POWER AUTO OFF MIX 2CH ACTION SLEEP DIMMER MUTING TV VIDEO DISC B MIX 2CH DIMMER TOP MENU TV CH UP MENU CH SELECT TEST GUI DISP ENTER TV CH DOWN RETURN MARKER SUB TITLE AUDIO ANGLE PL CLEAR A-B REPEAT S.SRND PLAY MODE REPEAT SELECTOR 3D AI POSITION SOUND EQ MEMORY DVD CD SUBWOOFER TAPE SHIFT SLOW SEARCH TUNER VOLUME C ACTION MUTING SET UP MUTING MUTING D Convenient functions A Changing the sound range display The unit's display shows the level of each sound range with the three types of display described below. Press [-DISPLAY/-DEMO]. Each time you press the button: Normal display ¡ Peak-hold display ¡ Aurora display a Normal display This display indicates the strength of the sound in each tonal range. b Peak-hold display The peak sound value of each sound range is held on the display for about one second after it occurs. c Aurora display The peak sound value of each sound range is displayed in inverted form. B Dimming the display Remote control only The display is dimmed and all indicators, except for the AC IN indicator, are turned off for better television viewing. Press [DIMMER]. To cancel, press [DIMMER] again. C Muting the volume Remote control only Press [MUTING]. Volume is reduced to minimum. To cancel Press [MUTING] again. "MUTING" goes out. To cancel from the unit, turn [VOL] to minimum (- - dB), then raise it to the required level. Muting is also canceled when the unit is turned off. Using headphones D (not included) Reduce the volume before connection. Avoid listening for prolonged periods of time to prevent hearing damage. Plug type: 3.5 mm (1/8˝) stereo Audio is automatically switched to stereo (2 channel). If sound is distorted, turn on dynamic range compression (➡ Audio-D.Range Compression, pages 52-53). 46 RQT6345 PHONES
-
 1
1 -
2
-
3
-
4
-
5
-
6
-
7
-
8
-
9
-
10
-
11
-
12
-
13
-
14
-
15
-
16
-
17
-
18
-
19
-
20
-
21
-
22
-
23
-
24
-
25
-
26
-
27
-
28
-
29
-
30
-
31
-
32
-
33
-
34
-
35
-
36
-
37
-
38
-
39
-
40
-
 41
41 -
 42
42 -
 43
43 -
 44
44 -
 45
45 -
 46
46 -
 47
47 -
 48
48 -
 49
49 -
 50
50 -
 51
51 -
52
-
53
-
54
-
55
-
56
-
57
-
58
-
59
-
60
-
61
-
62
-
63
-
64
 |
 |