Panasonic SCHC35 SCHC35 User Guide - Page 5
Connections - instructions
 |
View all Panasonic SCHC35 manuals
Add to My Manuals
Save this manual to your list of manuals |
Page 5 highlights
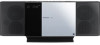
ENGLISH Connections ∫ Notes on speakers ≥ These speakers do not have magnetic shielding. Do not place them near a television, personal computer or other devices easily influenced by magnetism. Back View Additional Connections Open the EXT-IN AUX/Headphone cover to connect headphones or external music devices (e.g. MP3 player). Push the projecting part to open the cover A. Top View EXT-IN AUX/ Headphone cover Projecting part Exhaust holes Basic Connections 1 Connect the FM indoor antenna. ≥ Tape the antenna to a wall or column, in a position with the least amount of interference. Adhesive tape FM indoor antenna 2 Connect the AM loop antenna. ≥ Keep the loop antenna cord away from other wires and cords. AStand the antenna up on its base until it clicks. BAM loop antenna ∫ Connect the headphones (not supplied) Reduce the volume level and connect the headphones. Plug type: ‰3.5 mm (1/8q) stereo B ≥ To prevent hearing damage, avoid listening for prolonged periods of time. Excessive sound pressure from earphones and headphones cause hearing loss. ∫ Connect an external music device (for AUX mode) 1 Plug the audio cable (not supplied) into the EXT-IN AUX jack C. Plug type: ‰3.5 mm (1/8q) stereo 2 Press [EXT-IN, RADIO] repeatedly to select "AUX" and start playback on the connected device. EXT-IN AUX You can select the sound input level of the external device. [HC55] 1 Press [SOUND] repeatedly to select "INPUT LEVEL". 2 Press [2, 1] to select "HIGH" or "NORMAL". [HC35] Press [INPUT LEVEL] repeatedly to select "HIGH" or "NORMAL". ≥ Switch the equalizer off or turn the volume of the external device down to reduce the input signal. High level of input signal will distort the sound. ≥ For details, refer to the instruction manual of the other equipment. ≥ Cables and devices are not supplied. 3 Connect the AC power supply cord. Connect the AC power supply cord after all other connections are complete. Turn the unit on after a few seconds. Power consumption in standby mode: Approx. 0.1 W To household AC outlet 5 RQTX1260
-
 1
1 -
 2
2 -
 3
3 -
 4
4 -
 5
5 -
 6
6 -
 7
7 -
 8
8 -
 9
9 -
 10
10 -
 11
11 -
12
-
13
-
14
-
15
-
16
-
17
-
18
-
19
-
20
-
21
-
22
-
23
-
24
-
25
-
26
-
27
-
28
 |
 |
