Panasonic SCHT640W SAHT640 User Guide - Page 19
Play Menu, Picture Menu, Other Settings - review
 |
View all Panasonic SCHT640W manuals
Add to My Manuals
Save this manual to your list of manuals |
Page 19 highlights
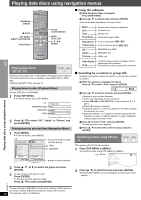
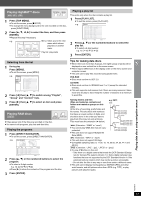
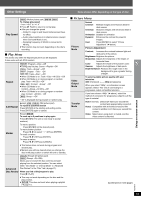
Other Settings Play Speed [DVD-A] (Motion picture part) [DVD-VR] [DVD-V] To change play speed - from "k0.6" to "k1.4" ≥ Press [1 PLAY] to return to normal play. ≥ After you change the speed - Dolby Pro Logic II and Sound Enhancement have no effect. - Audio output switches to 2-channel stereo (except when Surround Music is on). - Sampling frequency of 96 kHz is converted to 48 kHz. ≥ This function may not work depending on the disc's recording. ∫ Play Menu This works only when the elapsed play time can be displayed. It also works with all JPEG content. Repeat [DVD-VR]: Program>Disc>Off ≥ During play list play: Scene>Playlist>Off [DVD-A]: Track>Group§>Off [DVD-V]: Chapter>Title§>Off [VCD] [CD]: Track>Disc§>Off ≥ When CD Mode is on: Track>Disc>All CD's>Off ≥ When CD Mode is on during program or random play: Track>All CD's>Off [WMA] [MP3]: Content>Group§>Off ≥ When CD Mode is on: Content>Group>All CD's>Off ≥ When CD Mode is on during program or random play: Content>All CD's>Off [JPEG]: Group§>Off § "All" is displayed during program or random play. A-B Repeat Except [JPEG] [DVD-VR] (Still picture part) To repeat a specified section Press [ENTER] at the starting and ending points. Press [ENTER] again to cancel. Except [DVD-VR] To mark up to 5 positions to play again Press [ENTER] (The unit is now ready to accept markers.) Marker To mark a position: Press [ENTER] (at the desired point). To mark another position: Press [2, 1] to select "¢" ➜ Press [ENTER]. To recall a marker: Press [2, 1] ➜ Press [ENTER]. To erase a marker: Press [2, 1] ➜ Press [CANCEL]. ≥ This feature does not work during program and random play. ≥ Markers you add are cleared when you change the disc in the play position or switch the unit to standby. [DVD-VR] (Except still picture part) [DVD-V] (Except iR/iRW) Allows you to browse the disc contents and start playing from the selected position. You can select either "Intro Mode" or "Interval Mode" in "Advanced Advanced Disc Review" in the "Disc" tab (➜ page 21). Disc Review When you find a title/program to play Press [1 PLAY]. ≥ This may not work depending on the disc and the play position. ≥ [DVD-VR] This does not work when playing a playlist (➜ page 17). Items shown differ depending on the type of disc. ∫ Picture Menu Picture Mode Normal Cinema1: Mellows images and enhances detail in dark scenes. Cinema2: Sharpens images and enhances detail in dark scenes. Animation: Suitable for animation. Dynamic: Enhances the contrast for powerful images. User: Press [ENTER] to select "Picture Adjustment" (➜ below). Picture Adjustment Contrast: Increases the contrast between light and dark parts of the picture. Brightness: Brightens the picture. Sharpness: Adjusts the sharpness of the edges of horizontal lines. Color: Adjusts the shade of the picture's color. Gamma: Adjusts the brightness of dark parts. Depth Enhancer: Reduces the rough noise in the background to give a greater feeling of depth. Video Output Mode To select suitable picture quality with your television 480i (interlaced) ,------. 480p (progressive) When you select "480p", a confirmation screen appears. Select "Yes" only if connecting to a progressive output compatible television. If you have chosen "480p" (➜ above), select the method of conversion for progressive output to suit the type of material. Transfer Mode Auto1 (normal): Detects 24 frame-per-second film content and appropriately converts it. Auto2: Compatible with 30 frame-per-second film content in addition to 24 frame-per-second film content. Video: Select when using Auto1 or Auto2, and the video content is distorted. (Continued on next page) Using on-screen menus RQT8611 19
-
 1
1 -
2
-
3
-
4
-
5
-
6
-
7
-
8
-
9
-
10
-
11
-
12
-
13
-
 14
14 -
 15
15 -
 16
16 -
 17
17 -
 18
18 -
 19
19 -
 20
20 -
 21
21 -
 22
22 -
 23
23 -
 24
24 -
25
-
26
-
27
-
28
-
29
-
30
-
31
-
32
-
33
-
34
-
35
-
36
 |
 |
