Panasonic SR-CN108 Operating Instructions - Page 6
Cooking Rice
 |
View all Panasonic SR-CN108 manuals
Add to My Manuals
Save this manual to your list of manuals |
Page 6 highlights
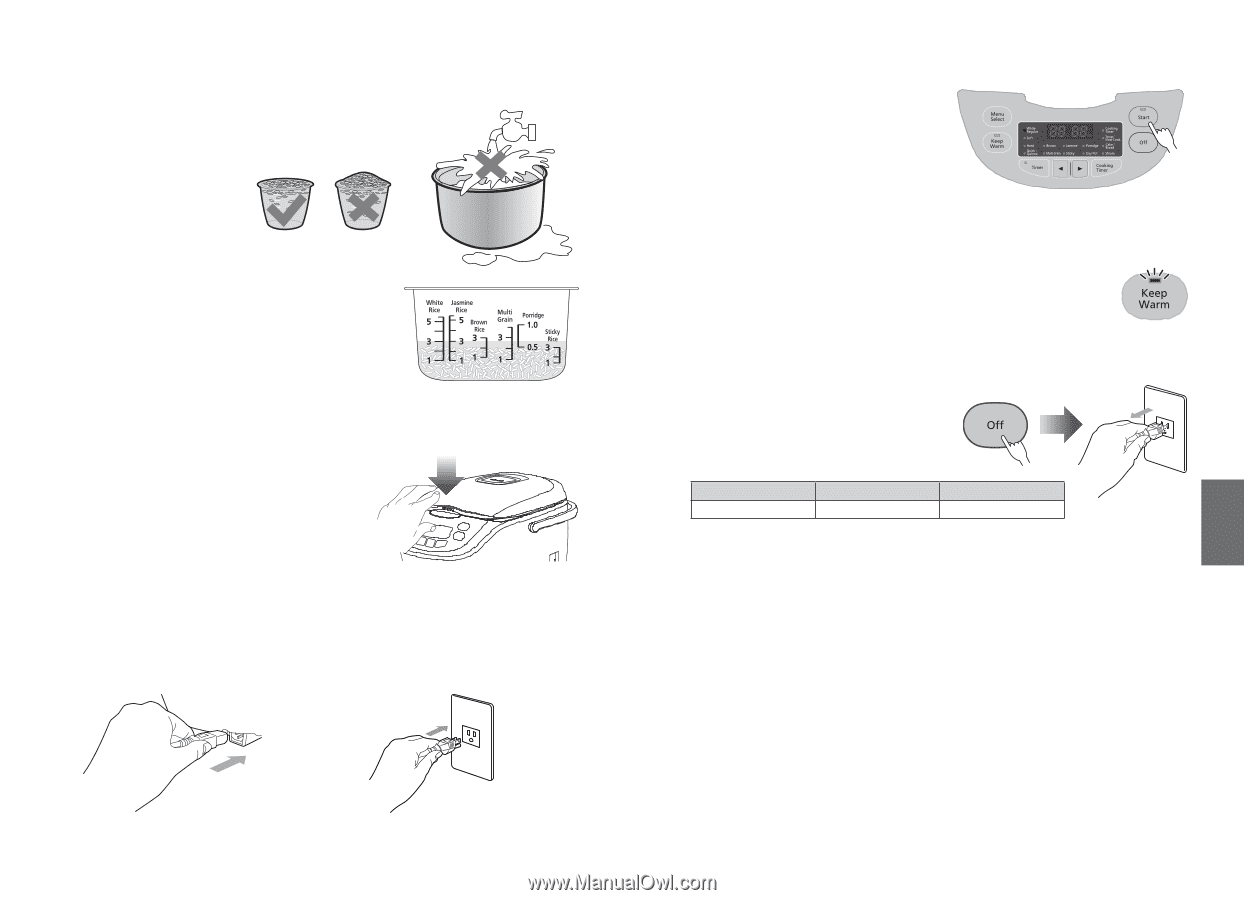
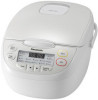
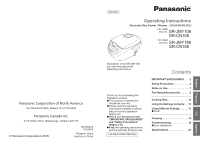
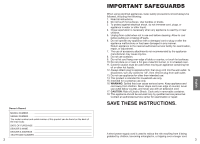
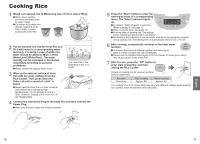
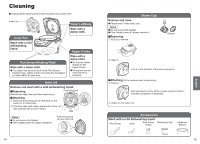
Cooking Rice 1 Weigh out required rice (A Measuring Cup of rice is about 150 g); OOWash rice in another container and make sure to wash it clean. OOIt is better not to wash rice directly inside the Inner Pan in order to avoid scuffing the Inner Pan. 2 Put the cleaned rice into the Inner Pan and fill it with water to a corresponding water level (e.g. if cooking 3 cups of white rice, water should be added to Mark 3 of the Water Level (White Rice)). The water quantity can be increased or decreased reasonably according to personal preference. OONever exceed the highest Water Level. The Inner Pan in the illustration is the 1.0 L model. 3 Wipe up the external surface of Inner Pan with dry cloth, putting it into the Rice Cooker. Then press down the Outer Lid until a sound of "click" is heard. OONever heat the Inner Pan on other stoves to avoid deformation caused by high temperatures; it is not allowed to use any other container, instead of the Inner Pan, on the Heating Plate. 4 Connect the Instrument Plug to the body first and then connect the Power Plug. OOMake sure that both plugs are firmly connected. ① ② 5 Press the "Start" button to enter the working process of a corresponding menu. The "Start" indicator lights up. OOBy default, "White Regular" is selected. When changing it, see page 13. OOWhen using the timer, see page 13. OOEntering state of stewing rice. The display shows remaining stewing time in countdown. OOAccording to the judgment of rice and water quantity by the computer program during cooking rice, the stewing time is automatically set to 5 min or 10 min. 6 After cooking, automatically switches to the keep warm function. OOTo prevent the rice from sticking together and reducing its taste, it is best to loosen the rice immediately. OOPlease use the attached Rice Scoop to fill rice instead of metal spoon which may cause scratch to the Inner Pan. 7 After the use, press the "Off" button to enter state of standby, and then unplug the Rice Cooker. Periods of cooking rice for various functions (only for reference): Function Time (min) "Soft" cooking Approx. 50 "Quick" cooking Approx. 30 The cooking time in the above table may vary with different voltage, water quantity, rice quantity, water temperature and rice quality. English 10 11
-
 1
1 -
 2
2 -
 3
3 -
 4
4 -
 5
5 -
 6
6 -
 7
7 -
 8
8 -
 9
9 -
 10
10 -
 11
11 -
 12
12 -
13
-
14
-
15
-
16
-
17
-
18
-
19
-
20
-
21
-
22
-
23
-
24
-
25
-
26
-
27
-
28
-
29
-
30
-
31
-
32
-
33
-
34
-
35
-
36
-
37
-
38
-
39
-
40
-
41
-
42
-
43
-
44
-
45
 |
 |