Panasonic Toughbook F9 Operating Instructions - Page 14
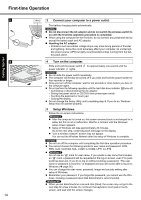
Connect your computer to a power outlet., Turn on the computer., Setup Windows.
 |
View all Panasonic Toughbook F9 manuals
Add to My Manuals
Save this manual to your list of manuals |
Page 14 highlights
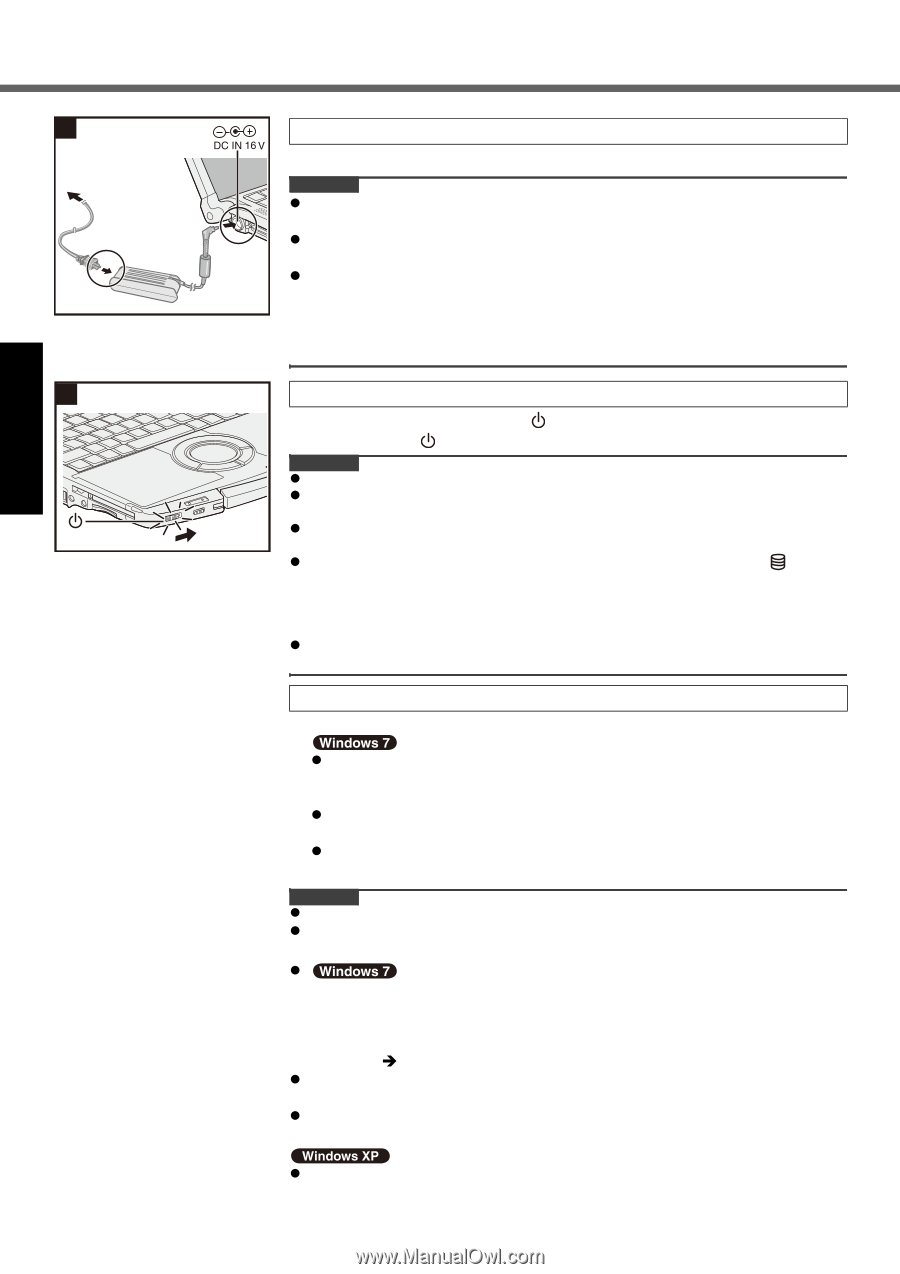
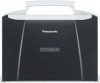
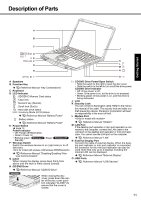
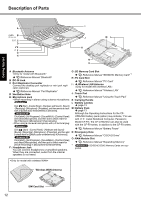
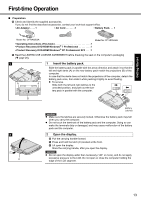
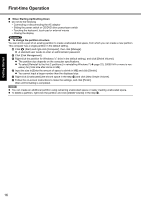
First-time Operation Troubleshooting Useful Information Getting Started 3 4 14 3 Connect your computer to a power outlet. The battery charging starts automatically. CAUTION z Do not disconnect the AC adaptor and do not switch the wireless switch to on until the first-time operation procedure is completed. z When using the computer for the first time, do not connect any peripheral device except the battery pack and AC adaptor. z Handling the AC adaptor • Problems such as sudden voltage drops may arise during periods of thunder and lightning. Since this could adversely affect your computer, an uninterruptible power source (UPS) is highly recommended unless running from the battery pack alone. 4 Turn on the computer. Slide and hold the power switch power indicator lights. for approximately one second until the CAUTION z Do not slide the power switch repeatedly. z The computer will forcibly be turned off if you slide and hold the power switch for four seconds or longer. z Once you turn off the computer, wait for ten seconds or more before you turn on the computer again. z Do not perform the following operation until the hard disk drive indicator turns off. • Connecting or disconnecting the AC adaptor • Sliding the power switch or CD/DVD drive power/open switch • Touching the keyboard or touch pad • Closing the display z Do not change the Setup Utility until completing step 5. If you do so, Windows setup may not operate properly. 5 Setup Windows. Follow the on-screen instructions. z After the computer is turned on, the screen remains black or unchanged for a while, but this is not a malfunction. Wait for a moment until the Windows setup screen appears. z Setup of Windows will take approximately 20 minutes. Go to the next step, confirming each message on the display. z "Join a wireless network" screen may not appear. You can set the Wireless Network after the setup of Windows is complete. CAUTION z Do not turn off the computer until completing the first-time operation procedure. z You cannot choose the following words for user name and password: CON, PRN, AUX, CLOCK$, NUL, COM1 to COM9, LPT1 to LPT9. z Do not use an "@" mark for user name. If you create a user name that includes an "@" mark, a password will be requested at the log-on screen, even if no password has been set. If you try to log on without entering a password, "The user name or password is incorrect." is displayed and you will not be able to log on to Windows (Î page 26). z You can change the user name, password, image and security setting after setup of Windows. z Remember your password. If you forget the password, you cannot use the Windows. Creating a password reset disk beforehand is recommended. z When you set date/time/time zone and click [Next], the screen may not go to the next step for a few minutes. Do not touch the keyboard, touch pad or touchscreen, and wait until the screen changes. Appendix
-
 1
1 -
2
-
3
-
4
-
5
-
6
-
7
-
8
-
 9
9 -
 10
10 -
 11
11 -
 12
12 -
 13
13 -
 14
14 -
 15
15 -
 16
16 -
 17
17 -
 18
18 -
 19
19 -
20
-
21
-
22
-
23
-
24
-
25
-
26
-
27
-
28
-
29
-
30
-
31
-
32
-
33
-
34
-
35
-
36
-
37
-
38
-
39
-
40
 |
 |