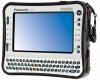
Panasonic U1 Electronic Board - Page 18
Storing images on a USB flash, memory device, Connector-A for USB Flash Memory Device.
 |
UPC - 092281895208
View all Panasonic U1 manuals
Add to My Manuals
Save this manual to your list of manuals |
Page 18 highlights
Scanning Storing images on a USB flash memory device 1 Set the power switch to on ( I ). 2 Connect the USB flash memory device to "USB Connector-A for USB Flash Memory Device". • When scanning has finished, a preview of the scanned image is shown on the display. Note • Do not remove the USB flash memory device until the preview is shown on the display. 5 Press the Advance Key ( ) to zoom in on the image. • When the USB flash memory device is connected, a USB flash memory icon will blink on the display. Once the unit recognizes the device, the icon will stop blinking. The display below is an example of the unit in standby mode. Note • You cannot use a USB flash memory device that is equipped with certain features such as a security feature. 3 Press the Mode Key scanning mode. to select the 4 Press the Start/Stop Key. • The unit starts scanning. • The scanning status is shown on the display. • It is possible to view specific areas of the image. • The current view area is shown on the top left side of the display. Press the Set-up Key ( ) to move down. Press the Advance Key ( ) to move left. • Press the Mode Key ( ) to return to the preview. 6 Press the Mode Key ( ). • The Screen Erase Announce is shown on the display. 7 After erasing the written text/diagrams on the screen, press the Mode Key ( ) to return to standby mode. • Only remove the USB flash memory device once you have returned to standby mode. • For information on saving files on a USB flash memory device, refer to page 17. 18
-
 1
1 -
2
-
3
-
4
-
5
-
6
-
7
-
8
-
9
-
10
-
11
-
12
-
 13
13 -
 14
14 -
 15
15 -
 16
16 -
 17
17 -
 18
18 -
 19
19 -
 20
20 -
 21
21 -
 22
22 -
 23
23 -
24
-
25
-
26
-
27
-
28
-
29
-
30
-
31
-
32
-
33
-
34
-
35
-
36
-
37
-
38
-
39
-
40
-
41
-
42
-
43
-
44
-
45
-
46
-
47
-
48
-
49
-
50
-
51
-
52
-
53
-
54
-
55
-
56
 |
 |
