Panasonic VDRM70PP Dvd Camcorder - Page 40
Setting Date and Time, This DVD Video Camera incorporates a rechargeable
 |
View all Panasonic VDRM70PP manuals
Add to My Manuals
Save this manual to your list of manuals |
Page 40 highlights
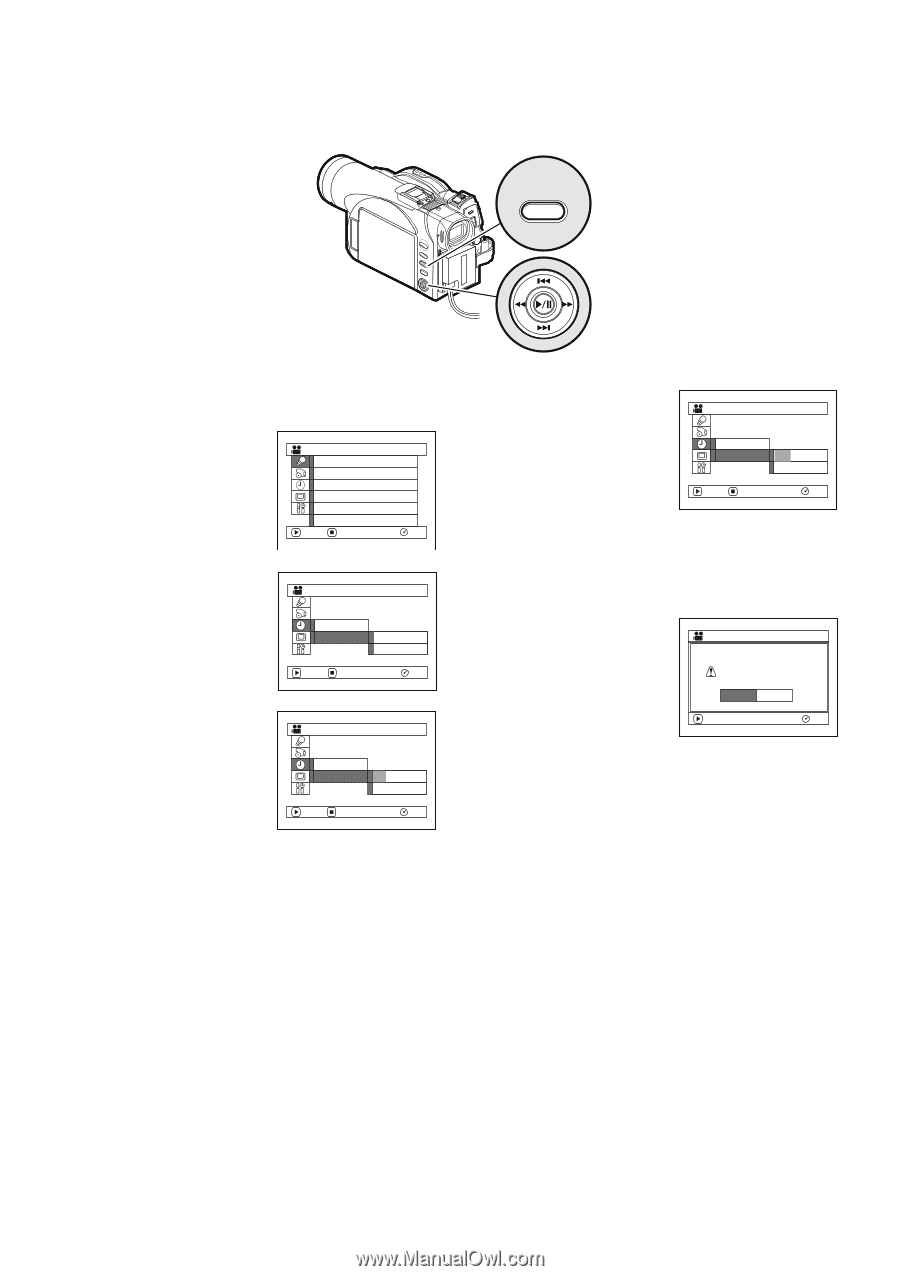
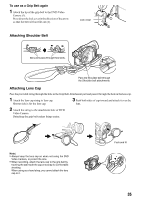
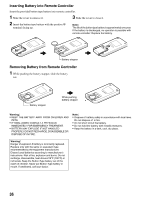
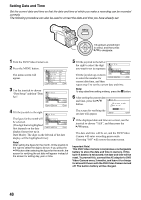
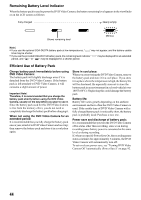
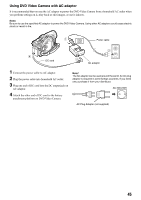
Setting Date and Time Set the current date and time so that the date and time at which you make a recording can be recorded correctly. The following procedure can also be used to correct the date and time you have already set. MENU Tilt up/down and left/right to select, and then press A to designate. 1 Turn the DVD Video Camera on. 2 Press the MENU button. The menu screen will appear. Came ra Func t i ons Set u p P r o g r am AE : A u t o Wh i t e Ba l . : A u t o EIS : On Dig. Zoom : 40x Wind Cut : Of f Wi d e : 4:3 ENTER RETURN RAM 3 Use the joystick to choose "Date Setup" and then "Date Set". Da t e Se t u p Da t e Mode Da t e Se t JAN 1 2004 12: 00AM ENTER RETURN RAM 4 Tilt the joystick to the right. Da t e Se t u p The figure for the month will be selected. [The digit that is highlighted first depends on the date Da t e Mode Da t e Se t JAN 1 2004 12: 00AM ENTER RETURN RAM display format (set up in Date Mode): The digit on the left end of the date display will be highlighted first.] Note: After setting the figure for the month, tilt the joystick to the right to select the digit to be set. If you press the A button after selecting the figure for the month, the screen for verifying the set date will appear instead of the screen for setting day, year or time. 5 Tilt the joystick to the left or the right to select the digit Da t e Se t u p you want to set in sequence. Tilt the joystick up or down to select the number for Da t e Mode Da t e Se t SEP 3 0 2004 8 : 00AM ENTER RETURN RAM current date/time, and then repeat step 5 to set the current date and time. Note: To stop date/time setting midway, press the C button. 6 After setting the current date and time, press the A button. Da t e Se t SEP 3 0 2004 8 : 0 0AM Da t e s e t u p? The screen for verifying the YES NO set date will appear. ENTER RAM 7 If the displayed date and time are correct, use the joystick to choose "YES", and then press the A button. The date and time will be set, and the DVD Video Camera will enter recording pause mode. Choosing "NO" will restore the menu screen. Important Note: This DVD Video Camera incorporates a rechargeable battery to store the date and time in memory. If this built-in battery is exhausted, the date and time will be reset. To prevent this, connect the AC adaptor to DVD Video Camera every 3 months, and leave it to charge for at least 24 hours with the DVD Video Camera turned off: The built-in battery will be charged. 40
-
 1
1 -
2
-
3
-
4
-
5
-
6
-
7
-
8
-
9
-
10
-
11
-
12
-
13
-
14
-
15
-
16
-
17
-
18
-
19
-
20
-
21
-
22
-
23
-
24
-
25
-
26
-
27
-
28
-
29
-
30
-
31
-
32
-
33
-
34
-
 35
35 -
 36
36 -
 37
37 -
 38
38 -
 39
39 -
 40
40 -
 41
41 -
 42
42 -
 43
43 -
 44
44 -
 45
45 -
46
-
47
-
48
-
49
-
50
-
51
-
52
-
53
-
54
-
55
-
56
-
57
-
58
-
59
-
60
-
61
-
62
-
63
-
64
-
65
-
66
-
67
-
68
-
69
-
70
-
71
-
72
-
73
-
74
-
75
-
76
-
77
-
78
-
79
-
80
-
81
-
82
-
83
-
84
-
85
-
86
-
87
-
88
-
89
-
90
-
91
-
92
-
93
-
94
-
95
-
96
-
97
-
98
-
99
-
100
-
101
-
102
-
103
-
104
-
105
-
106
-
107
-
108
-
109
-
110
-
111
-
112
-
113
-
114
-
115
-
116
-
117
-
118
-
119
-
120
-
121
-
122
-
123
-
124
-
125
-
126
-
127
-
128
-
129
-
130
-
131
-
132
-
133
-
134
-
135
-
136
-
137
-
138
-
139
-
140
-
141
-
142
-
143
-
144
-
145
-
146
-
147
-
148
-
149
-
150
-
151
-
152
-
153
-
154
-
155
-
156
-
157
-
158
-
159
-
160
-
161
-
162
-
163
-
164
-
165
-
166
-
167
-
168
-
169
-
170
-
171
-
172
-
173
-
174
 |
 |