Pentax 5534 ZX-M Manual - Page 40
optional
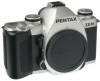 |
UPC - 027075042759
View all Pentax 5534 manuals
Add to My Manuals
Save this manual to your list of manuals |
Page 40 highlights
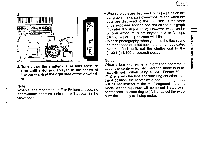
36 z m O fri 0 z (A 6 DATA BACK (optional) SELECT DATE i O Q ASJuS,T o If you have purchased your camera as the "Date" version, or if you have purchased the Data Back separately, the following section applies. 0 DATE button O SELECT button O ADJUST button Notes: • Carefully press the button with the protrusion part of the camera's strap clamp. Do not press the buttons with an object having have a sharp tip. Adjusting the year / month / day 1. Press 0 the DATE button repeatedly until the date is displayed. 2. Press 0 the SELECT button to make the year, month, or day you want to change blink. The digits blink in the following order. Year - Month - Day - Year 3. Change the date with 0 the ADJUST button. The digit increases by one each time the ADJUST button is depressed. Holding the button for about 2 to 3 seconds will change the digits continuously. 4. Press 0 the SELECT button to stop the digit from blinking, after you have changed the date. The adjusted date has been entered.
-
 1
1 -
2
-
3
-
4
-
5
-
6
-
7
-
8
-
9
-
10
-
11
-
12
-
13
-
14
-
15
-
16
-
17
-
18
-
19
-
20
-
21
-
22
-
23
-
24
-
25
-
26
-
27
-
28
-
29
-
30
-
31
-
32
-
33
-
34
-
 35
35 -
 36
36 -
 37
37 -
 38
38 -
 39
39 -
 40
40 -
 41
41 -
 42
42 -
 43
43 -
 44
44 -
 45
45 -
46
-
47
-
48
-
49
-
50
-
51
-
52
-
53
-
54
-
55
-
56
 |
 |
