Pentax Espio 24 EW Espio 24 EW Manual - Page 6
Ei§>
 |
View all Pentax Espio 24 EW manuals
Add to My Manuals
Save this manual to your list of manuals |
Page 6 highlights
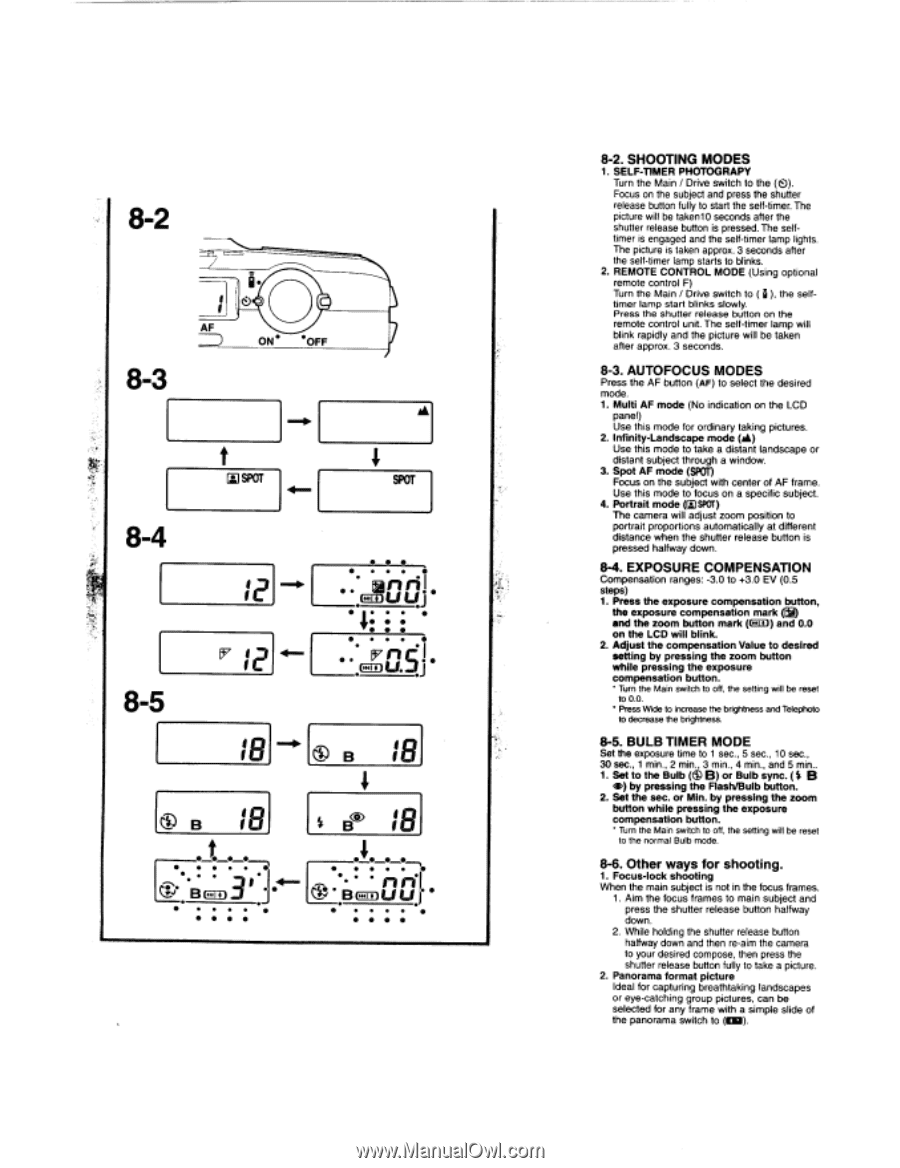
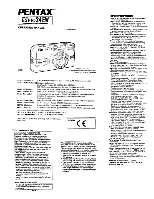
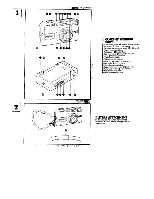
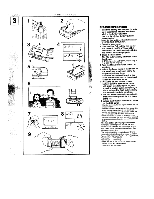
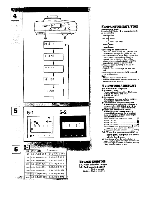
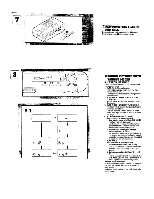
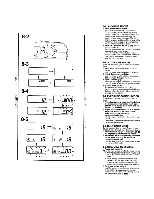
8-2 8-3 ▪ • • AF ON * *OFF 8-4 8-5 M SPOT SPOT •• 2 ® 12 I -- • • • • •. . • tIDO utLIJ • ir • • • • • • • • • • J=rLnl.sij• B 18 18 • 7 .-;0. • •• (.;" B • • Ei§> 18 ••- •••4••. • • n •r• i,• 6 5. 113 UL1 .6 8-2. SHOOTING MODES 1. SELF-TIMER PHOTOGRAPY Turn the Main / Drive switch to the (0). Focus on the subject and press the shutter release button fully to start the self-timer. The picture will be taken10 seconds after the shutter release button is pressed. The selftimer is engaged and the self-timer lamp lights. The picture is taken approx. 3 seconds after the self-timer lamp starts to blinks. 2. REMOTE CONTROL MODE (Using optional remote control F) Turn the Main / Drive switch to ( p ), the selftimer lamp start blinks slowly. Press the shutter release button on the remote control unit. The self-timer lamp will blink rapidly and the picture will be taken after approx. 3 seconds. 8-3. AUTOFOCUS MODES Press the AF button (4F) to select the desired mode. 1. Multi AF mode (No indication on the LCD panel) Use this mode for ordinary taking pictures. 2. Infinity-Landscape mode (A) Use this mode to take a distant landscape or distant subject through a window. 3. Spot AF mode (SPOT) Focus on the subject with center of AF frame. Use this mode to focus on a specific subject. 4. Portrait mode (1E SPOT) The camera will adjust zoom position to portrait proportions automatically at different distance when the shutter release button is pressed halfway down. 8-4. EXPOSURE COMPENSATION Compensation ranges: -3.0 to +3.0 EV (0.5 steps) 1. Press the exposure compensation button, the exposure compensation mark (N) and the zoom button mark (=I) and 0.0 on the LCD will blink. 2. Adjust the compensation Value to desired setting by pressing the zoom button while pressing the exposure compensation button. • Turn the Main switch to off, the setting will be reset to 0.0. • Press Wide to increase the brightness and Telephoto to decrease the brightness. 8-5. BULB TIMER MODE Set the exposure time to 1 sec., 5 sec., 10 sec., 30 sec., 1 min., 2 min., 3 min., 4 min., and 5 min.. 1. Set to the Bulb (T-IB) or Bulb sync. B ilI>) by pressing the Flash/Bulb button. 2. Set the sec. or Min. by pressing the zoom button while pressing the exposure compensation button. • Turn the Main switch to off, the setting will be reset to the normal Bulb mode. 8-6. Other ways for shooting. 1. Focus-lock shooting When the main subject is not in the focus frames. 1. Aim the focus frames to main subject and press the shutter release button halfway down. 2. While holding the shutter release button halfway down and then re-aim the camera to your desired compose, then press the shutter release button fully to take a picture. 2. Panorama format picture Ideal for capturing breathtaking landscapes or eye-catching group pictures, can be selected for any frame with a simple slide of the panorama switch to (M).
-
 1
1 -
 2
2 -
 3
3 -
 4
4 -
 5
5 -
 6
6
 |
 |