Pentax OPTIOS7 Operation Manual - Page 94
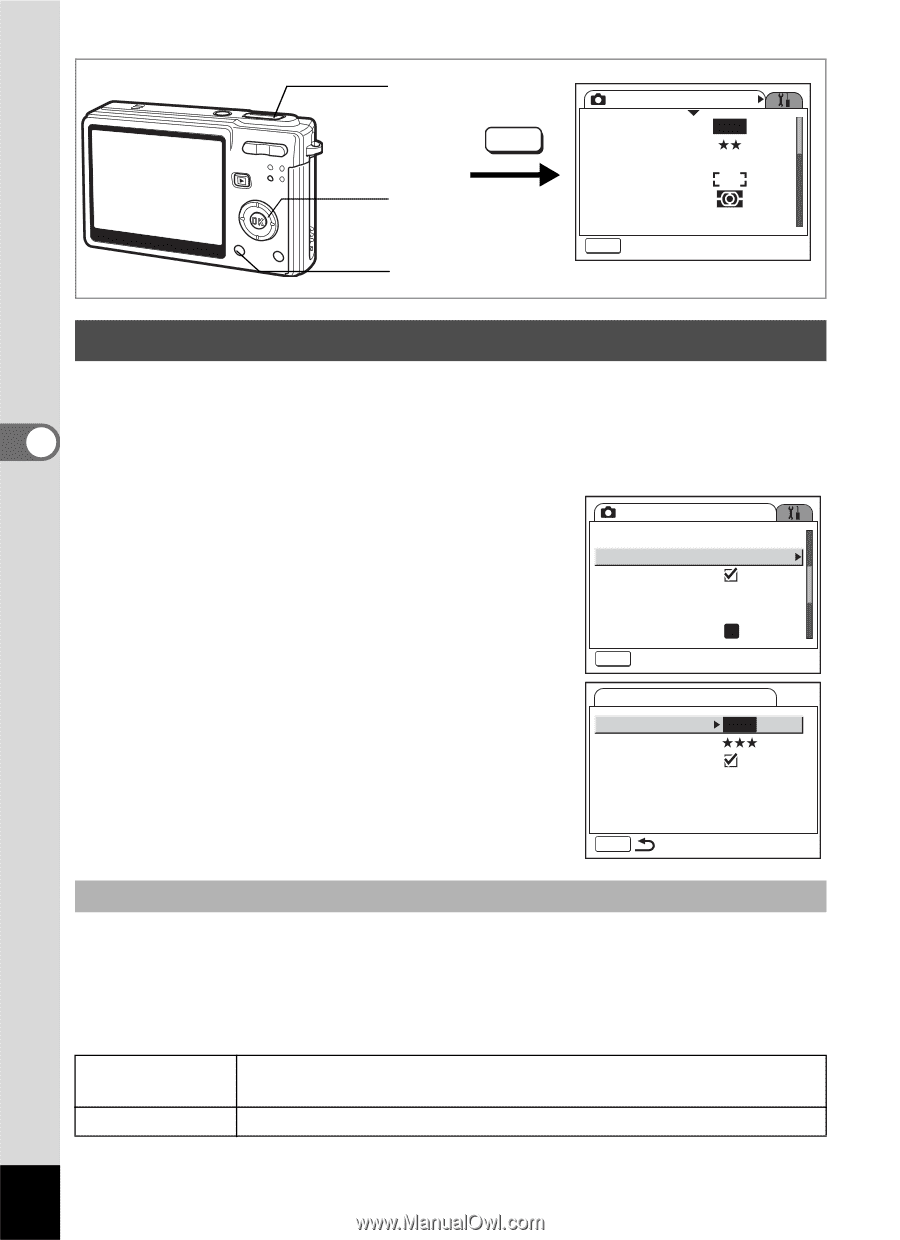
Selecting the Settings for Taking Movies, Press the MENU button in Capture mode.
 |
View all Pentax OPTIOS7 manuals
Add to My Manuals
Save this manual to your list of manuals |
Page 94 highlights
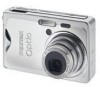
Shutter release button MENU Four-way controller MENU button Rec. Mode Recorded Pixels Quality Level White Balance AF Setting AE Metering Sensitivity 7M AWB Auto MENU Exit Selecting the Settings for Taking Movies You can select the recorded pixels and quality level for taking movies. 41 2 Press the MENU button in Capture mode. The [A Rec. Mode] menu appears. Use the four-way controller (23) to select [Movie]. Rec. Mode EV Compensation ±0.0 Movie Digital Zoom Instant Review 0.5sec Memory Green Button MENU Exit 3 Press the four-way controller (5). Movie The Movie setting menu appears. Recorded Pixels 640 Quality Level Movie anti-shake Taking Pictures MENU Selecting the Recorded Pixels of Movies You can choose the number of recorded pixels from 640 (640×480) and 320 (320×240). The more pixels are selected, the larger the file size. The file size also varies depending on the quality level setting. Recorded Pixels 640 (640×480) 320 (320×240) You can view high-quality movies at VGA size. The recordable time is shorter. The file size is small and the recordable time is longer. 92
-
 1
1 -
2
-
3
-
4
-
5
-
6
-
7
-
8
-
9
-
10
-
11
-
12
-
13
-
14
-
15
-
16
-
17
-
18
-
19
-
20
-
21
-
22
-
23
-
24
-
25
-
26
-
27
-
28
-
29
-
30
-
31
-
32
-
33
-
34
-
35
-
36
-
37
-
38
-
39
-
40
-
41
-
42
-
43
-
44
-
45
-
46
-
47
-
48
-
49
-
50
-
51
-
52
-
53
-
54
-
55
-
56
-
57
-
58
-
59
-
60
-
61
-
62
-
63
-
64
-
65
-
66
-
67
-
68
-
69
-
70
-
71
-
72
-
73
-
74
-
75
-
76
-
77
-
78
-
79
-
80
-
81
-
82
-
83
-
84
-
85
-
86
-
87
-
88
-
 89
89 -
 90
90 -
 91
91 -
 92
92 -
 93
93 -
 94
94 -
 95
95 -
 96
96 -
 97
97 -
 98
98 -
 99
99 -
100
-
101
-
102
-
103
-
104
-
105
-
106
-
107
-
108
-
109
-
110
-
111
-
112
-
113
-
114
-
115
-
116
-
117
-
118
-
119
-
120
-
121
-
122
-
123
-
124
-
125
-
126
-
127
-
128
-
129
-
130
-
131
-
132
-
133
-
134
-
135
-
136
-
137
-
138
-
139
-
140
-
141
-
142
-
143
-
144
-
145
-
146
-
147
-
148
-
149
-
150
-
151
-
152
-
153
-
154
-
155
-
156
-
157
-
158
-
159
-
160
-
161
-
162
-
163
-
164
-
165
-
166
-
167
-
168
-
169
-
170
-
171
-
172
-
173
-
174
-
175
-
176
-
177
-
178
-
179
-
180
-
181
-
182
-
183
-
184
-
185
-
186
-
187
-
188
-
189
-
190
-
191
-
192
 |
 |