Pfaff 204 Owner's Manual - Page 3
right half
 |
View all Pfaff 204 manuals
Add to My Manuals
Save this manual to your list of manuals |
Page 3 highlights
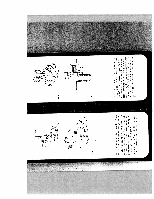
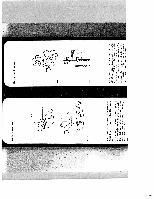
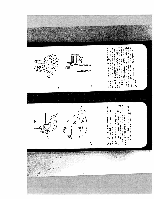
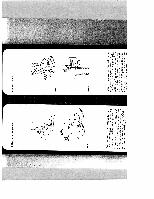
5--4-- Fig. 1 Fig. 2 I Fig. 3 Raise the needle and the sewing toot. Press the red button ito release the sewing foot shoe. To attach the sewing toot shoe, place it under the sewing foot holder and hold it in pace with your left hand Lower the presser bar lifter and at the same time reposition the sewing foot shoe so that pin 2 enters slot 3. Hole 4 and screw 5 serve for fitting an edge guide which you can buy from your dealer. Raise the needle and attach the adjustable zipper foot as follows, insert the rear stud into slot 1 (Fig. 2) and push up the toe of the toot so that the front stud enters slot 2. Push the ziDper foot toward the right as far as it will go Baste the zipper on the fabric. Then sew in the right half of the zipper (Fig. 3) Raise the needle and the zipper foot. Push the foot toward the left as far as it will go. Then sew in the left half of the zipper.
-
 1
1 -
 2
2 -
 3
3 -
 4
4 -
 5
5 -
 6
6 -
 7
7 -
 8
8 -
 9
9 -
10
-
11
-
12
-
13
-
14
-
15
-
16
-
17
-
18
-
19
-
20
-
21
-
22
-
23
-
24
-
25
-
26
-
27
-
28
-
29
 |
 |
