Pfaff 213 Owner's Manual - Page 7
Pfaff 213 Manual
 |
View all Pfaff 213 manuals
Add to My Manuals
Save this manual to your list of manuals |
Page 7 highlights
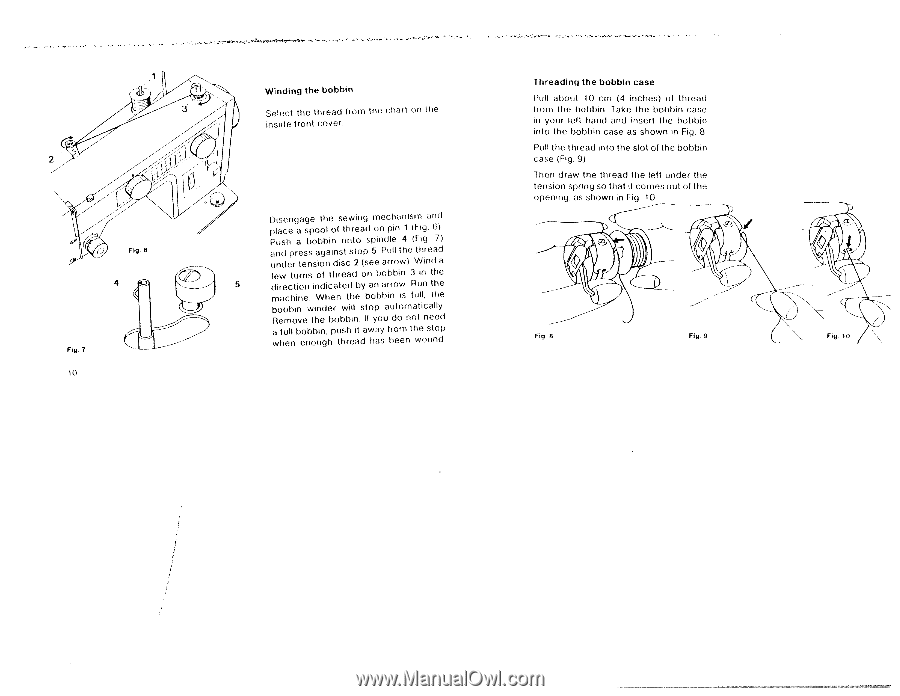
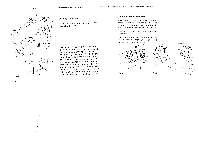
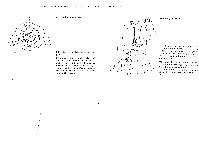
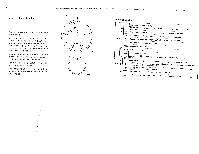
Winding the bobbin Select the thread from the chart on the inside front cover Disengage the sewing mechanism and place a spool of thread on pin 1 (Fig 0) Push a bobbin onto spindle 4 (Fig 7) and press against stop 5 Pull the thread under tension disc 2 (see arrow) Wind a few turns of thread on bobbin 3 in the direction indicated by an arrow Run the machine, iIhen the bubbin is lull, the bobbin winder will stop automatically Remove the bobbin If you do not need a full bobbin, push it away troni the stop when enough thread has been wound Threading the bobbin case PuW about 10 cm (4 inches) of thread ti om the bobbin Take the bobbin case in your left hand and insert the bobbin into the bobbin case as shown in Fig 8 Pull the I hread into the slot of the bobbin case (Fig 9) Then draw fh thread the left under the tension spring so that it comes out of the opening, as shown in Fig 10 Fig. 6 10
-
 1
1 -
 2
2 -
 3
3 -
 4
4 -
 5
5 -
 6
6 -
 7
7 -
 8
8 -
 9
9 -
 10
10 -
 11
11 -
 12
12 -
13
-
14
-
15
-
16
-
17
-
18
-
19
-
20
-
21
-
22
-
23
 |
 |