Pfaff 259 Owner's Manual - Page 45
buttons, hooks, PFAFF., start, stitches.
 |
View all Pfaff 259 manuals
Add to My Manuals
Save this manual to your list of manuals |
Page 45 highlights
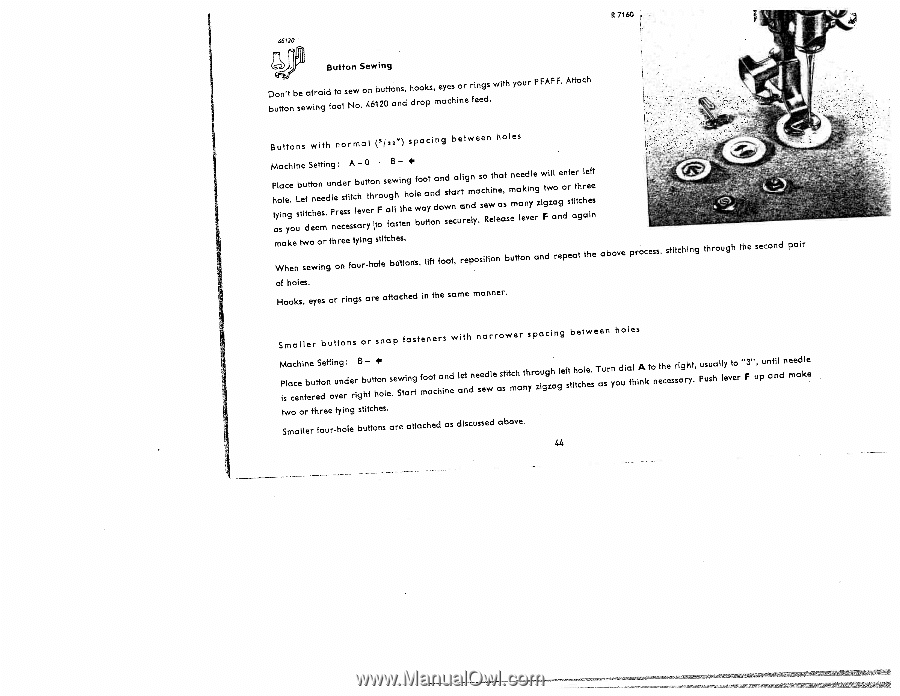
R7160 .62O Button Sewing Don't be afraid to sew on buttons, button sewing foot No. 46120 and hooks, eyes or rings drop machine feed. with your PFAFF. Attach I U Buttons with normal (5/a) spacing between holes MPhtayolsaialncecygh.eoiunLsbteeuidtttcStenhoeeeentmseti.dnulPgnner:edecsestesriAstcsblha-eurvty0etthortnroFousafegalBwlhs- titenhhngeolwfbeouaoatyttnodadnonwdssetnacaurlatirgenmlndya.sscoehRwietnhleeaa,astsmenmeaalekendviynleegrzwiFtgwizllaoangedonsrtteaitrtghcarhleeiefnest make two or three tying stitches. When sewing on four-hafe buttons, lift foot, reposition button and repeat the above process, stitching through the second pair of holes. Hooks, eyes or rings are attached in the some manner. Smaller buttons or snap fasteners with narrower spacing between holes Machine Setting: B- • Place button under button sewing is centered over right hole. Start foot and machine let needle stitch through left hole. and sew as many zigzag stitches Turn dial A ta the right, as you think necessary. usually to Push lever 3", until needle F up and make two or three tying stitches. Smaller four-hole buttons ore attached as discussed above. 44
-
 1
1 -
2
-
3
-
4
-
5
-
6
-
7
-
8
-
9
-
10
-
11
-
12
-
13
-
14
-
15
-
16
-
17
-
18
-
19
-
20
-
21
-
22
-
23
-
24
-
25
-
26
-
27
-
28
-
29
-
30
-
31
-
32
-
33
-
34
-
35
-
36
-
37
-
38
-
39
-
 40
40 -
 41
41 -
 42
42 -
 43
43 -
 44
44 -
 45
45 -
 46
46 -
 47
47 -
 48
48 -
 49
49 -
 50
50 -
51
-
52
-
53
-
54
 |
 |