Pfaff 339 Owner's Manual - Page 43
buttonhole
 |
View all Pfaff 339 manuals
Add to My Manuals
Save this manual to your list of manuals |
Page 43 highlights
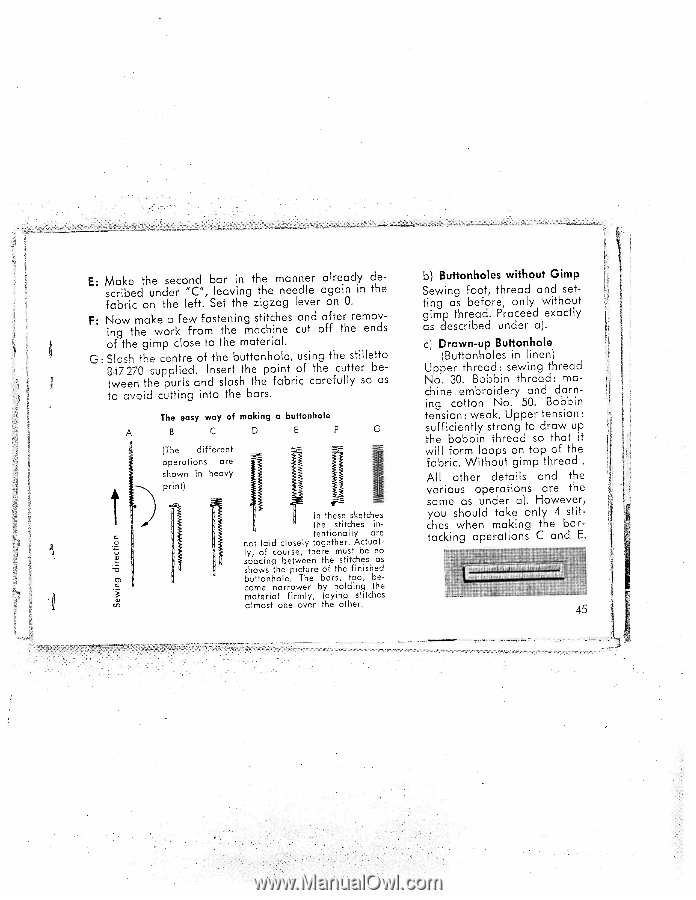
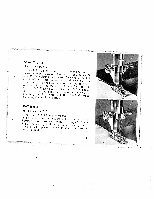
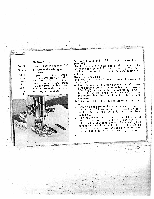
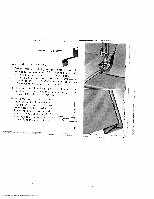
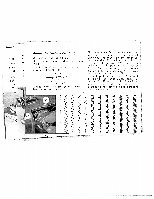
I' E: Make the second scribed under "C", fabric on the left. bar in the manner leaving the needle Set the zigzag lever already again in on 0. de the F: Now make a few fastening stitches ing the work from the machine and cut after remov off the ends b) Buttonholes without Gimp Sewing foot, thread and set ting as before, only without gimp thread. Proceed exactly as described under a). of the gimp close to the material. c) Drawn-up Buttonhole j C: S8tw4ic7es2eh7n0tFtheseucppepunlrtilresed.aonfdInthsseelratsbhuthttetohnephoofialnebt,rioucfsicntahgreetfhuceulltystetirslloebttaeos- 'to ovoid cutting into the bars. The easy way of making a buttonhole A B c 0 E F G (irie airtererit (Buttonholes in linen) Upper thread: Sewing thread No. 30. Bobbin thread: machine embroidery and darn ing cotton No. 50. Bobbin tension: weak, Upper tension: sufficiently strong to draw up the bobbin thread so that it will form loops on top of the operations are shown in heavy p H n t) fabric. Without gimp thread All other details and the various operations are the I I ____"\ In these sketches the stitches in tentionally are not laid closely together. Actual ly, of course, there spacing between the must be stitches no as shows the picture of the finished buttonhole. The bars, too, be come narrower by holding the material firmly, laying stitches same as under a). However, you should take only 4 stit ches when making t e bar- tacking operations C and E. II almost one over the other. I45
-
 1
1 -
2
-
3
-
4
-
5
-
6
-
7
-
8
-
9
-
10
-
11
-
12
-
13
-
14
-
15
-
16
-
17
-
18
-
19
-
20
-
21
-
22
-
23
-
24
-
25
-
26
-
27
-
28
-
29
-
30
-
31
-
32
-
33
-
34
-
35
-
36
-
37
-
 38
38 -
 39
39 -
 40
40 -
 41
41 -
 42
42 -
 43
43 -
 44
44 -
 45
45 -
 46
46 -
 47
47 -
 48
48 -
49
-
50
-
51
-
52
-
53
-
54
-
55
-
56
-
57
-
58
-
59
-
60
-
61
-
62
-
63
-
64
-
65
-
66
-
67
-
68
-
69
-
70
-
71
-
72
 |
 |