Pfaff 6250 Owner's Manual - Page 95
lubnc, Iraght
 |
View all Pfaff 6250 manuals
Add to My Manuals
Save this manual to your list of manuals |
Page 95 highlights
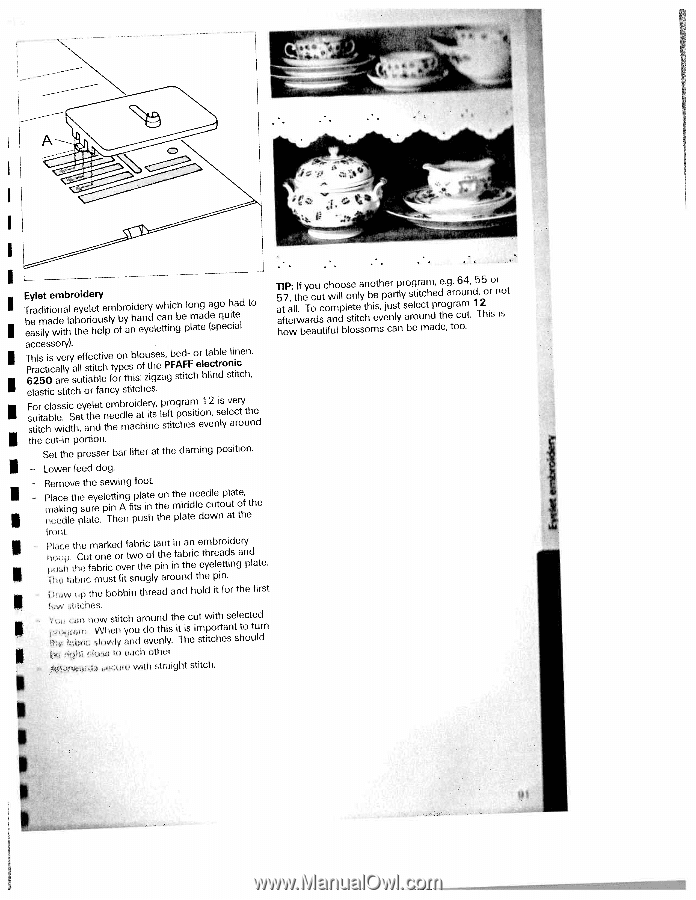
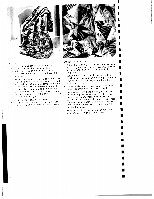
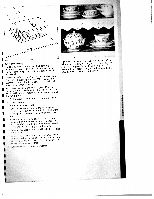
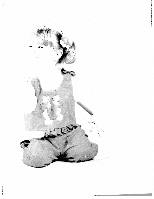
TEbeaeryasldiemltiytaieowdmneiatbhllraoetbhyiodeereliehorteuylseplmyobbfryoanihdaeenryydelwectahtniincgbheplolmantageda(esgpqoeuchiitaaeld to T5aahtIf7oPt,awe:lrtl.IhwfbeyTaeoraocduuusctticofawhumnolildploblsoseleotntiesltyacsthnohbomieestv,hspejeaucnrrasltypntlyrsaobesrgeltoeirutacmcnmthadpe,ddrteeoh.,gaget.rrooac6oumu4.nt,d15,T25Ionros rnet accessory). TP6hr2ais5ct0iiscaavlreleyrysaluel tfisfaetibctctliehveftoyorpntehsbisol:ofzutihsgeezsa,PgFbAsetdFit-Fchoerlbetlacibntrdleosnltiiinctcehn,. elastic stitch or fancy stitches. For classic eyelet suitable. Set the stitch width, and embroidery, needle at its the machine program 1 2 is very left position, select the stitches evenly around the cut-in portion. - Set the presser bar lifter at the darning position. - Lower teed dog. Remove the sewing foot Place the eyeletting plate making sure pin A fits in nuedle plate. Then push on the the the needle plate, middle cutout of the plate down at the hunt Mdcc tiuup the marked fabric taut Cut one or two of the the fabric over the pin in an embroidery fabric threads and in the eyeletting plate. h lubnc must fit snugly around the pin. up the bobbin thread and hold it for the first neVww vhtst:tnjitcyahonudardeovouentnhdlyis.thiTteihsceuimst twiptocithrhteassnetslhetocotuteulddrn t t,cl ether. willi Iraght stitch.
-
 1
1 -
2
-
3
-
4
-
5
-
6
-
7
-
8
-
9
-
10
-
11
-
12
-
13
-
14
-
15
-
16
-
17
-
18
-
19
-
20
-
21
-
22
-
23
-
24
-
25
-
26
-
27
-
28
-
29
-
30
-
31
-
32
-
33
-
34
-
35
-
36
-
37
-
38
-
39
-
40
-
41
-
42
-
43
-
44
-
45
-
46
-
47
-
48
-
49
-
50
-
51
-
52
-
53
-
54
-
55
-
56
-
57
-
58
-
59
-
60
-
61
-
62
-
63
-
64
-
65
-
66
-
67
-
68
-
69
-
70
-
71
-
72
-
73
-
74
-
75
-
76
-
77
-
78
-
79
-
80
-
81
-
82
-
83
-
84
-
85
-
86
-
87
-
88
-
89
-
 90
90 -
 91
91 -
 92
92 -
 93
93 -
 94
94 -
 95
95 -
 96
96 -
 97
97 -
 98
98 -
 99
99 -
 100
100 -
101
-
102
-
103
-
104
-
105
-
106
-
107
-
108
-
109
-
110
-
111
-
112
-
113
-
114
-
115
-
116
-
117
-
118
-
119
 |
 |